As the seasons change and the familiar tickle in the throat appears, many of us reach for natural remedies to support our family’s health. For centuries, one of the most trusted allies during cold and flu season has been elderberry syrup. This potent, delicious concoction is packed with immune-boosting properties, and making it at home is surprisingly simple and cost-effective. This comprehensive guide will walk you through every step, offering customization, safety tips, and expert advice to help you make the most potent and delicious syrup at home, far superior to store-bought versions.
Table of Contents
Why Make Homemade Elderberry Syrup?
Choosing to make your own elderberry syrup gives you complete control over the quality and potency of your final product. It’s a rewarding process that connects you to a long tradition of herbal wellness.
The Powerful Benefits of Elderberries
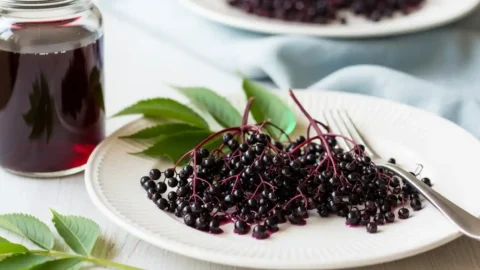
Elderberries, from the Sambucus nigra plant, are nutritional powerhouses. They are renowned for their high concentration of antioxidants, particularly anthocyanins, which give them their deep purple color. These compounds help combat oxidative stress in the body. Furthermore, elderberries are rich in vitamins, especially Vitamin C, and have been a cornerstone of traditional remedies for generations. Their primary claim to fame is providing powerful immune support, making them a go-to during the colder months.
Homemade vs. Store-Bought: The Advantages
While convenient, commercial elderberry syrups can be expensive and often contain preservatives, fillers, or excessive amounts of refined sugar. When you make it yourself, you control everything. You can choose organic elderberries, use natural sweeteners like raw honey or maple syrup, and adjust the flavor to your family’s liking. The result is a fresher, more potent, and significantly more affordable immune-boosting syrup.
The Ultimate Homemade Elderberry Syrup Recipe
This recipe is designed to be simple, effective, and easily customizable. It creates a potent syrup that will become a staple in your natural health toolkit.
Ingredients
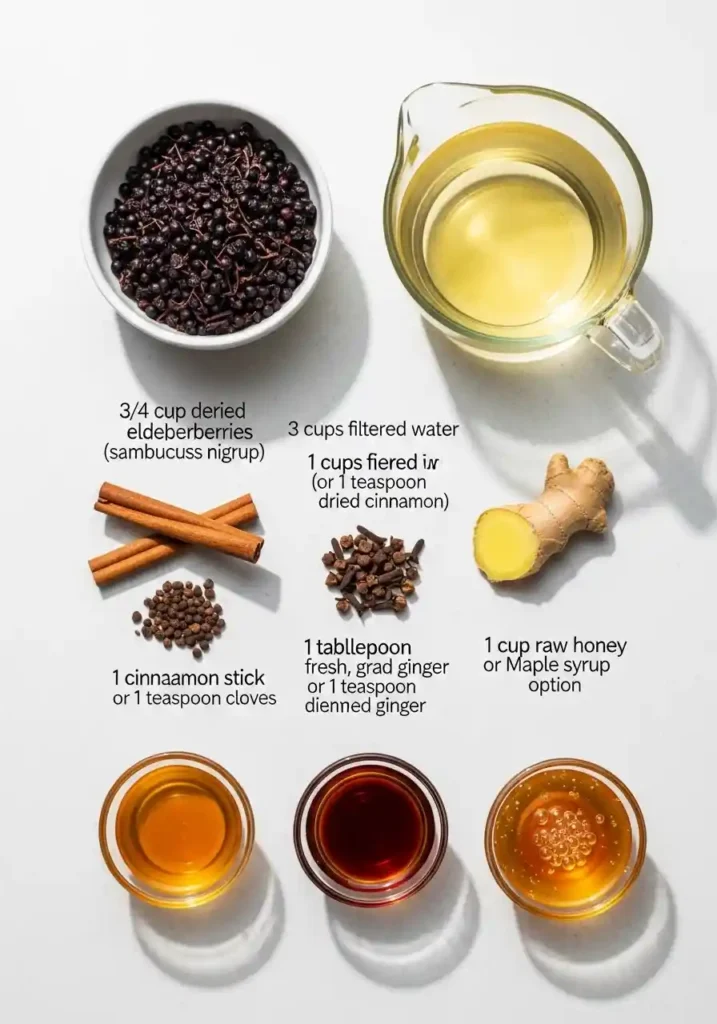
- 3/4 cup dried organic elderberries (Sambucus nigra)
- 3 cups filtered water
- 1 cinnamon stick (or 1 teaspoon dried cinnamon)
- 4 whole cloves (or 1 teaspoon dried cloves)
- 1 tablespoon fresh, grated ginger (or 1 teaspoon dried ginger)
- 1 cup raw honey (or maple syrup for a vegan option)
Equipment
- Medium saucepan or pot
- Fine-mesh strainer or cheesecloth
- A large bowl
- Wooden spoon or spatula
- Funnel (optional)
- Airtight glass jar or bottle for storage
Step-by-Step Instructions
- Combine Ingredients: In your saucepan, combine the dried elderberries, water, cinnamon stick, whole cloves, and fresh ginger. If using dried spices, add them here as well. (Kids can help measure the dry ingredients!)
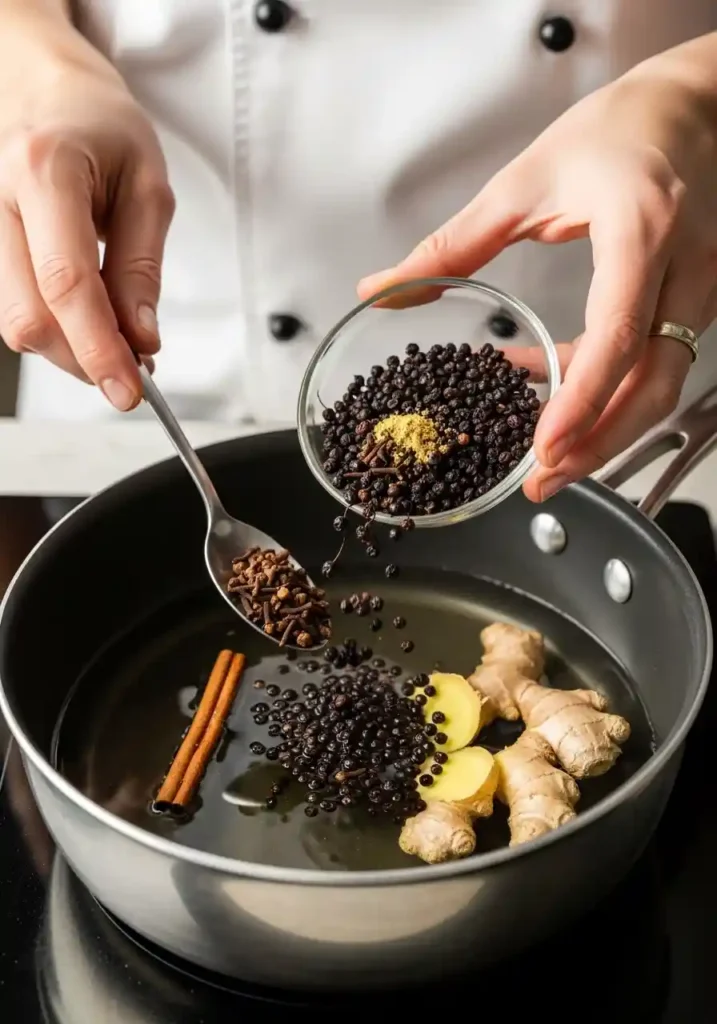
- Simmer and Reduce: Bring the mixture to a boil over medium-high heat. Once boiling, reduce the heat to low, cover the pot, and let it simmer gently. You want the liquid to reduce by about half, which will take approximately 40-45 minutes. Your kitchen will smell wonderfully aromatic!
- Cool and Strain: Remove the pot from the heat and allow the mixture to cool until it’s safe to handle, about 20-30 minutes.

- Extract the Juice: Pour the mixture through a fine-mesh strainer or a cheesecloth-lined bowl. Using the back of a wooden spoon, press down firmly on the berries to squeeze out every last drop of the precious liquid. Discard the spent berries and spices in your compost.
- Add Sweetener: Once the liquid has cooled to lukewarm (to preserve the beneficial enzymes in raw honey), stir in the raw honey until it is completely dissolved. If using maple syrup, you can add it while the liquid is slightly warmer.
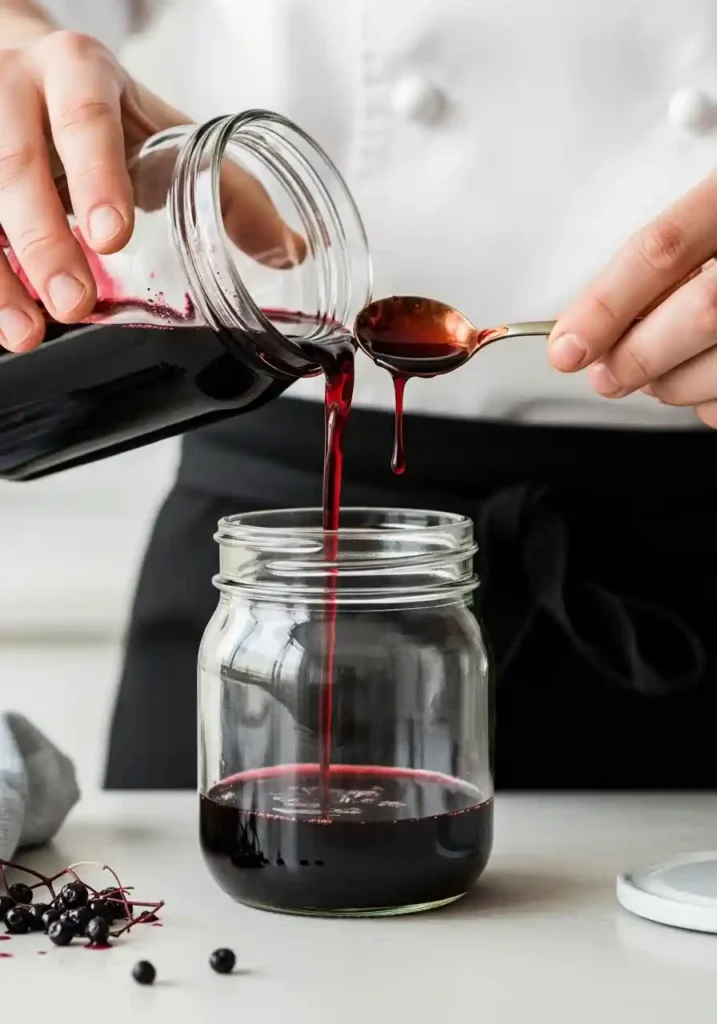
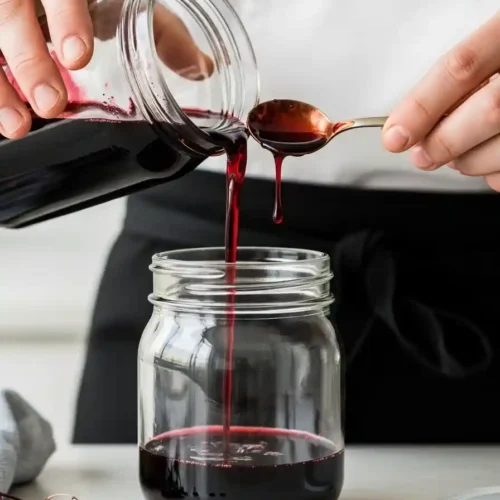
- Store Properly: Transfer your finished elderberry syrup into a clean, airtight glass jar. Store it in the refrigerator. For other preservation ideas, check out our guide to making an an herbal cordial recipe.
Customizing Your Elderberry Syrup
One of the best parts of this recipe is its versatility. You can easily adjust it to suit your taste and wellness needs.
Optional Immune-Boosting Add-ins
For an extra-potent blend, consider adding other herbs to the simmering stage:
- Rosehips: For an extra boost of Vitamin C.
- Star Anise: Adds a lovely flavor and has its own beneficial properties.
- Echinacea: Another well-known immune-supporting herb.
Sweetener Alternatives & Dietary Needs
- Vegan Elderberry Syrup: Simply substitute the raw honey with an equal amount of pure maple syrup.
- For Infants: Maple syrup is a safe alternative for children over one year old. Crucially, never give honey to infants under 12 months of age due to the risk of infant botulism.
Dosage & Safe Usage Guidelines
Always consult with a healthcare professional before starting any new herbal supplement.
- Standard Adult Dosage: 1 tablespoon daily for general immune support. If you feel a cold coming on, you can increase this to 1 tablespoon 3-4 times per day for a few days.
- Children’s Dosage (over 1 year): 1 teaspoon daily for general support. This can be increased to 1 teaspoon 3-4 times per day if needed. Remember, use maple syrup instead of honey for children between 1 and 2 years old.
Storage & Shelf Life
Proper storage is key to preserving the freshness and potency of your homemade syrup.
How to Store Homemade Elderberry Syrup
Your syrup must be stored in an airtight container in the refrigerator. Glass jars with tight-fitting lids are ideal.
How Long Does Homemade Elderberry Syrup Last?
When refrigerated properly, your syrup should last for up to two months. For longer storage, you can freeze the syrup in ice cube trays and then transfer the cubes to a freezer bag. Frozen syrup will last for up to 6 months.
Beyond the Spoon: Creative Ways to Use Elderberry Syrup
Don’t just limit your syrup to a medicinal dose! Its rich, fruity flavor is delicious in many ways:
- Stir it into sparkling water or tea.
- Drizzle it over yogurt, oatmeal, or pancakes.
- Add it to smoothies for a flavor and antioxidant boost.
- Use it as a base for cocktails or mocktails.
the ultimate homemade elderberry syrup recipe
Ingredients
- 3/4 cup dried organic elderberries Sambucus nigra
- 3 cups filtered water
- 1 cinnamon stick or 1 teaspoon dried cinnamon
- 4 whole cloves or 1 teaspoon dried cloves
- 1 tablespoon fresh grated ginger (or 1 teaspoon dried ginger)
- 1 cup raw honey or maple syrup for a vegan option
Instructions
Combine Ingredients:
- In your saucepan, combine the dried elderberries, water, cinnamon stick, whole cloves, and fresh ginger. If using dried spices, add them here as well. (Kids can help measure the dry ingredients!)
Simmer and Reduce:
- Bring the mixture to a boil over medium-high heat. Once boiling, reduce the heat to low, cover the pot, and let it simmer gently. You want the liquid to reduce by about half, which will take approximately 40-45 minutes. Your kitchen will smell wonderfully aromatic!
Cool and Strain:
- Remove the pot from the heat and allow the mixture to cool until it’s safe to handle, about 20-30 minutes.
Extract the Juice:
- Pour the mixture through a fine-mesh strainer or a cheesecloth-lined bowl. Using the back of a wooden spoon, press down firmly on the berries to squeeze out every last drop of the precious liquid. Discard the spent berries and spices in your compost.
Add Sweetener:
- Once the liquid has cooled to lukewarm (to preserve the beneficial enzymes in raw honey), stir in the raw honey until it is completely dissolved. If using maple syrup, you can add it while the liquid is slightly warmer.
Store Properly:
- Transfer your finished elderberry syrup into a clean, airtight glass jar. Store it in the refrigerator. For other preservation ideas, check out our guide to making an an herbal cordial recipe.
Notes
Nutrition
- Calories: 200
- Sugar: 278g
- Sodium: 21mg
- Fat: 1g
- Carbohydrates: 299g
- Protein: 2g
Frequently Asked Questions (FAQ)
How do you make elderberry syrup?
You make it by simmering dried elderberries with water and spices like cinnamon, cloves, and ginger until the liquid reduces. After straining the berries, you mix in a sweetener like raw honey or maple syrup.
What not to mix with elderberry?
Avoid consuming raw, uncooked elderberries, leaves, or stems, as they can be toxic. Also, individuals with autoimmune conditions or those on immunosuppressant medications should consult a doctor before using elderberry.
How long do you cook elderberries to remove toxins?
Simmering elderberries for at least 40-45 minutes, as instructed in this recipe, is sufficient to cook them thoroughly and neutralize the compounds that can cause stomach upset.
Can I use fresh elderberries instead of dried?
Yes, you can. The general rule is to double the quantity. For this recipe, you would use 1.5 cups of fresh or frozen elderberries. Ensure they are properly identified as Sambucus nigra and are ripe (dark purple/black).
Conclusion
Making your own homemade elderberry syrup is an empowering, simple, and effective way to support your family’s well-being. With this easy-to-follow recipe and customization tips, you can create a natural remedy that is both delicious and packed with immune-boosting power. Enjoy the peace of mind that comes from knowing exactly what’s in your cold and flu season toolkit.