of baking a dessert that’s as unforgettable as the occasion itself? Whether it’s Valentine’s Day, an anniversary, or just a Tuesday night craving for something sweet, this heart-shaped cake is your secret weapon. Imagine slicing into a tender, moist crumb with a hint of vanilla warmth, crowned with billowy whipped cream and jewel-like berries—no fancy tools or piping skills required.
Perfect for beginners yet stunning enough to impress, this recipe leans on pantry staples and clever shortcuts (hello, heart-shaped pan magic!). We’ve even tucked in tips for gluten-free, vegan, or chocolate-loving twists. Ready to bake a treat that’s as fun to make as it is to share? Let’s turn your kitchen into a love story.
Table of Contents
Why You’ll Love This Heart-Shaped Cake
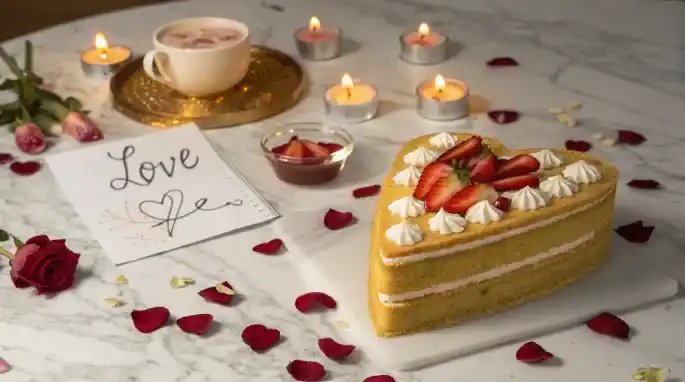
There’s something undeniably magical about a dessert that looks as special as it tastes. This heart-shaped cake isn’t just a treat for the eyes—it’s a celebration of flavor, simplicity, and love. Whether you’re planning a cozy Valentine’s Day dinner, surprising someone on their birthday, or simply craving a homemade delight, this recipe is designed to win hearts without demanding hours in the kitchen.
Here’s why it stands out:
- Romantic Versatility: While perfect for Valentine’s Day, this cake adapts effortlessly to any occasion. Swap vanilla extract for almond or add citrus zest to match spring brunches or summer gatherings. It’s a blank canvas for creativity.
- Beginner-Friendly Simplicity: No stand mixer? No problem. A hand whisk and a trusty heart-shaped pan (or even two round pans shaped into a heart) are all you need. The steps are straightforward, and we’ve included tips to avoid common pitfalls, like overmixing the batter.
- Time-Saving Brilliance: Bake the layers ahead and frost them the day of your event. This make-ahead trick is a lifesaver for busy hosts who want to impress without last-minute stress.
- Dietary Flexibility: Craving a gluten-free or vegan version? Substitute all-purpose flour with a 1:1 gluten-free blend or use dairy-free butter and flax eggs. The result remains tender and moist—no compromises on taste or texture.
Pro Tip: For the smoothest batter and even baking, ensure ingredients like eggs and butter are at room temperature before mixing. Cold ingredients can lead to a lumpy batter or uneven rise.
This cake is more than a dessert—it’s an invitation to create memories. Share it with someone special, savor it solo with a cup of tea, or gift it to a friend who needs a sweet pick-me-up. With its tender crumb and effortless charm, it’s a recipe you’ll return to time and again.
Ingredients
Let’s gather everything you’ll need to create this showstopping heart-shaped cake. The ingredients are simple, but a few thoughtful choices ensure your cake turns out tender, moist, and bursting with flavor.
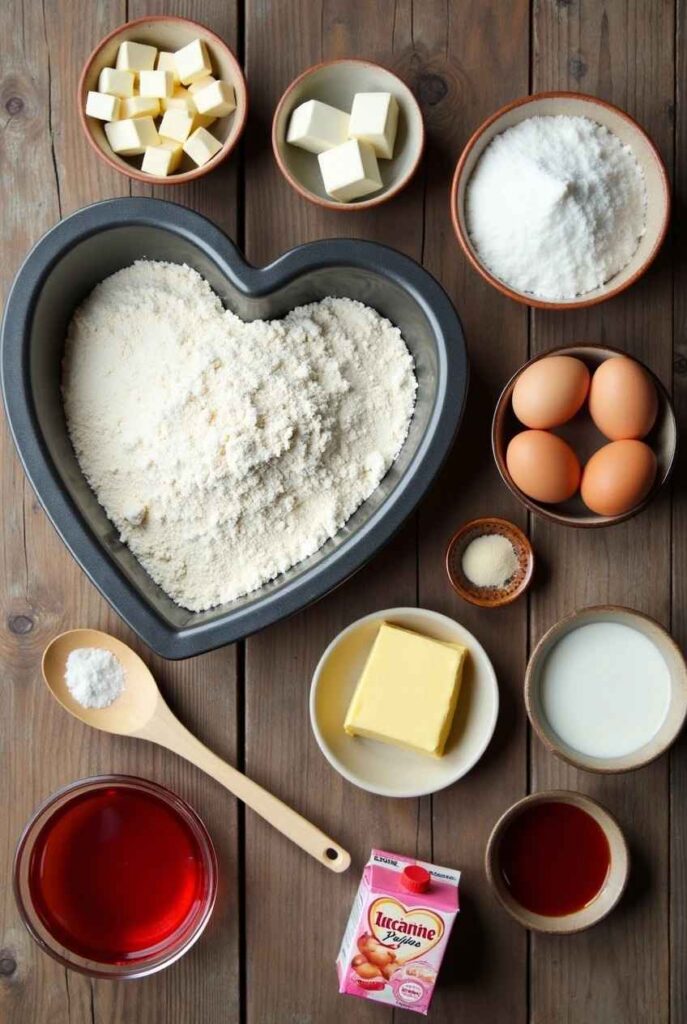
For the Cake:
- 2 cups all-purpose flour – Spoon and level it into your measuring cup for accuracy (too much flour = dense cake!). For a gluten-free version, swap in a 1:1 gluten-free baking blend.
- 1½ cups granulated sugar – Balances sweetness without overpowering the vanilla.
- ¾ cup unsalted butter, softened – Room temperature is key! Soft butter traps air, creating a light crumb. Use dairy-free butter for a vegan twist.
- 3 large eggs – Bring them to room temperature for smoother mixing. For a vegan cake, substitute with 3 flax eggs (3 tbsp ground flaxseed + 9 tbsp water, rested for 5 mins).
- 1 cup whole milk – Adds richness; almond or oat milk work beautifully for dairy-free needs.
- 1 tbsp baking powder – The secret lift for a fluffy texture.
- 1 tsp vanilla extract – Pure vanilla adds depth. Try almond extract for a nutty twist!
- Pinch of salt – Enhances all the flavors.
For Decoration:
- 2 cups whipped cream or vanilla buttercream – Light and airy whipped cream complements the cake’s simplicity, while buttercream offers stability for warmer days.
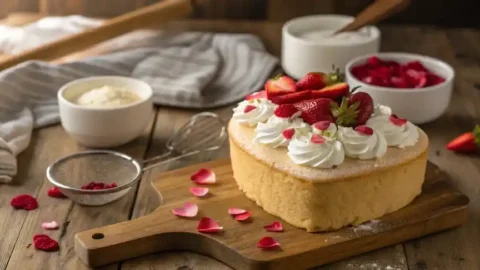
- Fresh berries or edible flowers – Strawberries, raspberries, or rose petals add a pop of color and freshness.
Pro Tips for Success:
- Measure flour correctly: Fluff the flour in its bag, spoon it into the measuring cup, then level with a knife. No packing!
- Softened butter hack: In a rush? Cut butter into small cubes and microwave in 5-second bursts until slightly yielding but not melted.
- Food coloring: For a pink hue, add 2–3 drops of gel food coloring to the batter. Gel ensures vibrant color without thinning the mix.
How To Make Your Heart-Shaped Cake
Let’s transform those simple ingredients into a showstopping dessert! Follow these steps for a tender, moist cake with a picture-perfect finish.
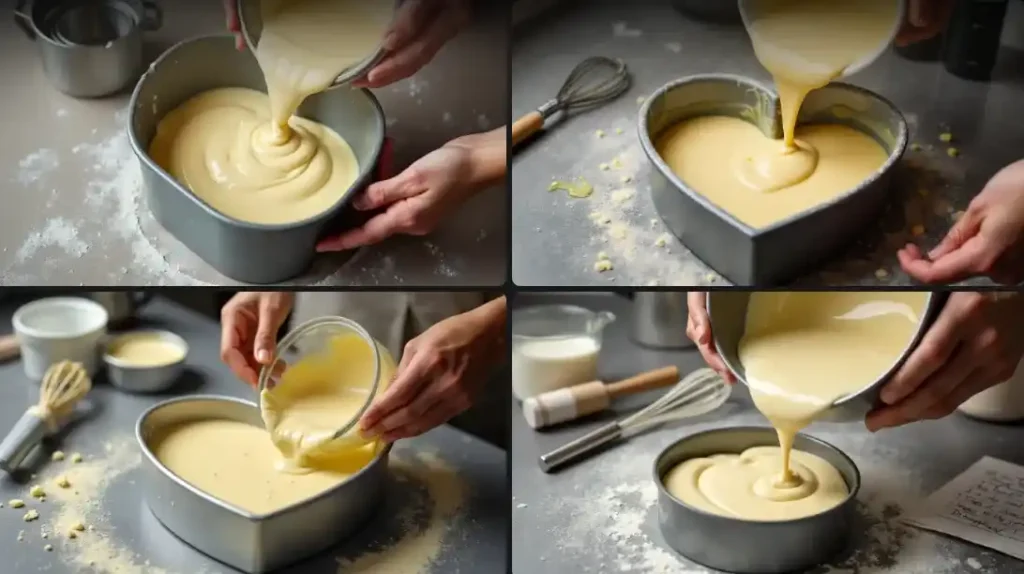
Step 1: Prep Your Pan & Preheat
- Preheat oven to 350°F (175°C). This ensures even baking from the moment the batter hits the oven.
- Grease your heart-shaped pan: Use softened butter or nonstick spray, then dust lightly with flour. For extra insurance, line the bottom with parchment paper cut to shape.
Step 2: Mix Dry Ingredients
In a medium bowl, whisk together:
- 2 cups all-purpose flour
- 1 tbsp baking powder
- Pinch of salt
Whisking aerates the flour, which helps create a lighter crumb.
Step 3: Cream Butter & Sugar
- In a large bowl, beat ¾ cup softened butter and 1½ cups granulated sugar with a hand mixer or stand mixer on medium speed for 2–3 minutes. The mixture should look pale and fluffy.
- Pro Tip: Scrape the bowl’s sides halfway through to ensure no sugar granules hide at the bottom.
Step 4: Add Eggs & Vanilla
- Crack in 3 large eggs, one at a time, mixing well after each addition. This builds structure and emulsifies the batter.
- Stir in 1 tsp vanilla extract (or your chosen flavoring).
Step 5: Combine Wet & Dry Ingredients
- Alternate adding the dry mix and 1 cup milk to the butter mixture in three parts, starting and ending with dry ingredients. Mix on low speed until just combined—overmixing leads to a tough cake.
- Fold gently with a silicone spatula to catch any pockets of flour.
Step 6: Bake to Perfection
- Pour batter into the prepared pan and smooth the top.
- Bake for 25–30 minutes, or until a toothpick inserted into the center comes out clean.
- Cool for 10 minutes in the pan, then transfer to a wire rack to cool completely. Rushing this step risks a crumbly cake!
Step 7: Decorate with Flair
- Once cooled, spread 2 cups whipped cream or buttercream over the cake using an offset spatula. For smooth edges, dip the spatula in warm water between swipes.
- Top with fresh berries or edible flowers. Press them gently into the frosting to secure.
Troubleshooting Tips:
- Sinking middle? Your oven temperature might be off—use an oven thermometer to verify.
- Dry edges? Tent the pan with foil halfway through baking if your oven runs hot.
- No heart-shaped pan? Bake two round layers, then carve them into a heart using a template.
Pro Tips and Variations
Now that you’ve mastered the basics, let’s elevate your heart-shaped cake with expert tricks and creative twists! These tips ensure flawless results every time, while variations let you tailor the recipe to any taste or occasion.
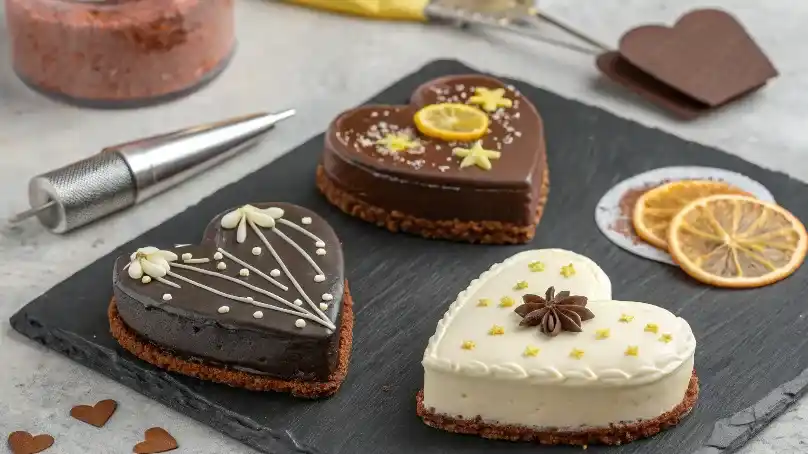
Flavor Variations
- Chocolate Lover’s Twist: Replace ¼ cup flour with unsweetened cocoa powder for a rich chocolate base. Pair with chocolate ganache frosting and fresh raspberries.
- Citrus Burst: Add 1 tbsp lemon or orange zest to the batter for a bright, tangy kick. Top with a citrus glaze (powdered sugar + citrus juice) for extra zing.
- Berry Bliss: Fold ½ cup fresh or frozen blueberries (tossed in flour) into the batter before baking. The berries add juicy pockets of flavor.
Decorating Hacks
- Fruit Stencils: Place a small heart-shaped cookie cutter on the frosted cake, fill it with cocoa powder or sprinkles, then lift for an instant design.
- Edible Glitter: Brush the frosted cake with a thin layer of honey or simple syrup, then gently press edible glitter onto the surface for a romantic shimmer.
- Layered Look: Slice the cake horizontally and add a filling of jam or lemon curd between layers for a surprise burst of flavor.
Storage Solutions
- Room Temperature: Store unfrosted cake in an airtight container for up to 2 days. Frost just before serving to maintain texture.
- Refrigeration: Frosted cakes keep for 3 days in the fridge. Let slices sit at room temperature for 20 minutes before serving to soften the crumb.
- Freezing: Wrap cooled, unfrosted layers in plastic wrap and freeze for up to 3 months. Thaw overnight in the fridge before decorating.
Allergy-Friendly Swaps
- Gluten-Free: Use a 1:1 gluten-free flour blend. For best results, add ½ tsp xanthan gum if your blend doesn’t include it.
- Dairy-Free: Substitute butter with coconut oil or vegan butter, and use almond or oat milk. Opt for coconut whipped cream as frosting.
- Egg-Free: Replace each egg with ¼ cup unsweetened applesauce or a flax egg (1 tbsp ground flax + 3 tbsp water per egg).
Pro Tips for Success
- Even Baking: Rotate the pan halfway through baking if your oven has hot spots.
- Smoother Frosting: Chill the cake for 30 minutes before frosting to reduce crumbs.
- Flavor Infusion: Brush cooled cake layers with a simple syrup (equal parts sugar and water, heated until dissolved) infused with vanilla or rose water for added moisture and aroma.
Serving Suggestions
Your heart-shaped cake deserves a presentation as memorable as its flavor! Whether you’re hosting a romantic dinner or celebrating a milestone, these ideas will turn your dessert into the star of the table.
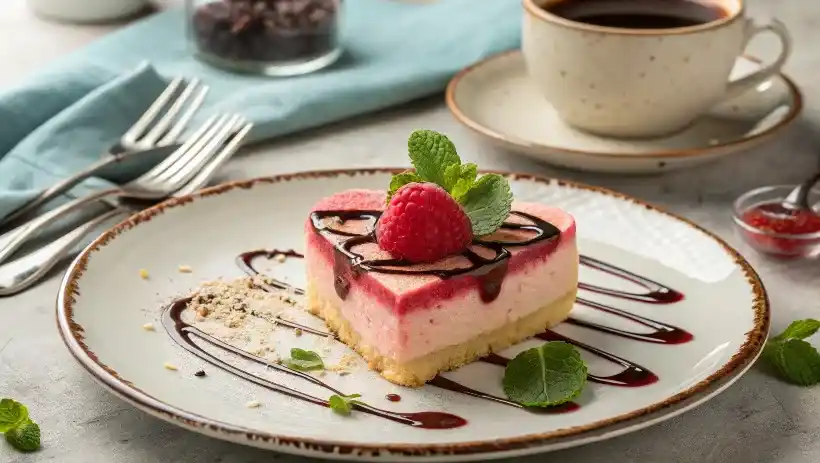
Elevate Your Presentation
- Dust with Elegance: A light sprinkle of powdered sugar or edible gold dust adds a touch of sophistication. Use a stencil for heart-shaped designs.
- Fresh Garnishes: Top with seasonal berries, mint sprigs, or edible flowers like pansies or violets for vibrant color and freshness.
- Sauces & Drizzles: Serve with a side of raspberry coulis, salted caramel, or dark chocolate ganache for dipping or drizzling.
Perfect Pairings
- Beverages: Pair slices with a warm cup of chai tea, a glass of sparkling rosé, or a rich espresso for contrast.
- Ice Cream Companions: Vanilla bean ice cream complements the cake’s simplicity, while a scoop of lemon sorbet adds zesty balance.
- Texture Play: Add crunch with toasted almond slivers or a side of shortbread cookies.
Occasion-Specific Ideas
- Valentine’s Day: Serve on a red charger plate with rose petals scattered around the base. Add a handwritten note on a mini chalkboard for a personal touch.
- Birthdays: Insert candles into fresh strawberries instead of the cake to keep frosting intact. Pair with a DIY Dessert Charcuterie Board for a festive spread.
- Brunch Gatherings: Offer smaller portions alongside coffee and fresh fruit salad for a light, sweet finish.
Pro Tips for Serving
- Clean Slices: Dip your knife in hot water and wipe it dry between cuts for neat, crumb-free slices.
- Temperature Matters: For best texture, let refrigerated cake sit at room temperature for 20 minutes before serving.
- Leftover Love: Transform day-old cake into trifles—layer crumbled cake with whipped cream and berries in individual glasses.
Celebrate life’s milestones with style—explore our Graduation Cakes recipe for creative designs that honor achievements as sweetly as this heart-shaped cake celebrates love.
Conclusion
You’ve just unlocked the secret to creating a heart-shaped cake that’s as delightful to bake as it is to share. This recipe isn’t just about mixing ingredients—it’s about crafting moments, whether you’re surprising a loved one, celebrating a milestone, or simply indulging in a slice of homemade joy.
Why This Cake Stays With You:
- Effortless Elegance: With its tender crumb and eye-catching shape, this dessert proves that stunning results don’t require complex techniques.
- Adaptable for Every Occasion: Swap frostings, experiment with flavors, or adjust decorations to match holidays, birthdays, or even a Tuesday night treat.
- Confidence in Every Bite: From precise baking times to foolproof substitutions, you’re equipped to handle any twist (or kitchen mishap) with grace.
A Final Sprinkle of Inspiration:
Baking is more than a skill—it’s a love language. So, dust off that heart-shaped pan, preheat your oven, and let the aroma of vanilla and butter fill your kitchen. When you present this cake, watch eyes light up and hear the inevitable “You made this?!”—because yes, you did.
Keep the Magic Alive:
- Share Your Creation: Snap a photo and tag your masterpiece on social media. You might just inspire someone else to bake their first heart-shaped wonder.
Here’s to cakes that taste like love and memories made one slice at a time. Happy baking!
FAQs
How do I make a heart-shaped cake?
Start by prepping a heart-shaped cake pan with butter and flour. Follow the recipe’s mixing and baking steps, then cool completely before decorating with frosting and garnishes like berries or edible flowers. For detailed instructions, revisit the How To Make section above.
How much batter do I need for a heart-shaped pan?
A standard 8-inch heart-shaped pan holds 4–4.5 cups of batter (the same as an 8-inch round pan). Fill it two-thirds full to avoid overflow. Adjust quantities if using a larger or smaller pan.
How to make a heart-shaped cake without a heart pan?
Use two round cake pans (one 8-inch and one 6-inch) or a square pan:
Bake two round layers.
Cut the smaller circle in half to form the top curves of the heart.
Arrange the halves against the sides of the full circle to create a heart shape.
What’s the best way to cut a heart-shaped cake?
Slice vertically from the top center curve downward, angling toward the bottom point. For even portions, cut parallel slices about 1.5 inches wide. Use a sharp knife dipped in hot water for clean edges.
How do you cut a cake into shapes?
Freeze the cake for 30 minutes first to reduce crumbs. Place a stencil (e.g., a paper heart) on top, trace around it with a knife, then carefully carve. Save scraps for cake pops or trifles!
What is a vintage heart cake?
A vintage-style heart cake often features retro decorations like buttercream rosettes, pastel colors, or lace piping. It’s inspired by mid-20th-century baking aesthetics—think delicate, romantic, and slightly whimsical.
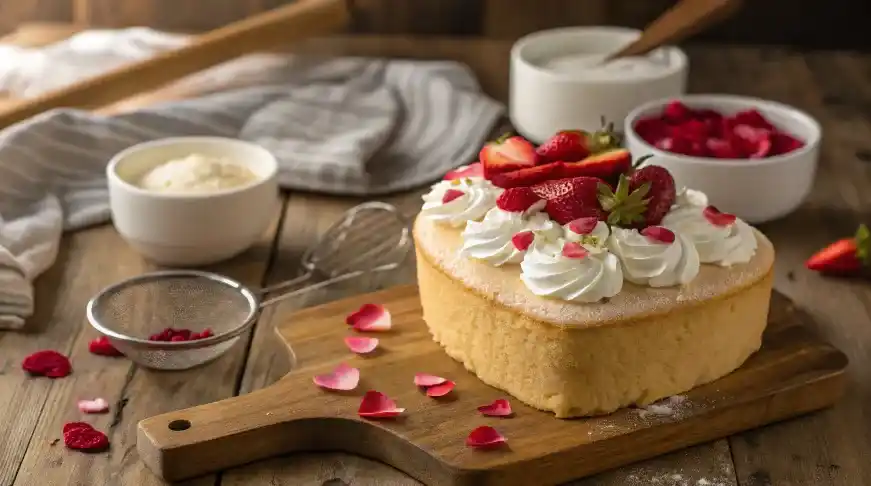
heart shaped cake
Ingredients
2 cups all-purpose flour
- Spoon and level it into your measuring cup for accuracy too much flour = dense cake!. For a gluten-free version, swap in a 1:1 gluten-free baking blend.
1½ cups granulated sugar
- Balances sweetness without overpowering the vanilla.
¾ cup unsalted butter, softened
- Room temperature is key! Soft butter traps air creating a light crumb. Use dairy-free butter for a vegan twist.
3 large eggs
- Bring them to room temperature for smoother mixing. For a vegan cake substitute with 3 flax eggs (3 tbsp ground flaxseed + 9 tbsp water, rested for 5 mins).
1 cup whole milk
- Adds richness; almond or oat milk work beautifully for dairy-free needs.
1 tbsp baking powder
- The secret lift for a fluffy texture.
1 tsp vanilla extract
- Pure vanilla adds depth. Try almond extract for a nutty twist!
Pinch of salt
- Enhances all the flavors.
Instructions
Step 1: Prep Your Pan & Preheat
- Preheat oven to 350°F (175°C). This ensures even baking from the moment the batter hits the oven.
- Grease your heart-shaped pan: Use softened butter or nonstick spray, then dust lightly with flour. For extra insurance, line the bottom with parchment paper cut to shape.
Step 2: Mix Dry Ingredients
- In a medium bowl, whisk together:
- 2 cups all-purpose flour
- 1 tbsp baking powder
- Pinch of salt
- Whisking aerates the flour, which helps create a lighter crumb.
Step 3: Cream Butter & Sugar
- In a large bowl, beat ¾ cup softened butter and 1½ cups granulated sugar with a hand mixer or stand mixer on medium speed for 2–3 minutes. The mixture should look pale and fluffy.
- Pro Tip: Scrape the bowl’s sides halfway through to ensure no sugar granules hide at the bottom.
Step 4: Add Eggs & Vanilla
- Crack in 3 large eggs, one at a time, mixing well after each addition. This builds structure and emulsifies the batter.
- Stir in 1 tsp vanilla extract (or your chosen flavoring).
Step 5: Combine Wet & Dry Ingredients
- Alternate adding the dry mix and 1 cup milk to the butter mixture in three parts, starting and ending with dry ingredients. Mix on low speed until just combined—overmixing leads to a tough cake.
- Fold gently with a silicone spatula to catch any pockets of flour.
Step 6: Bake to Perfection
- Pour batter into the prepared pan and smooth the top.
- Bake for 25–30 minutes, or until a toothpick inserted into the center comes out clean.
- Cool for 10 minutes in the pan, then transfer to a wire rack to cool completely. Rushing this step risks a crumbly cake!
Step 7: Decorate with Flair
- Once cooled, spread 2 cups whipped cream or buttercream over the cake using an offset spatula. For smooth edges, dip the spatula in warm water between swipes.
- Top with fresh berries or edible flowers. Press them gently into the frosting to secure.
Notes
Nutrition Information (Per Serving)
| Nutrient | Amount |
|---|---|
| Calories | 360 |
| Total Fat | 18g |
| Saturated Fat | 11g |
| Protein | 5g |
| Carbohydrates | 45g |
| Sugar | 28g |
| Fiber | 1g |
| Sodium | 220mg |

