

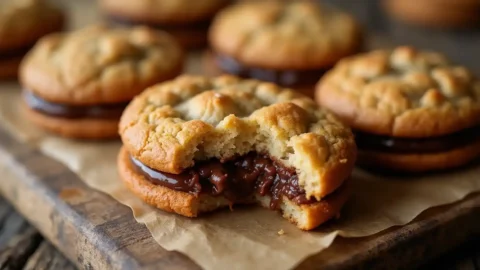
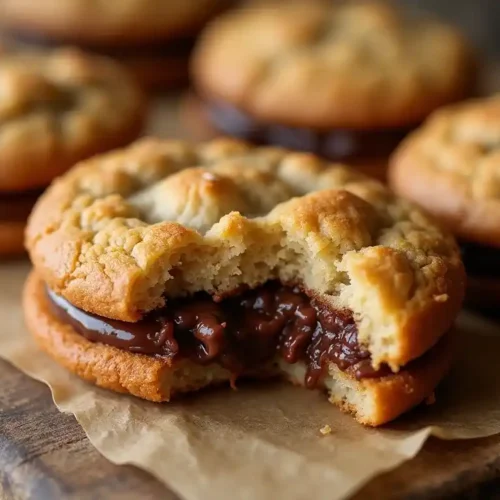
There’s something undeniably magical about sinking your teeth into a freshly baked cookie that reveals a gooey center with every bite. If you’ve ever wandered the bustling streets of New York City, you know the irresistible charm of bakery-style stuffed cookies—their soft and chewy dough, rich filling, and crisp exterior create a crowd-pleasing dessert that feels like the ultimate comfort food. In this recipe, I’ll show you how to bring that same NYC flair right into your own kitchen, using simple steps to craft an indulgent treat that tastes elevated yet remains approachable for bakers of all skill levels. Let’s get started!
Table of Contents
Key Benefits

There’s no denying that a perfectly stuffed cookie is more than just a dessert—it’s an experience. Whether you’re aiming to satisfy a sudden sweet craving or hoping to impress guests with a bakery-quality treat, these NYC-inspired cookies check every box. Below are a few highlights that showcase why this indulgent dessert deserves a spot in your recipe collection:
- Bakery-Quality at Home
By mastering simple techniques and using everyday pantry staples, you can recreate that soft and chewy cookie texture with a gooey center right in your own kitchen—no trip to the Big Apple necessary. - Crowd-Pleasing Dessert
These cookies are an instant hit at gatherings because of their dramatic reveal: that first bite unveiling a rich, decadent filling. They’re perfect for holiday parties, potlucks, and everything in between. - Easy yet Impressive
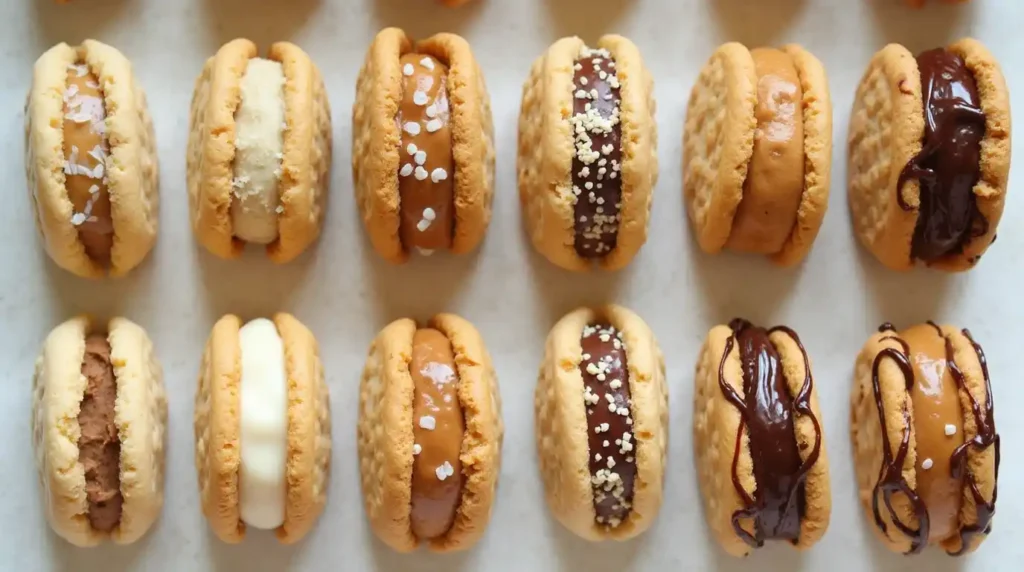
Despite their show-stopping appearance, making these treats doesn’t require professional baking skills. With a little guidance and a few insider tips, anyone can whip up this indulgent dessert without feeling overwhelmed. - Versatile Flavor Combinations
From classic chocolate to more adventurous fillings like hazelnut spread or peanut butter, the possibilities are endless. The flexibility of this recipe gives you the freedom to tailor each cookie to your personal cravings. - Ultimate Comfort Food
There’s something incredibly satisfying about the warmth of a freshly baked cookie, especially one with a decadent, melt-in-your-mouth center. Think of this as a cozy pick-me-up whenever you need a sweet moment.
Embrace these benefits to elevate your baking game and treat yourself to a truly standout dessert. In the upcoming sections, I’ll share the exact ingredients, instructions, pro tips, and more, ensuring you have all the knowledge you need for a flawless baking experience.
Ingredients
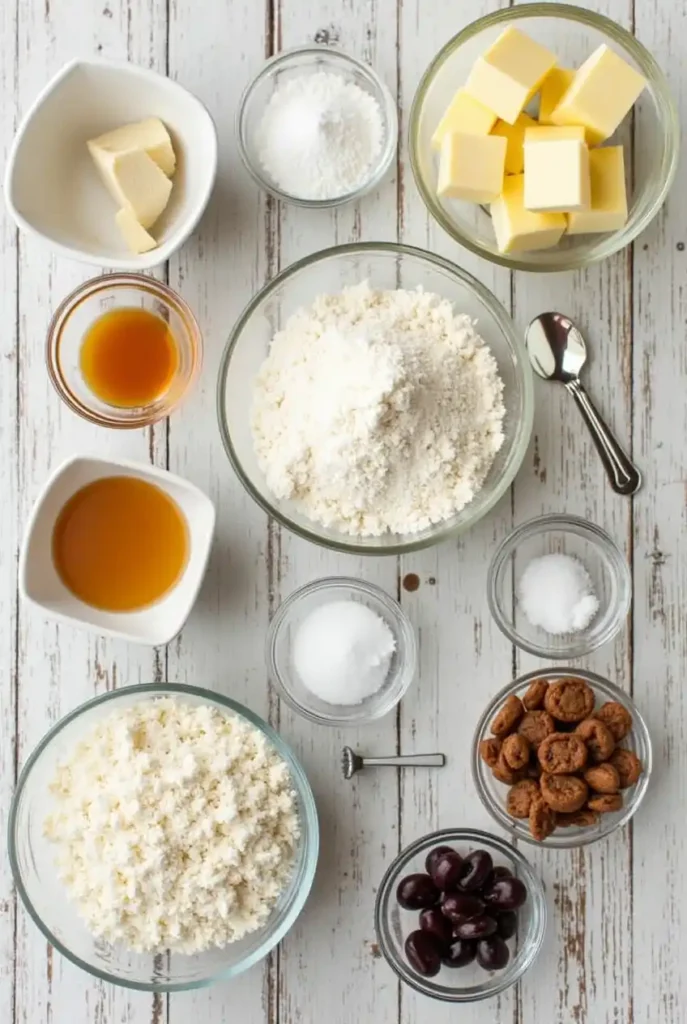
When it comes to crafting bakery-style stuffed cookies with that soft and chewy bite and a gooey center, starting with the right ingredients makes all the difference. I like to keep this list simple yet comprehensive, ensuring you have everything needed to bake up a decadent dessert at home. Here’s a quick rundown of what you’ll need:
- All-Purpose Flour
- The foundation of any homemade baked goods. This type of flour strikes the ideal balance between lightness and structure, giving you that crisp exterior while still maintaining a tender crumb.
- Brown Sugar and Granulated Sugar
- A combination of these sweeteners enhances both flavor and texture. Brown sugar adds a subtle molasses note and extra moisture, contributing to a richer taste and melt-in-your-mouth chew.
- Unsalted Butter
- Using butter at room temperature ensures a smooth, creamy cookie dough. Unsalted butter allows you to control the overall salt content, which is especially important for highlighting the sweetness of the filling.
- Eggs
- Acting as a binding agent, eggs also help create that soft interior. Make sure they’re at room temperature for easier mixing and consistent results.
- Vanilla Extract
- This simple pantry staple elevates the dough’s flavor profile, making it taste like a classic NYC-inspired cookie fresh from a bustling city bakery.
- Baking Soda and Salt
- Baking soda gives the cookies a lift and subtle crispness on the outside, while salt brings out the depth of the other flavors.
- Filling of Your Choice
- From indulgent chocolate chips to creamy peanut butter or a luscious hazelnut spread, the choice is yours. Pick a favorite or experiment with new flavors to make your stuffed cookies unforgettable.
Feel free to play around with different toppings or textures to personalize this recipe. While these ingredients keep things traditional, don’t hesitate to get creative—everything from chopped nuts to flavored candy can find its place in the dough. In the next section, we’ll dive into the step-by-step instructions, ensuring you’ll end up with NYC-worthy cookies ready to impress.
Instructions
Creating these bakery-quality stuffed cookies is much easier than you might imagine. With just a few careful steps, you’ll end up with a soft, chewy dough and a gooey center that truly captures that NYC-inspired charm. Follow the guide below, and don’t be afraid to customize as you go along.
- Combine the Dry Ingredients
- In a medium bowl, whisk together your all-purpose flour, baking soda, and salt.
- This step helps evenly distribute the leavening agent, promoting a consistent rise and tender texture.
- Cream the Butter and Sugars
- In a separate large mixing bowl, cream the softened butter, brown sugar, and granulated sugar until the mixture is light and fluffy.
- Aim for a pale color and airy consistency—this usually takes about 2–3 minutes with an electric mixer on medium speed.
- Incorporate the Wet Ingredients
- Add the room-temperature eggs one at a time, mixing well after each addition.
- Stir in the vanilla extract to enhance the dough’s warm, comforting flavor profile.
- Bring It All Together
- Slowly fold the dry ingredients into the butter mixture, ensuring you don’t overwork the dough. Overmixing can lead to tougher cookies, which detracts from that decadent dessert texture.
- Chill the Dough (Optional but Recommended)
- For extra depth of flavor and an even chewier bite, cover the dough and refrigerate it for at least 30 minutes.
- Chilling the dough also makes it easier to handle when stuffing with your chosen filling.
- Preheat and Prep
- Preheat your oven to 350°F (175°C) before you start shaping the cookies.
- Line a baking sheet with parchment paper to prevent sticking and make cleanup simpler.
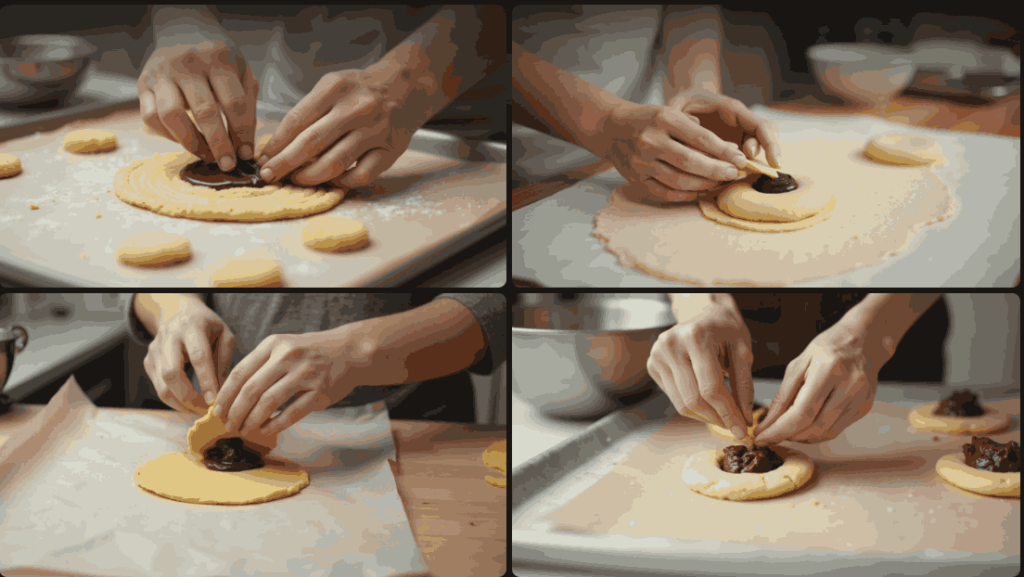
- Shape and Stuff
- Scoop about two tablespoons of dough per cookie, then flatten slightly in your hand.
- Place a generous dollop of filling—like chocolate chips, peanut butter, or hazelnut spread—in the center.
- Fold or pinch the dough around the filling to seal it inside, forming a neat ball. Make sure there are no gaps to keep the center delightfully gooey.
- Bake to Perfection
- Arrange the stuffed dough balls on the lined baking sheet, leaving a couple of inches between each to allow for spreading.
- Bake for 10–12 minutes or until the edges are lightly golden. The centers might look soft, but they’ll firm up as the cookies cool.
- Cool and Enjoy
- Let the cookies rest on the baking sheet for a minute or two before transferring them to a wire rack.
- This brief waiting period ensures they set without overbaking and helps lock in that soft and chewy texture.
Use these straightforward steps as your roadmap to incredible stuffed cookies that rival anything you’ll find in a bustling New York bakery. Up next, we’ll explore pro tips, variations, and creative ways to make these treats truly your own.
Pro Tips and Variations

Baking stuffed cookies can feel like a creative playground—there’s plenty of room to fine-tune techniques and experiment with flavors. Below are some insider tips to help you achieve that signature soft and chewy texture, plus variations to keep your cookie repertoire exciting.
- Chill the Dough for Extra Flavor
- Although this step isn’t strictly required, refrigerating the dough for at least 30 minutes helps the flavors meld and makes the cookies easier to shape.
- If you have time, let the dough rest overnight; you’ll be amazed at the enhanced depth of flavor and consistent, bakery-quality finish.
- Portioning for Uniform Baking
- Use a cookie scoop or measuring spoon to ensure each piece of dough is roughly the same size.
- Even portioning means every cookie will bake through evenly, giving you that gooey center without risking under- or overbaking.
- Perfectly Encasing the Filling
- When adding your filling—whether it’s rich hazelnut spread, creamy peanut butter, or another indulgent choice—make sure you seal the dough completely around it.
- Pinching the edges together thoroughly prevents any leaks and keeps the center molten and decadent.
- Experiment with Flour Blends
- If you’re catering to dietary preferences or allergies, try using a gluten-free all-purpose mix.
- Keep an eye on texture adjustments, as different flour blends can alter the dough’s elasticity and final crumb.
- Add Textural Elements
- Mix in chopped nuts, crushed candy, or even toffee bits to create more crunch.
- For an extra sprinkle of indulgence, roll the dough balls in sugar or drizzle melted chocolate on top once cooled.
- Play with Flavor Enhancers
- A quick pinch of sea salt on top of each cookie before baking can balance sweetness and add that gourmet touch.
- You can also stir a bit of instant espresso powder into the dough if you’re pairing a chocolate filling—this intensifies the overall cocoa notes without making the cookies taste like coffee.
- Scale Up for a Crowd
- These stuffed cookies are a showstopper for parties or special events, so feel free to double or triple the recipe.
- Just be sure to bake in batches or have multiple lined baking sheets ready to avoid overcrowding.
With these tips and variations, you can turn a simple recipe into countless personalized creations. Whether you stick with the classic flavors or branch out into bold new territory, the key is to have fun experimenting. In the next section, we’ll talk about serving ideas and how to elevate your presentation, making these New York City-inspired stuffed cookies the star of any dessert table.
For a fun sweet-and-salty twist, be sure to visit our Cheez It Peanut Butter And Chocolate Magic for a delightfully crunchy treat!
Serving Suggestions
Elevating these bakery-style stuffed cookies to a show-stopping dessert is all about thoughtful presentation and creative pairings. Whether you’re enjoying them at home or serving them at a celebration, here are a few ideas to make each cookie truly shine:
- Plate Them Warm
- Since these treats have a gooey center, try serving them fresh from the oven or gently reheated.
- The warm filling contrasts beautifully with a cool beverage or ice cream, creating a crowd-pleasing dessert.
- Pair with Beverages
- Keep it classic by setting out a chilled glass of milk alongside your cookies—particularly fun if you have little ones or just want a comforting throwback.
- For a more grown-up feel, offer coffee or even a foamy latte. The rich flavors of espresso are a natural match for sweet, decadent dough.
- Dress Up the Platter
- Arrange your stuffed cookies on a large serving board or a tiered dessert stand to make a bold statement at gatherings.
- Mix in colorful fruits, a few sprigs of fresh mint, or drizzles of chocolate sauce to add visual interest and tempting variety.
- Turn Them into Ice Cream Sandwiches
- Slice each cookie in half and fill with a scoop of vanilla or chocolate ice cream.
- The contrast of cold ice cream with the soft, chewy cookie layers creates an unforgettable sweet treat.
- Grab-and-Go Goodies
- If you’re hosting a casual gathering, simply stack the cookies in a clear jar or on a cake stand for guests to enjoy at their leisure.
- Offer small paper or decorative bags so friends can easily take a cookie home—perfect for parties and potlucks.
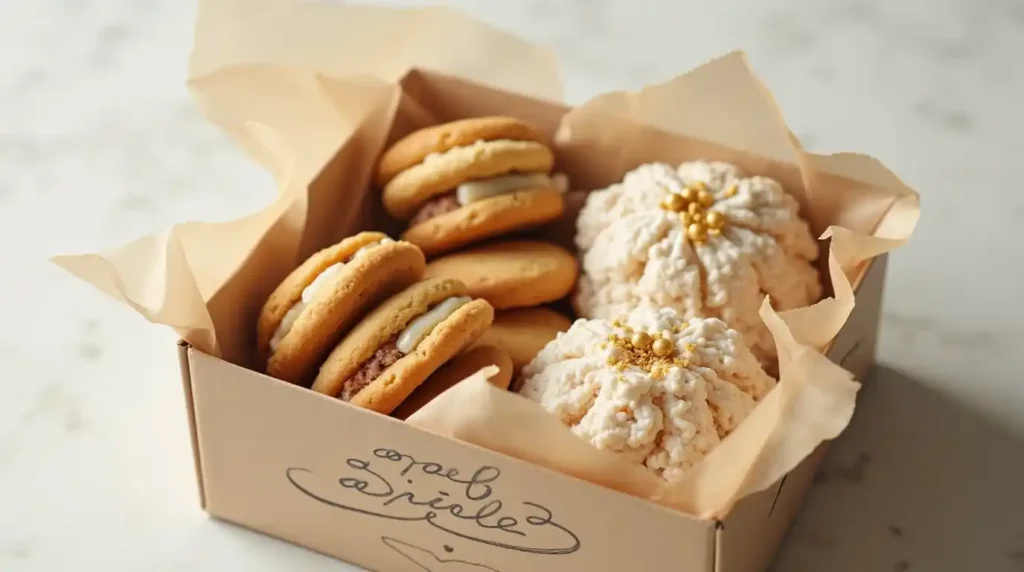
- Gifting and Celebrations
- Dress up your baked goods by placing each cookie in a festive box or wrapping them in parchment paper tied with ribbon.
- Great for birthdays, holidays, or housewarming presents—everyone appreciates a homemade indulgence.
No matter how you serve them, these NYC-inspired stuffed cookies are bound to steal the spotlight. Up next, we’ll wrap up with final thoughts and address a few commonly asked questions to ensure you have all the guidance you need for a flawless baking experience.
Conclusion
By now, you’ve seen just how simple it can be to capture that classic NYC bakery taste in your own kitchen. From selecting quality ingredients to ensuring a perfectly gooey center, each step has been thoughtfully designed to help you achieve a memorable sweet treat. Whether you’re serving these stuffed cookies at a family gathering or keeping a batch on hand for late-night cravings, you’ll love how their soft and chewy texture pairs seamlessly with a rich filling.
As you continue experimenting, remember that the best part of baking is making a recipe uniquely your own. Try swapping fillings, adjusting the level of sweetness, or even shaping the dough differently for a fresh twist on this indulgent dessert. Above all, enjoy the process—it’s the little moments of mixing, shaping, and sharing that truly bring these cookies to life.
If you found these tips and techniques helpful, stay tuned for even more ideas on enhancing flavor, saving time, and delighting your taste buds. In our last section, we’ll answer some frequently asked questions to ensure your baking experience remains stress-free and consistently delicious. Happy baking!
FAQs
Below are some frequently asked questions to guide you through common challenges and help ensure the best possible outcome for your NYC-inspired stuffed cookies:
1. How should I store leftover cookies?
Keep them in an airtight container at room temperature for up to three days. This method preserves their soft and chewy texture while preventing the centers from drying out.
If you need them to stay fresh longer, store them in the freezer and gently reheat when you’re ready to indulge.
2. Can I freeze the dough before baking?
Absolutely. Freezing pre-portioned dough balls is a great way to have freshly baked treats on hand whenever you crave them.
Shape and stuff the dough as if you’re about to bake, then arrange on a baking sheet and freeze until solid. Transfer the frozen dough balls to a sealed freezer bag or container. When ready to bake, allow them to thaw slightly, then follow the usual baking instructions.
3. Why are my cookies spreading too much?
This often happens if your dough is too warm or if there’s an imbalance between butter and dry ingredients.
Chilling the dough for at least 30 minutes before baking can help, and double-check your flour measurements to ensure accuracy.
4. My filling is leaking. What can I do?
Make sure each cookie is sealed completely. Pinch the edges and roll into a tight ball so the filling doesn’t escape while baking.
If you’re using a runny filling, try freezing it beforehand. This trick helps it stay contained until the dough has a chance to set around it.
5. Is it okay to use salted butter?
Yes, but be mindful of the total salt in your recipe. You might need to reduce the added salt slightly if you’re using salted butter to avoid an overly salty taste.
Unsalted butter is usually recommended for better flavor control.
6. Can I make these cookies gluten-free?
You can substitute a gluten-free all-purpose flour blend in place of regular flour. Just keep in mind that the texture may differ slightly, so consider adding a little extra liquid or fat if the dough feels crumbly.
7. How do I reheat leftover cookies?
For that freshly baked taste, warm the cookies in a preheated 300°F (150°C) oven for about 3–5 minutes.
Microwaving for short bursts of 10 seconds can also soften the center, though the exterior might not be as crisp.
Feel free to reach out with more questions as you perfect your bakery-quality stuffed cookies. Each batch offers a new chance to fine-tune, experiment, and enjoy a truly indulgent dessert that brings the taste of a New York bakery right into your home.
best nyc stuffed cookies recipe
Ingredients
All-Purpose Flour
- The foundation of any homemade baked goods. This type of flour strikes the ideal balance between lightness and structure giving you that crisp exterior while still maintaining a tender crumb.
Brown Sugar and Granulated Sugar
- A combination of these sweeteners enhances both flavor and texture. Brown sugar adds a subtle molasses note and extra moisture contributing to a richer taste and melt-in-your-mouth chew.
Unsalted Butter
- Using butter at room temperature ensures a smooth creamy cookie dough. Unsalted butter allows you to control the overall salt content, which is especially important for highlighting the sweetness of the filling.
Eggs
- Acting as a binding agent eggs also help create that soft interior. Make sure they’re at room temperature for easier mixing and consistent results.
Vanilla Extract
- This simple pantry staple elevates the dough’s flavor profile making it taste like a classic NYC-inspired cookie fresh from a bustling city bakery.
Baking Soda and Salt
- Baking soda gives the cookies a lift and subtle crispness on the outside while salt brings out the depth of the other flavors.
Filling of Your Choice
- From indulgent chocolate chips to creamy peanut butter or a luscious hazelnut spread the choice is yours. Pick a favorite or experiment with new flavors to make your stuffed cookies unforgettable.
Instructions
Combine the Dry Ingredients
- In a medium bowl, whisk together your all-purpose flour, baking soda, and salt.
- This step helps evenly distribute the leavening agent, promoting a consistent rise and tender texture.
Cream the Butter and Sugars
- In a separate large mixing bowl, cream the softened butter, brown sugar, and granulated sugar until the mixture is light and fluffy.
- Aim for a pale color and airy consistency—this usually takes about 2–3 minutes with an electric mixer on medium speed.
Incorporate the Wet Ingredients
- Add the room-temperature eggs one at a time, mixing well after each addition.
- Stir in the vanilla extract to enhance the dough’s warm, comforting flavor profile.
Bring It All Together
- Slowly fold the dry ingredients into the butter mixture, ensuring you don’t overwork the dough. Overmixing can lead to tougher cookies, which detracts from that decadent dessert texture.
Chill the Dough (Optional but Recommended)
- For extra depth of flavor and an even chewier bite, cover the dough and refrigerate it for at least 30 minutes.
- Chilling the dough also makes it easier to handle when stuffing with your chosen filling.
Preheat and Prep
- Preheat your oven to 350°F (175°C) before you start shaping the cookies.
- Line a baking sheet with parchment paper to prevent sticking and make cleanup simpler.
Shape and Stuff
- Scoop about two tablespoons of dough per cookie, then flatten slightly in your hand.
- Place a generous dollop of filling—like chocolate chips, peanut butter, or hazelnut spread—in the center.
- Fold or pinch the dough around the filling to seal it inside, forming a neat ball. Make sure there are no gaps to keep the center delightfully gooey.
Bake to Perfection
- Arrange the stuffed dough balls on the lined baking sheet, leaving a couple of inches between each to allow for spreading.
- Bake for 10–12 minutes or until the edges are lightly golden. The centers might look soft, but they’ll firm up as the cookies cool.
Cool and Enjoy
- Let the cookies rest on the baking sheet for a minute or two before transferring them to a wire rack.
- This brief waiting period ensures they set without overbaking and helps lock in that soft and chewy texture.
Notes
Nutrition Information (Per Serving)
- Calories: 250
- Total Fat: 12 g
- Saturated Fat: 7 g
- Carbohydrates: 32 g
- Sugars: 18 g
- Protein: 4 g
- Fiber: 1 g
- Cholesterol: 30 mg
- Sodium: 180 mg