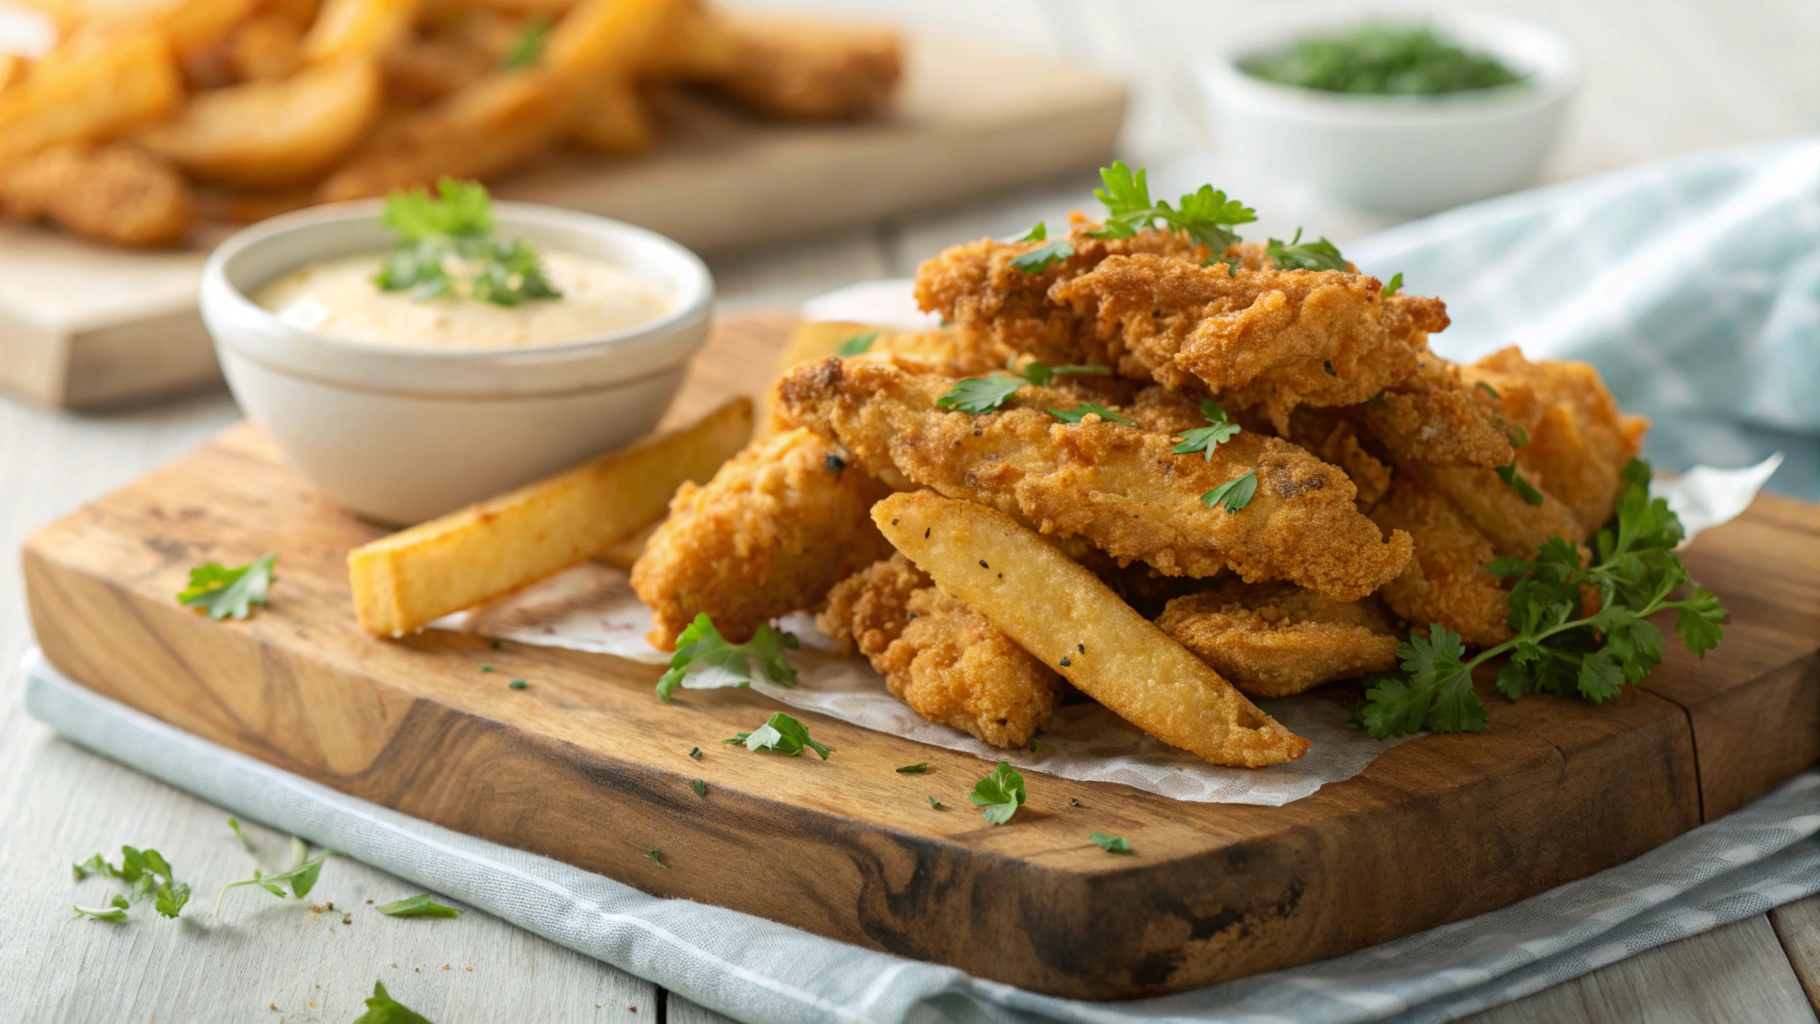
Imagine biting into a piece of crispy, golden-brown chicken that’s tender on the inside and bursting with flavor in every bite. That’s exactly what you’ll get with this New York Fried Chicken recipe. Whether you’re craving a comforting meal for your family or preparing a dish that’s sure to impress your friends, this recipe has got you covered. The secret? A perfectly seasoned, crispy coating that locks in all the juiciness you could want from fried chicken. And the best part? It’s surprisingly easy to make! Get ready to elevate your chicken game and create a meal that will leave everyone asking for more. Ready to dive in? Let’s get cooking!
1. Key Benefits of New York Fried Chicken

Why settle for average fried chicken when you can make a batch that’s truly mind-blowing? Here’s why you’ll fall in love with this New York Fried Chicken recipe:
- Crispy and Juicy: With its irresistible golden-brown coating, this fried chicken locks in all the juiciness you crave, offering the perfect crispy texture on the outside and tender, flavorful meat on the inside. Every bite is a satisfying mix of crunch and melt-in-your-mouth goodness.
- Quick and Easy: Don’t worry about spending hours in the kitchen. This recipe is designed to deliver maximum flavor in a short amount of time. The ingredients are simple, and the process is easy to follow, making it perfect for both beginners and seasoned cooks.
- Versatile Flavor: You can customize the seasoning to your taste—whether you love a hint of spice with cayenne or prefer a milder flavor with garlic and onion powder. This recipe adapts to whatever flavor profile you’re craving, from classic savory to zesty kick!
- Perfect for Any Occasion: Whether you’re cooking for a busy weeknight dinner, a weekend get-together, or a family feast, this fried chicken is the perfect choice. It’s simple, yet it packs a punch in both taste and texture, making it the go-to recipe for any occasion.
- Family-Friendly: With its crunchy coating and savory flavor, this fried chicken is sure to please both kids and adults alike. It’s an easy way to turn a regular meal into something special, and everyone will be coming back for seconds.
By the end of this recipe, you’ll have a platter of fried chicken that doesn’t just meet expectations, but exceeds them. Ready to experience the magic? Let’s get cooking!
2. Ingredients for New York Fried Chicken

Let’s dive into the ingredients that will make this New York Fried Chicken unforgettable. Here’s what you’ll need to create that perfect balance of crispy coating and tender, juicy meat:
- Chicken Pieces (about 4-6 pieces):
You can use drumsticks, thighs, or chicken breasts—whichever you prefer. Thighs give a juicy, flavorful bite, while breasts are lean and tender. Make sure your chicken is thawed and patted dry to ensure the coating sticks perfectly. - All-Purpose Flour (1 cup):
This is the base of your crispy coating. It provides the perfect crunch while giving the seasonings something to adhere to. For a bit more texture, you can substitute part of the flour with cornstarch. - Buttermilk (1 cup):
Buttermilk helps tenderize the chicken, making it juicy and moist. It also adds a subtle tang that enhances the flavor. If you don’t have buttermilk, you can make a quick substitute by mixing 1 cup of milk with 1 tablespoon of vinegar or lemon juice. - Eggs (2 large):
Eggs act as the binder, ensuring the flour coating sticks to the chicken. They also contribute to that golden, crispy finish. - Seasonings & Spices:
- Garlic Powder (1 tsp)
- Onion Powder (1 tsp)
- Paprika (1 tsp)
- Cayenne Pepper (1/2 tsp) – for a little kick, but you can adjust the amount based on your preference.
- Salt (1 tsp)
- Black Pepper (1/2 tsp)
These spices are the backbone of your chicken’s flavor profile. The paprika adds a touch of smokiness, while the garlic and onion powder bring savory depth. Cayenne adds a gentle heat that’ll make your chicken pop.
- Vegetable Oil (for frying):
You’ll need enough oil to fully submerge the chicken. Vegetable oil works well because it has a high smoking point, but feel free to use peanut or canola oil if you prefer. Make sure the oil reaches the right temperature (350°F/175°C) for crispy results.
Pro Tip:
For extra flavor, consider marinating the chicken in the buttermilk and spices for a few hours (or overnight). This will allow the flavors to really soak into the chicken, making each bite even more delicious.
Now that you have everything ready, it’s time to turn these ingredients into a crispy masterpiece! Let’s move on to how we’ll put everything together.
3. How to Make New York Fried Chicken
Now that you’ve gathered all the ingredients, let’s walk through the steps to make this mouthwatering New York Fried Chicken. Follow these instructions carefully for a crispy, juicy result that will wow everyone at the table!
Step 1: Prepare the Chicken
- Pat dry the chicken pieces with paper towels. This step is crucial to ensure the coating sticks and crisps up nicely.
- Season the chicken. Sprinkle a little salt and pepper over each piece to give the meat a bit of flavor before it’s coated. This will enhance the overall taste.
Step 2: Make the Breading Station
- In a shallow bowl, whisk together the flour, garlic powder, onion powder, paprika, cayenne pepper, salt, and black pepper. This seasoned flour mix will give the chicken its crispy, flavorful coating.
- In a separate shallow bowl, beat the eggs. Then add the buttermilk to the eggs and mix until smooth. This will help the flour adhere to the chicken, creating that perfect crunch.
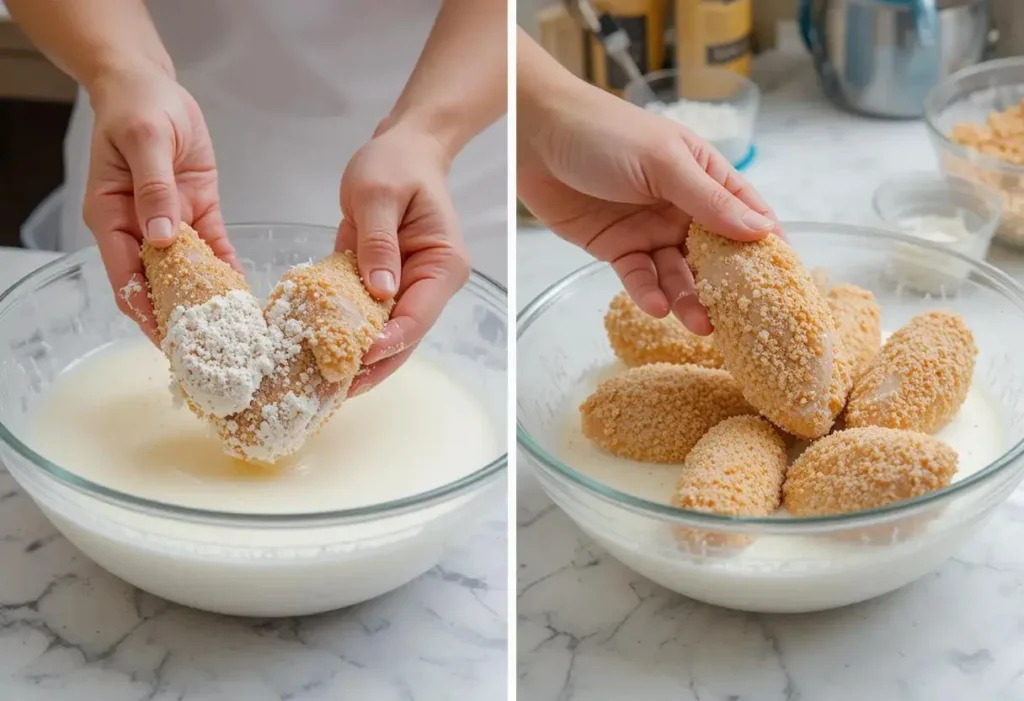
Step 3: Coat the Chicken
- Dip each chicken piece into the egg mixture, making sure it’s fully coated. Let the excess drip off.
- Next, transfer the chicken to the flour mixture and press gently to ensure an even coat of flour. Make sure to coat every surface for the ultimate crispy exterior.
- Double-coat for extra crunch: For a thicker, crispier crust, you can dip the chicken back into the egg mixture and then into the flour again.
Step 4: Heat the Oil
- In a large skillet or deep fryer, heat the oil over medium-high heat. You want the oil to reach about 350°F (175°C). To test if it’s ready, drop in a small amount of flour—if it sizzles, you’re good to go!
- Don’t overcrowd the pan. Fry the chicken in batches if necessary to ensure each piece gets enough room to fry evenly and crisp up perfectly.
Step 5: Fry the Chicken
- Carefully lower the chicken into the hot oil, one piece at a time. Fry the chicken for 10-12 minutes, turning occasionally, until the outside is golden brown and crispy. You’ll want the internal temperature of the chicken to reach 165°F (74°C) for safety.
- Use a slotted spoon or tongs to remove the chicken from the oil. Let it rest on a paper towel-lined plate to drain excess oil.
Step 6: Serve and Enjoy!
- Once all the pieces are fried, serve hot and enjoy that irresistible crunch with every bite. You’ll have perfectly golden, juicy chicken with a crispy, flavorful crust.
Pro Tip:
If you prefer a more uniform texture, use a deep fryer instead of a skillet. This allows for even frying and guarantees a crispy coating on all sides.
Now that you know how to make this amazing New York Fried Chicken, it’s time to gather your sides and dig in! The result? A crispy, tender masterpiece that’s just waiting to be devoured.
4. Pro Tips and Variations

Ready to take your New York Fried Chicken to the next level? Here are some pro tips and variations that will help you perfect your fried chicken technique and customize the recipe to suit your tastes.
Pro Tips for Perfect Fried Chicken:
- Pat Dry, Then Season: Always start by patting the chicken dry with paper towels. This removes excess moisture, helping the flour coating stick better and giving you that perfect crispy texture. Once dry, season the chicken with a pinch of salt and pepper before you start breading—it makes a big difference in flavor.
- Control the Oil Temperature: The key to crispy fried chicken is maintaining the right oil temperature. Too high, and the coating will burn before the chicken cooks through; too low, and the chicken will be greasy. Aim for 350°F (175°C). If you don’t have a thermometer, drop a small piece of bread in the oil—if it browns in about 60 seconds, the oil is at the right temperature.
- Don’t Overcrowd the Pan: Give each piece of chicken enough space in the pan so the hot oil can circulate around it evenly. Overcrowding the pan causes the oil temperature to drop, resulting in soggy, unevenly cooked chicken. If necessary, fry in batches.
- Double-Bread for Extra Crunch: If you love a super crispy crust, try double-breading your chicken. Simply dip each piece in the egg mixture, coat it in flour, then dip it back in the egg and flour again. This creates a thicker, crunchier coating that’s golden brown and irresistibly crispy.
Flavor Variations:
- Spicy Kick: If you like your fried chicken with a bit of heat, add more cayenne pepper or even some hot sauce to the buttermilk marinade. For an extra spicy punch, toss the chicken in a spicy seasoning blend once it’s out of the fryer.
- Herbed Chicken: Add some dried herbs to your flour mixture for a more fragrant, savory twist. Try thyme, rosemary, or oregano to complement the rich, crispy crust. These herbs will infuse the chicken with an aromatic flavor while frying.
- Panko Crust: For a lighter, crunchier texture, substitute half the flour with panko breadcrumbs. This will give your chicken a unique crunch and a slightly different texture—perfect if you’re after a delicate yet crispy crust.
- Buttermilk Brine: For even juicier chicken, try marinating your chicken in a buttermilk brine for a few hours or overnight. The buttermilk will not only tenderize the meat but also enhance its flavor, making each bite melt in your mouth.
Storage Tip:
If you’re lucky enough to have leftovers, fried chicken can be stored in the fridge for up to 3 days. For the best texture when reheating, place the chicken on a wire rack in the oven at 375°F (190°C) for about 10-15 minutes. This helps keep the coating crispy while reheating the chicken.
By following these tips and experimenting with some variations, you’ll be able to make New York Fried Chicken that suits your exact taste and texture preferences. Whether you like it spicy, herby, or extra crispy, this recipe can easily be tailored to fit your flavor cravings. Ready to impress your family and friends? You’ve got this!
5. Serving Suggestions for New York Fried Chicken
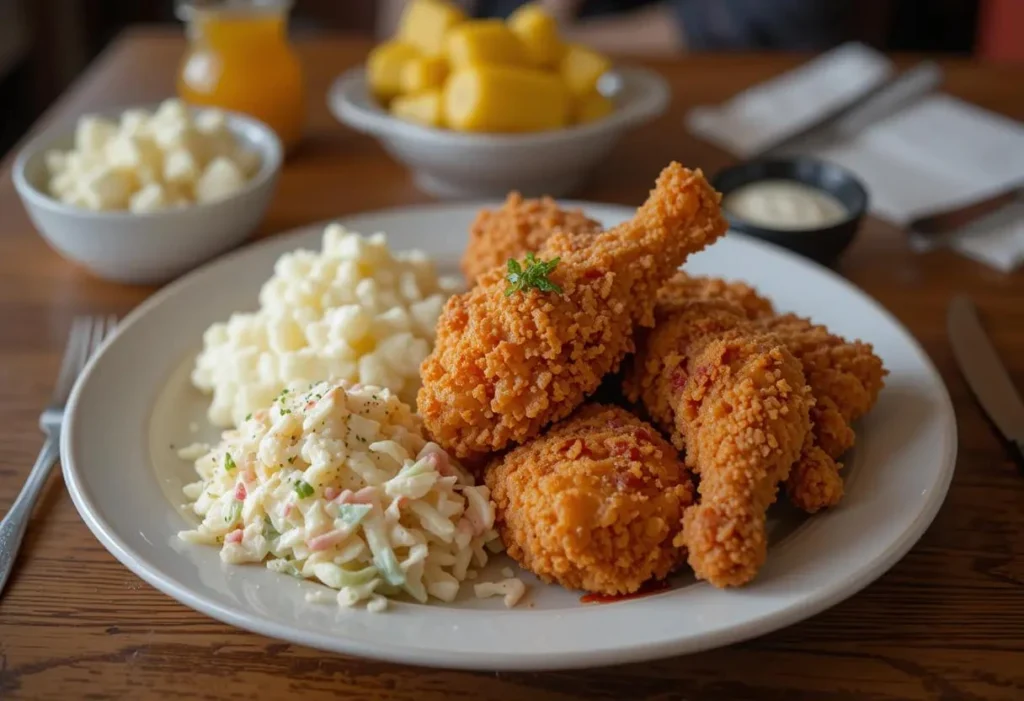
Once your New York Fried Chicken is crispy, golden, and perfectly cooked, it’s time to think about how to serve it up! Whether you’re making it for a casual dinner or a special occasion, the right sides and presentation can really elevate your meal. Here are some mouthwatering serving suggestions to pair with your fried chicken:
1. Classic Sides to Complement Fried Chicken
Fried chicken pairs beautifully with classic sides that add texture, freshness, and flavor. Here are a few options:
- Creamy Mashed Potatoes: Soft, buttery mashed potatoes are the perfect balance to crispy chicken. Add some garlic or sour cream to elevate the flavor, or serve with a rich gravy for extra indulgence.
- Coleslaw: A tangy, crunchy coleslaw offers a nice contrast to the rich, crispy chicken. The freshness of the cabbage and the slight vinegar kick will balance out the heaviness of the fried chicken beautifully.
- Corn on the Cob: Sweet, buttery corn on the cob is a classic Southern side that never goes out of style. Serve it with a sprinkle of salt and a bit of chili powder for a pop of flavor.
- Biscuits: Fluffy, warm biscuits are another must-have with fried chicken. Whether you make them from scratch or buy them from the store, their buttery goodness is irresistible when paired with your chicken.
2. Sauces for Dipping
Enhance the flavor of your fried chicken with a variety of dipping sauces:
- Honey Mustard: The perfect blend of sweetness and tang, honey mustard complements the savory flavors of the chicken while adding a zesty kick.
- Hot Sauce: If you love heat, a few dashes of your favorite hot sauce will take your fried chicken to the next level. A good, tangy hot sauce adds a layer of complexity and spice.
- Barbecue Sauce: A smoky, sweet barbecue sauce is another great option, giving the chicken a deep, caramelized flavor that pairs wonderfully with the crispy coating.
- Ranch Dressing: If you prefer something creamy, ranch dressing is a fan favorite. Its cool, herbaceous notes are the perfect contrast to the warm, crispy chicken.
3. Garnishing and Presentation
Presentation matters, especially when you want to impress your guests. Here are a few tips for serving your fried chicken with flair:
- Fresh Herbs: Garnish your fried chicken with freshly chopped parsley or thyme. Not only will this add a pop of color, but the fresh herbs will complement the rich flavors of the chicken.
- Lemon Wedges: A squeeze of fresh lemon over your chicken adds brightness and balances out the richness. It’s the perfect finishing touch!
- Crispy Fried Pickles: Serve your fried chicken with a side of crispy fried pickles for a tangy, crunchy contrast that will make the meal feel extra special.
4. Drinks to Pair with Fried Chicken
To round out your meal, choose drinks that complement the flavors of your fried chicken:
- Iced Tea: A cold glass of sweet or unsweetened iced tea is the perfect drink to cool down after a bite of crispy fried chicken. Add a slice of lemon for extra zest.
- Lemonade: For a refreshing and tangy pairing, serve some homemade lemonade. It’s the perfect balance to the rich, savory chicken.
- Craft Beer: If you’re into beer, a crisp lager or pale ale pairs nicely with fried chicken. The effervescence and subtle bitterness of the beer cut through the richness, making each bite feel lighter.
Pro Tip:
If you’re serving fried chicken for a crowd, consider setting up a fried chicken bar with various sides, sauces, and toppings. This lets everyone customize their plate to their liking, making it a fun and interactive experience.
With these serving suggestions, your New York Fried Chicken will be the star of any meal, leaving your guests full, happy, and asking for the recipe. Ready to dig in? It’s time to enjoy the fruits of your labor!
6. Conclusion

Congratulations! You’ve just made a batch of crispy, golden, and juicy New York Fried Chicken that’s sure to be a hit at the dinner table. With its perfectly seasoned coating, tender meat, and endless flavor possibilities, this recipe brings the best of fried chicken to your kitchen. Whether you’re cooking for a family dinner or impressing guests at a gathering, this dish is a guaranteed crowd-pleaser.
But it doesn’t just stop at the fried chicken itself—this recipe gives you room to get creative. From the seasoning in the breading to the dipping sauces and side pairings, you can make it your own. Want extra heat? Add more cayenne. Craving a crispy, panko-crusted finish? Go for it. This recipe is all about giving you the foundation to create a dish that suits your taste buds and keeps everyone coming back for more.
For more delicious chicken recipes, check out this recipe from : Chicken with Buttered Noodles
Why You’ll Love This Recipe:
- Crispy on the outside, juicy on the inside: This New York Fried Chicken is the perfect balance of textures—crispy, crunchy coating with tender, juicy chicken inside.
- Easy to customize: From spice levels to side pairings, this recipe can be tailored to your exact preferences.
- Crowd-pleasing: Whether you’re hosting a big family dinner or a casual gathering, everyone will love the crispy, savory goodness of fried chicken.
Don’t forget—every great meal is made even better when shared with friends and family. So, now that you’ve mastered New York Fried Chicken, it’s time to gather your loved ones and enjoy the delicious results together. Whether you serve it with a classic side or get creative with some new flavors, this fried chicken is sure to blow your mind—and everyone else’s too!
Happy cooking, and enjoy every crispy bite!
7. FAQs
We know you’re excited to try your hand at this irresistible New York Fried Chicken, and you might have a few questions along the way. Here are some frequently asked questions that can help guide you as you perfect this recipe. If you still have more questions, don’t hesitate to reach out!
1. Can I use chicken breasts instead of chicken thighs?
Absolutely! While bone-in, skin-on chicken thighs tend to provide the best results due to their juiciness, you can definitely use chicken breasts if you prefer. Just keep in mind that chicken breasts cook faster, so you’ll need to monitor the frying time to ensure they don’t dry out. For the best results, choose bone-in, skin-on breasts for extra flavor.
2. How do I keep the fried chicken crispy after cooking?
If you’re not serving your fried chicken immediately, the best way to keep it crispy is by placing the chicken on a wire rack over a baking sheet. This allows air to circulate around the chicken and prevents it from becoming soggy. If you need to reheat it, place it in an oven preheated to 375°F (190°C) for about 10-15 minutes to restore its crispiness.
3. Can I make the chicken ahead of time?
Yes! You can prepare and bread the chicken up to 24 hours in advance and store it in the refrigerator. This gives the breading more time to adhere to the chicken, resulting in an even crispier finish when you fry it. Just make sure to bring the chicken back to room temperature before frying to ensure even cooking.
4. What oil is best for frying chicken?
For the crispiest fried chicken, we recommend using oils with a high smoke point, such as vegetable oil, peanut oil, or canola oil. These oils can withstand the high heat needed for frying without breaking down, giving your chicken that perfect golden brown coating.
5. Can I make this recipe gluten-free?
Yes! To make this New York Fried Chicken gluten-free, substitute the all-purpose flour with a gluten-free flour blend. You can also use gluten-free breadcrumbs if you want to add a bit more crunch. Just be sure to check the labels on your ingredients to ensure they are truly gluten-free.
6. How do I know when the chicken is cooked through?
The easiest way to check if your chicken is fully cooked is by using a meat thermometer. The internal temperature should reach 165°F (74°C). If you don’t have a thermometer, check the juices by piercing the thickest part of the chicken—if the juices run clear, it’s ready!
7. Can I fry the chicken in a deep fryer?
Yes! You can absolutely use a deep fryer to cook your chicken. Just be sure to heat the oil to 350°F (175°C) before frying. If you’re using a deep fryer, you can also place the chicken in batches to avoid overcrowding, ensuring it cooks evenly and crisps up perfectly.
8. What should I serve with New York Fried Chicken?
We’ve got plenty of suggestions in the Serving Suggestions section of the recipe! Classic sides like mashed potatoes, coleslaw, and corn on the cob pair wonderfully with fried chicken. You can also serve it with a variety of sauces like honey mustard, barbecue sauce, or ranch dressing for an extra burst of flavor.
9. Can I freeze fried chicken for later?
Yes, you can freeze fried chicken! Once it’s fully cooked and cooled, wrap each piece tightly in plastic wrap or foil, then store them in a freezer-safe bag or container. When you’re ready to eat, simply reheat in the oven to bring back the crispiness. The chicken will keep for up to 3 months in the freezer.
____________________________

new york fried chicken
Ingredients
Chicken Pieces (about 4-6 pieces):
- You can use drumsticks thighs, or chicken breasts—whichever you prefer. Thighs give a juicy, flavorful bite, while breasts are lean and tender. Make sure your chicken is thawed and patted dry to ensure the coating sticks perfectly.
All-Purpose Flour (1 cup):
- This is the base of your crispy coating. It provides the perfect crunch while giving the seasonings something to adhere to. For a bit more texture you can substitute part of the flour with cornstarch.
Buttermilk (1 cup):
- Buttermilk helps tenderize the chicken making it juicy and moist. It also adds a subtle tang that enhances the flavor. If you don’t have buttermilk, you can make a quick substitute by mixing 1 cup of milk with 1 tablespoon of vinegar or lemon juice.
Eggs (2 large):
- Eggs act as the binder ensuring the flour coating sticks to the chicken. They also contribute to that golden, crispy finish.
Seasonings & Spices:
- o Garlic Powder 1 tsp
- o Onion Powder 1 tsp
- o Paprika 1 tsp
- o Cayenne Pepper 1/2 tsp – for a little kick, but you can adjust the amount based on your preference.
- o Salt 1 tsp
- o Black Pepper 1/2 tsp
- These spices are the backbone of your chicken’s flavor profile. The paprika adds a touch of smokiness while the garlic and onion powder bring savory depth. Cayenne adds a gentle heat that’ll make your chicken pop.
Vegetable Oil (for frying):
- You’ll need enough oil to fully submerge the chicken. Vegetable oil works well because it has a high smoking point but feel free to use peanut or canola oil if you prefer. Make sure the oil reaches the right temperature (350°F/175°C) for crispy results.
Instructions
Step 1: Prepare the Chicken
- Pat dry the chicken pieces with paper towels. This step is crucial to ensure the coating sticks and crisps up nicely.
- Season the chicken. Sprinkle a little salt and pepper over each piece to give the meat a bit of flavor before it’s coated. This will enhance the overall taste.
Step 2: Make the Breading Station
- In a shallow bowl, whisk together the flour, garlic powder, onion powder, paprika, cayenne pepper, salt, and black pepper. This seasoned flour mix will give the chicken its crispy, flavorful coating.
- In a separate shallow bowl, beat the eggs. Then add the buttermilk to the eggs and mix until smooth. This will help the flour adhere to the chicken, creating that perfect crunch.
Step 3: Coat the Chicken
- Dip each chicken piece into the egg mixture, making sure it’s fully coated. Let the excess drip off.
- Next, transfer the chicken to the flour mixture and press gently to ensure an even coat of flour. Make sure to coat every surface for the ultimate crispy exterior.
- Double-coat for extra crunch: For a thicker, crispier crust, you can dip the chicken back into the egg mixture and then into the flour again.
Step 4: Heat the Oil
- In a large skillet or deep fryer, heat the oil over medium-high heat. You want the oil to reach about 350°F (175°C). To test if it’s ready, drop in a small amount of flour—if it sizzles, you’re good to go!
- Don’t overcrowd the pan. Fry the chicken in batches if necessary to ensure each piece gets enough room to fry evenly and crisp up perfectly.
Step 5: Fry the Chicken
- Carefully lower the chicken into the hot oil, one piece at a time. Fry the chicken for 10-12 minutes, turning occasionally, until the outside is golden brown and crispy. You’ll want the internal temperature of the chicken to reach 165°F (74°C) for safety.
- Use a slotted spoon or tongs to remove the chicken from the oil. Let it rest on a paper towel-lined plate to drain excess oil.
Step 6: Serve and Enjoy!
- Once all the pieces are fried, serve hot and enjoy that irresistible crunch with every bite. You’ll have perfectly golden, juicy chicken with a crispy, flavorful crust.
Notes
- Calories: 375 kcal
- Total Fat: 22g
- Saturated Fat: 3g
- Cholesterol: 85mg
- Sodium: 800mg
- Total Carbohydrates: 18g
- Dietary Fiber: 1g
- Sugars: 1g
- Protein: 26g
- Iron: 2mg
- Calcium: 40mg


