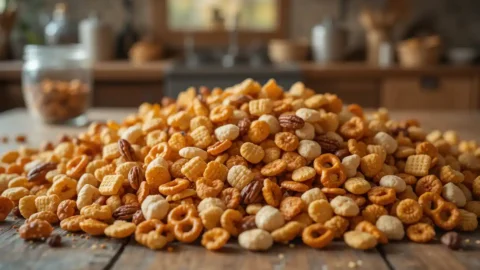
If you’re on the hunt for a snack that’s both easy to make and downright addictive, this Chex Mix recipe oven is about to become your new go-to! Whether you’re hosting a game day party, gathering with family, or simply craving a crunchy treat, this homemade Chex Mix is versatile enough to fit any occasion. With just a few simple ingredients like Chex cereal, pretzels, and a savory seasoning mix, you’ll have a batch ready in no time. Plus, it’s fully customizable—add in your favorite nuts or tweak the seasoning to match your taste. Ready to create a snack that will literally blow your mind? Let’s dive into this simple yet irresistible recipe!
1. Key Benefits of This Chex Mix Recipe

When you’re craving a crunchy, savory snack, this oven-baked Chex Mix delivers in all the right ways. Not only is it easy to make, but it’s also incredibly versatile and offers a range of benefits that will keep you coming back for more. Whether you’re preparing it for a party or simply for yourself, here’s why you’ll love this Chex Mix recipe:
A Customizable Snack
One of the best parts of this recipe is how easy it is to customize. You can make it your own by adjusting the ingredients based on your taste preferences or dietary needs. Whether you prefer cheese-flavored snacks, a bit of spice, or a sweet twist, the possibilities are endless.
- Add spicy seasonings like chili powder or cayenne for an extra kick.
- If you’re a sweet tooth, consider adding a touch of brown sugar or even chocolate chips.
- Keep it gluten-free by using certified gluten-free Chex cereal and other compatible ingredients.
A Crowd-Pleaser
Hosting a get-together? Your guests will be raving about your homemade Chex Mix. This recipe is perfect for parties, game nights, and movie marathons. It’s a simple snack that satisfies a wide variety of tastes and is easy to serve in large quantities. No one can resist those crunchy, seasoned morsels!
Packed with Flavor
The combination of Chex cereal, pretzels, nuts, and a special seasoning mix creates an irresistible flavor profile. Each bite is a perfect balance of savory, salty, and crunchy—a satisfying snack that will leave you craving more.
Healthier than Store-Bought Options
While store-bought Chex Mix can be loaded with artificial flavors and preservatives, this homemade version is as fresh as it gets. Plus, you have full control over the ingredients, which means you can reduce sodium, cut back on unhealthy fats, and even incorporate healthier options like unsalted nuts or whole-grain pretzels. It’s a better alternative without compromising on taste.
Make It Ahead of Time
Preparing snacks for a big event or just for everyday enjoyment can be a hassle. With this recipe, you can easily make it ahead of time and store it for later. Whether you’re hosting or preparing for a busy week, this recipe lets you enjoy a delicious treat without the last-minute stress.
- Store it: Once your Chex Mix has cooled completely, store it in an airtight container to keep it fresh for up to two weeks.
- Pre-pack it: You can also pre-portion it into snack-sized bags for easy grab-and-go servings.
Great for Sharing
This chex mix recipe is also perfect for gifting. Whether you’re preparing a small batch for a family member or a large quantity for a party favor, it’s an ideal snack to share with others. People will appreciate the thoughtful gesture, and you’ll love the positive feedback!
____________________
By now, you can see just how many ways this oven-baked Chex Mix benefits your kitchen and your taste buds. From its versatility to its ability to serve a crowd, this snack is the perfect go-to for all your munching needs. Let’s move on to the ingredients you’ll need to bring this snack sensation to life!
2. Ingredients for the Best Chex Mix Recipe Oven
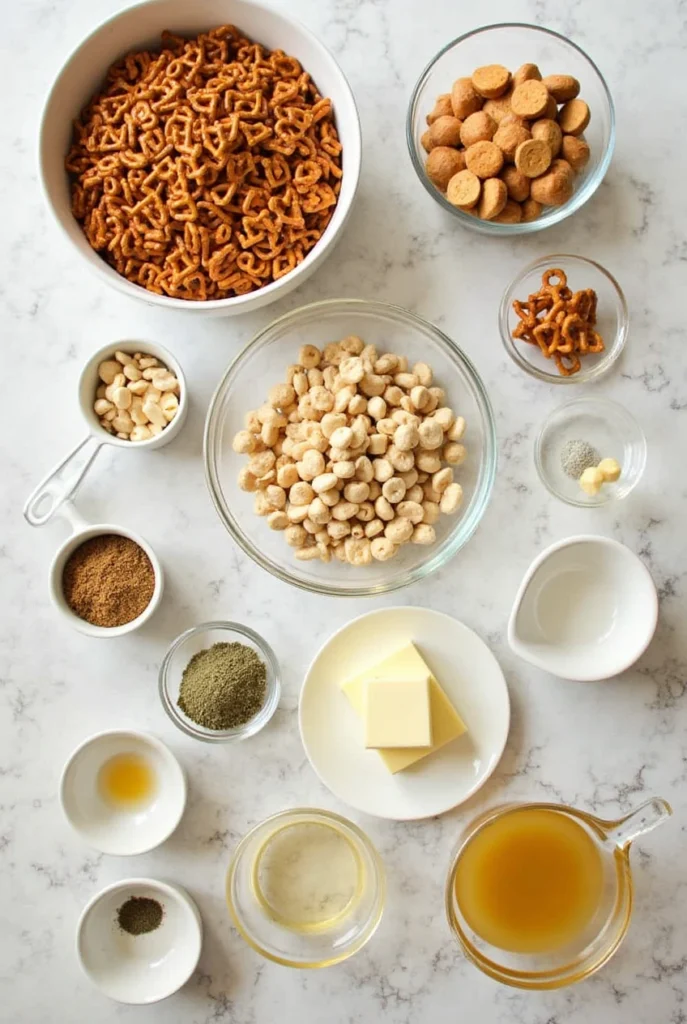
Before you dive into making this oven-baked Chex Mix, it’s important to gather all the ingredients that will make it so delicious. This recipe uses simple, pantry-friendly items, but it’s the combination of these ingredients that creates the perfect snack. Here’s a list of everything you’ll need to get started:
Dry Ingredients
- Chex Cereal (Rice, Corn, or Wheat)
The base of your Chex Mix, providing the signature crunch and texture. Use a combination of Rice Chex, Corn Chex, and Wheat Chex for variety, or pick your favorite! Rice Chex is a bit lighter, while Corn Chex offers a sweet note, and Wheat Chex gives a nutty flavor. - Pretzels
Choose small pretzel twists or pretzel sticks—they’re perfect for adding a salty crunch to your mix. Opt for mini pretzels if you want bite-sized pieces for easy snacking. - Nuts
Cashews, peanuts, and almonds are popular options. These nuts not only add texture but also a rich, nutty flavor that pairs beautifully with the seasonings. If you have a nut allergy or prefer a different crunch, try sunflower seeds or pumpkin seeds as alternatives. - Cheese Crackers
Adding cheese crackers (like Goldfish or Cheez-It) enhances the cheesy flavor of your Chex Mix. They bring an extra layer of deliciousness and make the snack even more indulgent.
Wet Ingredients
- Butter
Melted unsalted butter is the binding agent that ensures all the dry ingredients are coated in the perfect amount of richness. You can swap for olive oil or coconut oil if you prefer a lighter or dairy-free option. - Worcestershire Sauce
This ingredient brings a distinct savory flavor to the mix. It’s a key component in creating that classic Chex Mix taste. The tangy, slightly spicy flavor works wonders to enhance the other seasonings. - Seasonings
Here’s where the magic happens. The right seasonings can elevate your Chex Mix from simple to scrumptious. Use:- Garlic powder for a rich, aromatic depth.
- Onion powder to add a mild, savory note.
- Seasoned salt for an extra salty kick (adjust to taste).
- Paprika for a mild smoky flavor.
- Black pepper for a little heat.
- Sugar (Optional)
If you want to add a hint of sweetness, consider adding a small amount of brown sugar or granulated sugar. A touch of sweetness will balance out the savory flavors for a more complex taste.
Optional Add-ins for Extra Flavor
- M&Ms or Chocolate Chips
For those with a sweet tooth, adding chocolate pieces or M&Ms will turn your Chex Mix into a delicious sweet and salty treat. - Dried Fruit
Craisins, raisins, or dried cranberries can add a bit of tartness that contrasts nicely with the salty ingredients. They’ll also introduce a chewy texture that balances the crunch. - Bagel Chips
Crushed bagel chips are a great way to add a crunchy bite with an additional flavor dimension. You can use mini bagel chips or break up larger ones into bite-sized pieces.
____________________
Tips for Ingredient Selection
- Customize to Your Taste: Feel free to swap out ingredients based on what you like. If you prefer a more cheesy flavor, add extra cheese crackers or even some grated Parmesan cheese. If you love spicy snacks, ramp up the hot sauce or cayenne pepper.
- Go for Fresh: Fresh ingredients, especially the butter and seasonings, make a world of difference in the flavor. If you can, use freshly ground pepper or smoked paprika for an added depth of taste.
- Portion Control: If you’re watching your sodium intake, opt for unsalted nuts and pretzels, and control the amount of seasoned salt and Worcestershire sauce you use. You’ll still get great flavor without the extra salt.
____________________
Now that you’ve gathered your ingredients, it’s time to get started on mixing and baking this delicious snack! Next, we’ll walk through the easy-to-follow steps to make this Chex Mix come to life.
3. Instructions for Making Oven-Baked Chex Mix
Now that you have your ingredients ready, it’s time to assemble and bake your delicious homemade Chex Mix! This recipe is simple, quick, and requires just a few easy steps to transform those pantry ingredients into a crunchy, flavorful snack. Let’s dive into the process!

Step 1: Preheat the Oven
Before you start mixing, it’s important to preheat your oven to 250°F (120°C). A low temperature ensures that your Chex Mix bakes evenly, getting crispy without burning. It also gives the seasoning time to infuse all the ingredients with flavor.
Step 2: Prepare the Baking Sheet
Line a large baking sheet with parchment paper or a silicone baking mat. This makes cleanup a breeze and prevents your Chex Mix from sticking. If you don’t have either of these, just lightly grease the sheet with some butter or oil.
Step 3: Mix the Dry Ingredients
In a large mixing bowl, combine your dry ingredients. Start by adding the Chex cereal (Rice, Corn, and/or Wheat), pretzels, nuts, and cheese crackers. Gently stir them together, ensuring they’re evenly distributed. You can use a spatula or even your hands to mix, but be gentle to avoid crushing the delicate Chex pieces.
- Pro Tip: If you’re adding any optional ingredients like M&Ms or chocolate chips, now’s the time to toss them in (but only if you want them to stay intact through baking; otherwise, wait until after baking).
Step 4: Prepare the Seasoning Mixture
In a separate bowl, melt butter in the microwave or on the stove (about 1 minute). Once melted, add the Worcestershire sauce, garlic powder, onion powder, paprika, seasoned salt, black pepper, and any other spices or seasonings you prefer.
- Pro Tip: Adjust the amount of seasoning to your personal taste. If you like it extra spicy, add more cayenne pepper or chili powder. If you prefer a savory flavor, increase the garlic powder and onion powder.
Step 5: Coat the Chex Mix
Slowly pour the seasoning mixture over the dry ingredients, tossing gently as you go to ensure that everything is evenly coated. It’s important to cover each piece with the buttery, flavorful seasoning for maximum taste in every bite. Be thorough, but again, be careful not to break the cereal or crackers.
- Pro Tip: Use two large spoons or spatulas to gently toss the mixture. This will ensure the seasonings are well distributed without crushing the cereal or crackers.
Step 6: Bake the Chex Mix
Now, transfer your seasoned mixture onto the prepared baking sheet. Spread it out evenly, making sure the pieces are in a single layer for even baking. Place the sheet in the preheated oven and bake for 1 hour, stirring every 15 minutes to ensure that the Chex Mix cooks evenly. This constant stirring helps prevent burning while making sure everything gets perfectly crispy.
- Pro Tip: Don’t skip the stirring! Stirring every 15 minutes helps the mix bake evenly, preventing certain areas from getting overcooked or too dry while others stay soggy.
Step 7: Cool and Store
Once your Chex Mix is golden brown and crisp, remove it from the oven and let it cool completely on the baking sheet. It will crisp up even more as it cools. Once cooled, store it in an airtight container to keep it fresh. You can also portion it into smaller bags for easy snacking on the go.
- Pro Tip: If you’re planning on storing it for a long period, you can freeze your Chex Mix for up to 3 months. Just let it cool completely before sealing it in a freezer-safe bag or container.
___________________
And there you have it! A delicious, homemade oven-baked Chex Mix that’s perfect for any occasion. It’s simple to make, endlessly customizable, and absolutely addictive. Your next step is to dig in and enjoy this savory snack!
Bonus Tips:
- Make Ahead: You can easily make Chex Mix in advance, store it in a jar or container, and have a tasty snack ready whenever you need it.
- Sharing: Pack some in small snack bags to share with friends, family, or coworkers. They’ll love it!
- Store for Later: Keep leftovers in a sealed container for up to two weeks, though we bet it won’t last that long!
Now that you know how to make the perfect Chex Mix, you’re ready to get creative with your next batch! Whether you stick to the classic recipe or add your own unique twists, this snack is bound to be a crowd favorite.
4. Pro Tips and Variations for the Best Chex Mix Ever

Ready to take your oven-baked Chex Mix to the next level? Whether you’re looking to customize the recipe for a specific taste, make it even more indulgent, or simply improve your technique, I’ve got you covered with some helpful pro tips and delicious variations. These little tweaks will ensure that every batch is as tasty as possible!
Pro Tips for the Perfect Chex Mix
- Mix the Seasoning Well: One of the secrets to a flavorful Chex Mix is ensuring the seasoning coats every piece evenly. After adding the melted butter and spices, be sure to toss the ingredients gently so that each bite is packed with flavor. I recommend using two large spoons or a spatula to distribute the seasoning.
- Don’t Skip the Stirring: Stir your Chex Mix every 15 minutes while it bakes. This may feel like a small detail, but it ensures that all parts of your mix get that perfect golden-brown crispness. Skipping this step can lead to unevenly baked ingredients, with some pieces being overdone and others not fully crisped.
- Bake Low and Slow: The key to crispy Chex Mix is baking at a low temperature (250°F or 120°C). While you may be tempted to speed up the process by cranking the heat, a slow bake ensures the seasonings adhere perfectly and the mix doesn’t burn. Trust me—your patience will be rewarded!
- Cool Completely Before Storing: Let your Chex Mix cool completely before you store it. This helps it become extra crispy and prevents condensation from making it soggy in the storage container. Spread it out on the baking sheet or on some parchment paper while it cools.
- Experiment with Oils: While butter is the classic option, you can experiment with olive oil or even coconut oil for a different flavor profile. Olive oil adds a nice richness and works well if you want to create a more Mediterranean-inspired version of Chex Mix.
- Season to Taste: Don’t be afraid to adjust the seasoning to suit your preferences. Add a pinch of cayenne pepper for a spicy kick, or swap out the paprika for smoked paprika if you want a smoky flavor. Taste the seasoning mixture before you coat the Chex Mix to ensure it’s exactly how you like it.
Creative Variations to Try
Chex Mix is incredibly versatile, and you can easily switch up the ingredients and flavors based on what you have at hand or what mood you’re in. Here are some fun variations to get your creative juices flowing!
- Sweet and Savory Chex Mix
Want to satisfy both your sweet and savory cravings? Add chocolate chips, mini marshmallows, or M&Ms to your Chex Mix after baking. The sweetness balances perfectly with the salty, savory base. For an even more indulgent treat, drizzle some melted white chocolate or dark chocolate over the cooled mix. - Cheesy Chex Mix
If you’re a cheese lover, kick up the flavor by adding Parmesan cheese or cheddar powder to the seasoning mix. You can even toss in cheese crackers (like Goldfish or Cheez-Its) for that extra cheesy crunch. For even more cheesiness, sprinkle some grated Parmesan over the mix after it’s done baking. - Spicy Chex Mix
For those who like it hot, try adding jalapeño powder, hot sauce, or chili flakes to the seasoning mix. You can also throw in some spicy pretzels or flavored peanuts for an added kick. If you want to make it extra spicy, toss in some sriracha or a few dashes of Tabasco sauce along with your melted butter. - Maple Bacon Chex Mix
Take your Chex Mix to the next level with the smoky richness of bacon. Fry up some crispy bacon, crumble it, and stir it into the mix just before baking. Add a little bit of maple syrup and a pinch of cayenne pepper for a sweet, spicy, and savory treat. The bacon and maple syrup combination creates an irresistible snack. - Herb-Infused Chex Mix
For a fresher twist, use a variety of fresh herbs like rosemary, thyme, or basil. Just chop them finely and mix them with the seasoning. The herbs infuse the Chex Mix with an aromatic flavor that makes it feel like a sophisticated snack. You can also add dried oregano or herbes de Provence for a more Mediterranean flavor.
Make It Gluten-Free
If you’re catering to gluten-free eaters, it’s easy to make your Chex Mix gluten-free by choosing gluten-free Chex cereal (they offer multiple varieties), as well as ensuring the pretzels and crackers you select are gluten-free. This way, everyone can enjoy your homemade mix without worry!
Storage Tips
- Longer Shelf Life: To keep your Chex Mix fresh for a longer time, store it in an airtight container at room temperature. It will stay fresh for up to two weeks, and you’ll still get that perfect crunch each time you grab a handful.
- Freezing for Later: If you’ve made a large batch and want to store it for even longer, feel free to freeze it! Just allow it to cool completely, and then transfer it to a freezer-safe container or zip-top bag. When you’re ready to enjoy it again, just pop it into the oven at 250°F for about 10 minutes to re-crisp it.
Bonus Tip: Make It a Gift!
Chex Mix makes a fantastic homemade gift for friends and family. Pack it in a decorative jar or cute gift bags, and you’ve got an easy, delicious present for any occasion. It’s an ideal treat for holidays, birthdays, or even as a little thank-you for someone special!
____________________
With these tips and variations, you’re all set to create the best oven-baked Chex Mix ever. Don’t hesitate to experiment and adjust the recipe to your liking. Whether you prefer it sweet, savory, spicy, or cheesy, there’s a perfect Chex Mix recipe for every taste. Enjoy the process, and most importantly, enjoy the snack!
5. Serving Suggestions

When it comes to serving your homemade Chex Mix, the possibilities are endless! Whether you’re preparing it for a cozy movie night, a party, or just an afternoon snack, here are some fun and creative ways to serve your Chex Mix that will elevate your experience:
- Classic Snack Bowl: The most traditional (and convenient) way to enjoy Chex Mix is simply serving it in a bowl. Use a large, shallow bowl to let everyone dig in easily. This is perfect for casual gatherings or when you just want to snack while watching your favorite show.
- Individual Servings: For a more elegant touch, consider serving Chex Mix in small, individual bowls or cups. This adds a personal feel, making it ideal for parties or picnics where guests can easily grab their own portion without the need for sharing.
- Mix it into Trail Mix: Looking for a quick breakfast or pre-workout snack? Combine your Chex Mix with other nuts, dried fruits, or even dark chocolate pieces. This transformation adds both texture and nutrition, and it’s a great on-the-go option.
- Pair with Dips: Why not take your Chex Mix experience to the next level by pairing it with a dip? Try a creamy ranch dip, spicy salsa, or even a tangy hummus. The crunchiness of the Chex Mix paired with a smooth dip is the perfect match.
- Perfect for Packing: Make your own snack packs! Portion your Chex Mix into small bags or containers for an easy snack on the go. They’re great for school lunches, road trips, or a mid-afternoon energy boost.
- Chex Mix as a Salad Topper: Here’s a fun twist: sprinkle some Chex Mix on top of your favorite salad for an unexpected crunch. Whether it’s a leafy green salad, pasta salad, or even a potato salad, the savory flavors of the mix complement fresh veggies perfectly.
- Gift It: Want to give a thoughtful gift? Package your Chex Mix in a cute mason jar or decorative tin. Add a ribbon, and you’ve got a homemade gift that’s perfect for holidays, birthdays, or as a “just because” treat.
____________________
Pro Tip: Make it Ahead of Time
Chex Mix stores well, so make a big batch in advance! This not only saves you time, but the flavors can actually improve as they sit, letting all the savory goodness soak into the mix. Keep it sealed in an airtight container for up to two weeks – if it lasts that long!
By presenting your Chex Mix in these fun and thoughtful ways, you’ll turn an ordinary snack into something special that everyone will love. Whether you’re serving it for a crowd or just yourself, these ideas will take your Chex Mix experience to the next level!
Conclusion
Congratulations! You’ve just mastered the art of making a homemade Chex Mix that’s perfectly baked in the oven and full of flavor. Whether you’re snacking solo or sharing with friends and family, this recipe is sure to be a hit. The best part? You can easily customize it with your favorite ingredients to make it uniquely yours!
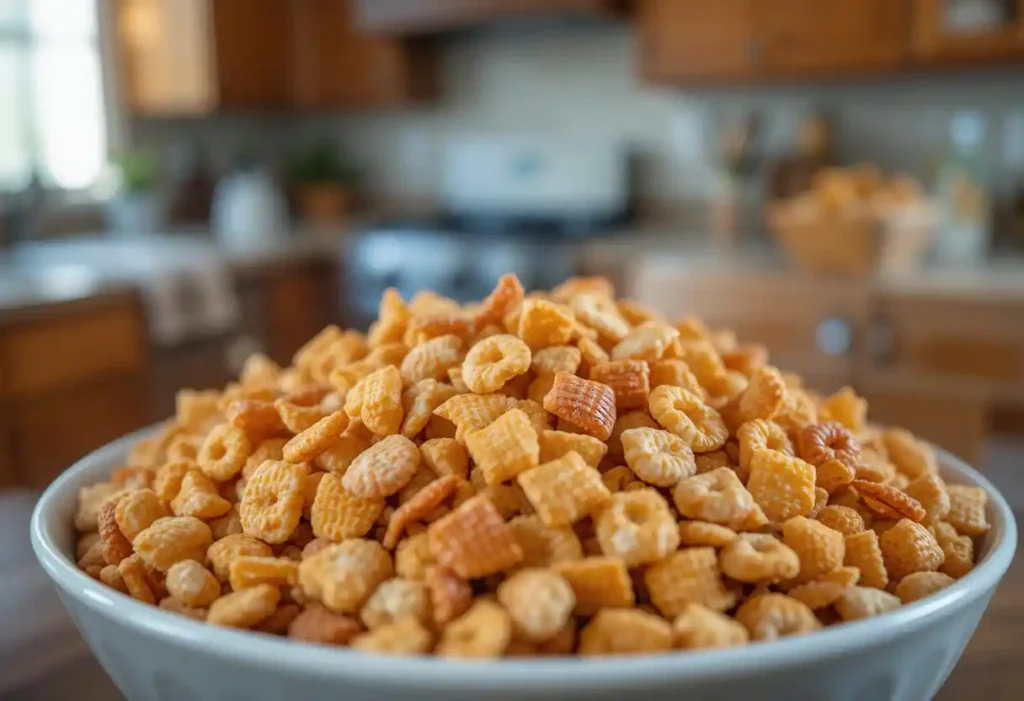
By following these simple steps, you’ve created a snack that’s crispy, crunchy, and utterly irresistible. Chex Mix is the ideal snack for any occasion, from casual get-togethers to formal parties. And once you try making it at home, you’ll never want to go back to store-bought again!
Remember, the beauty of Chex Mix lies in its versatility. Feel free to experiment with different seasonings, nuts, or even add a little sweetness if you’re in the mood. Whether it’s spicy, savory, or a bit of both, your homemade Chex Mix will always be tailored to your taste.
We hope this recipe becomes your go-to snack for every occasion. Don’t forget to share your creations on social media and tag us – we’d love to see how you personalize your Chex Mix!
Discover the ultimate crunchy and flavorful snack with our irresistible Kettle Chips recipe click here to get the full recipe and make your own today!
FAQs
1. Can I make Chex Mix ahead of time?
Yes! One of the best things about Chex Mix is that it’s a perfect make-ahead snack. You can prepare it in advance and store it in an airtight container at room temperature for up to two weeks. The flavors actually get better as they sit, so you can enjoy your Chex Mix over several days or even weeks!
2. Can I use gluten-free Chex cereal?
Absolutely! If you’re following a gluten-free diet or need to accommodate dietary restrictions, you can use gluten-free Chex cereal. The recipe will work just as well with the gluten-free version, so you don’t have to compromise on taste or texture.
3. Can I add more spices to customize the flavor?
Definitely! One of the best aspects of Chex Mix is its flexibility. Feel free to get creative with the seasoning. Add a pinch of cayenne pepper for heat, or sprinkle in some garlic powder, smoked paprika, or even a dash of parmesan cheese for a savory twist. Taste along the way and adjust to your personal preferences!
4. How can I make my Chex Mix spicier?
If you love a spicy kick, there are several ways to amp up the heat in your Chex Mix. Try adding some hot sauce or a sprinkle of chili powder to the mix. For an even bolder flavor, toss in some crushed red pepper flakes or even a few diced jalapeños before baking. Adjust the spice level based on your personal preference.
5. Can I add dried fruits to the mix?
Yes, dried fruits can be a delicious addition to your Chex Mix, especially if you like a sweet-salty flavor combination. Try adding raisins, dried cranberries, or dried apricots for a chewy, sweet contrast to the crunchy mix. Just be sure to add them after the Chex Mix has finished baking, as dried fruits can get too hard when cooked in the oven.
6. How do I store leftovers?
To keep your Chex Mix fresh, store it in an airtight container at room temperature. It should stay crispy and flavorful for up to two weeks. If you’d like to keep it for longer, you can freeze it for up to 2-3 months. Just make sure it’s fully cooled before sealing it in a container to avoid moisture buildup.
7. Can I bake Chex Mix on a sheet pan instead of a baking dish?
Yes, you can! A large sheet pan will work just as well. Just be sure to spread the mixture evenly across the pan for uniform baking. If using a sheet pan, you may want to stir the mix a bit more often during baking to ensure even coating and prevent burning.
________________________

chex mix recipe oven
Ingredients
Dry Ingredients
- Chex Cereal Rice, Corn, or Wheat
- The base of your Chex Mix providing the signature crunch and texture. Use a combination of Rice Chex, Corn Chex, and Wheat Chex for variety, or pick your favorite! Rice Chex is a bit lighter, while Corn Chex offers a sweet note, and Wheat Chex gives a nutty flavor.
- Pretzels
- Choose small pretzel twists or pretzel sticks—they’re perfect for adding a salty crunch to your mix. Opt for mini pretzels if you want bite-sized pieces for easy snacking.
- Nuts
- Cashews peanuts, and almonds are popular options. These nuts not only add texture but also a rich, nutty flavor that pairs beautifully with the seasonings. If you have a nut allergy or prefer a different crunch, try sunflower seeds or pumpkin seeds as alternatives.
- Cheese Crackers
- Adding cheese crackers like Goldfish or Cheez-It enhances the cheesy flavor of your Chex Mix. They bring an extra layer of deliciousness and make the snack even more indulgent.
Wet Ingredients
- Butter
- Melted unsalted butter is the binding agent that ensures all the dry ingredients are coated in the perfect amount of richness. You can swap for olive oil or coconut oil if you prefer a lighter or dairy-free option.
- Worcestershire Sauce
- This ingredient brings a distinct savory flavor to the mix. It’s a key component in creating that classic Chex Mix taste. The tangy slightly spicy flavor works wonders to enhance the other seasonings.
- Seasonings
- Here’s where the magic happens. The right seasonings can elevate your Chex Mix from simple to scrumptious. Use:
- Garlic powder for a rich aromatic depth.
- Onion powder to add a mild savory note.
- Seasoned salt for an extra salty kick adjust to taste.
- Paprika for a mild smoky flavor.
- Black pepper for a little heat.
- If you like things spicy don’t be shy with the cayenne pepper or chili powder. For a more savory profile, consider adding dried herbs like rosemary or thyme.
- Sugar Optional
- If you want to add a hint of sweetness consider adding a small amount of brown sugar or granulated sugar. A touch of sweetness will balance out the savory flavors for a more complex taste.
Optional Add-ins for Extra Flavor
- M&Ms or Chocolate Chips
- For those with a sweet tooth adding chocolate pieces or M&Ms will turn your Chex Mix into a delicious sweet and salty treat.
- Dried Fruit
- Craisins raisins, or dried cranberries can add a bit of tartness that contrasts nicely with the salty ingredients. They’ll also introduce a chewy texture that balances the crunch.
- Bagel Chips
- Crushed bagel chips are a great way to add a crunchy bite with an additional flavor dimension. You can use mini bagel chips or break up larger ones into bite-sized pieces.
Instructions
Step 1: Preheat the Oven
- Before you start mixing, it’s important to preheat your oven to 250°F (120°C). A low temperature ensures that your Chex Mix bakes evenly, getting crispy without burning. It also gives the seasoning time to infuse all the ingredients with flavor.
Step 2: Prepare the Baking Sheet
- Line a large baking sheet with parchment paper or a silicone baking mat. This makes cleanup a breeze and prevents your Chex Mix from sticking. If you don’t have either of these, just lightly grease the sheet with some butter or oil.
Step 3: Mix the Dry Ingredients
- In a large mixing bowl, combine your dry ingredients. Start by adding the Chex cereal (Rice, Corn, and/or Wheat), pretzels, nuts, and cheese crackers. Gently stir them together, ensuring they’re evenly distributed. You can use a spatula or even your hands to mix, but be gentle to avoid crushing the delicate Chex pieces.
- Pro Tip: If you’re adding any optional ingredients like M&Ms or chocolate chips, now’s the time to toss them in (but only if you want them to stay intact through baking; otherwise, wait until after baking).
Step 4: Prepare the Seasoning Mixture
- In a separate bowl, melt butter in the microwave or on the stove (about 1 minute). Once melted, add the Worcestershire sauce, garlic powder, onion powder, paprika, seasoned salt, black pepper, and any other spices or seasonings you prefer.
- Pro Tip: Adjust the amount of seasoning to your personal taste. If you like it extra spicy, add more cayenne pepper or chili powder. If you prefer a savory flavor, increase the garlic powder and onion powder.
Step 5: Coat the Chex Mix
- Slowly pour the seasoning mixture over the dry ingredients, tossing gently as you go to ensure that everything is evenly coated. It’s important to cover each piece with the buttery, flavorful seasoning for maximum taste in every bite. Be thorough, but again, be careful not to break the cereal or crackers.
- Pro Tip: Use two large spoons or spatulas to gently toss the mixture. This will ensure the seasonings are well distributed without crushing the cereal or crackers.
Step 6: Bake the Chex Mix
- Now, transfer your seasoned mixture onto the prepared baking sheet. Spread it out evenly, making sure the pieces are in a single layer for even baking. Place the sheet in the preheated oven and bake for 1 hour, stirring every 15 minutes to ensure that the Chex Mix cooks evenly. This constant stirring helps prevent burning while making sure everything gets perfectly crispy.
- Pro Tip: Don’t skip the stirring! Stirring every 15 minutes helps the mix bake evenly, preventing certain areas from getting overcooked or too dry while others stay soggy.
Step 7: Cool and Store
- Once your Chex Mix is golden brown and crisp, remove it from the oven and let it cool completely on the baking sheet. It will crisp up even more as it cools. Once cooled, store it in an airtight container to keep it fresh. You can also portion it into smaller bags for easy snacking on the go.
- Pro Tip: If you’re planning on storing it for a long period, you can freeze your Chex Mix for up to 3 months. Just let it cool completely before sealing it in a freezer-safe bag or container.
Notes
Nutrition Information (Per Serving)
- Calories: 200
- Fat: 12g
- Saturated Fat: 2g
- Trans Fat: 0g
- Carbs: 22g
- Fiber: 1g
- Sugars: 5g
- Protein: 3g
- Cholesterol: 10mg
- Sodium: 250mg
- Potassium: 80mg
- Iron: 2% DV
- Calcium: 2% DV

