Planning dessert for game-day? This post turns an ordinary sponge into a dazzling baseball decorated cake that even first-time bakers can master. From mixing a smooth vanilla batter to piping picture-perfect stitches on your baseball cake, you’ll learn insider techniques that save time, trim costs, and guarantee cheers—making every minute you spend reading totally worth it.
Table of Contents
A baseball cake is a perfect way to celebrate any occasion, especially for avid sports fans. With creativity, your baseball cake can stand out during any event.
Why Is a Baseball Cake the Ultimate Birthday Crowd-Pleaser?
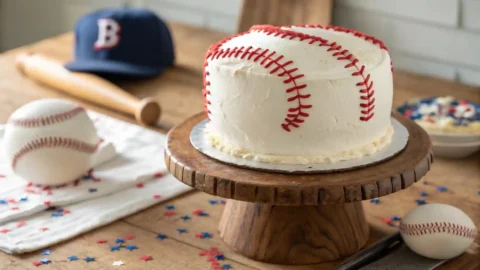
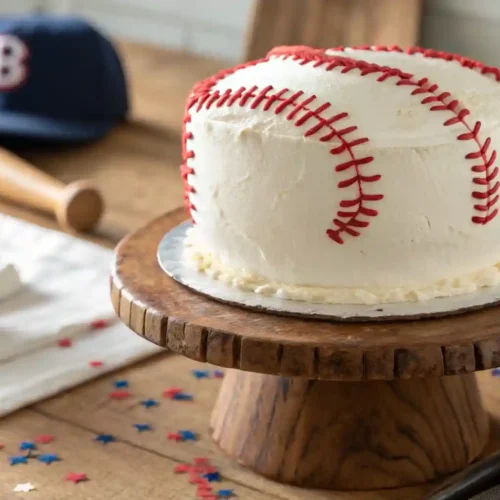
A round cake covered in bright white icing and stitched in bold red instantly evokes the diamond, making it the perfect centrepiece for a birthday celebration. Kids and adults alike recognise the familiar seams and can’t wait to cut the first slice. When you set the confection on the table, you don’t just present dessert—you celebrate the season, the team, and the guest of honour in one delicious show of spirit.
Because the design is essentially a cake with white sides and a few strategic red lines, it stays simple enough for a first-time decorator while still looking professional enough to rival any neighbourhood bakery. Even better, you can match the flavor to your crowd—classic vanilla cake for purists, chocolate for die-hard chocoholics, or a dramatic red velvet cake for fans who bleed team colours. Whatever you choose, the end result is a birthday cake that scores major fan points without taking extra innings in the kitchen.
Choosing the right flavor for your baseball cake can enhance the overall experience, making it memorable for everyone who enjoys it.
Parents report that the round shape also doubles as a learning tool; you can discuss innings, bases, and even fractions as you carve the portions, turning dessert time into an impromptu math lesson that keeps youngsters engaged.
A baseball cake brings everyone together, creating a sense of community and celebration among fans.
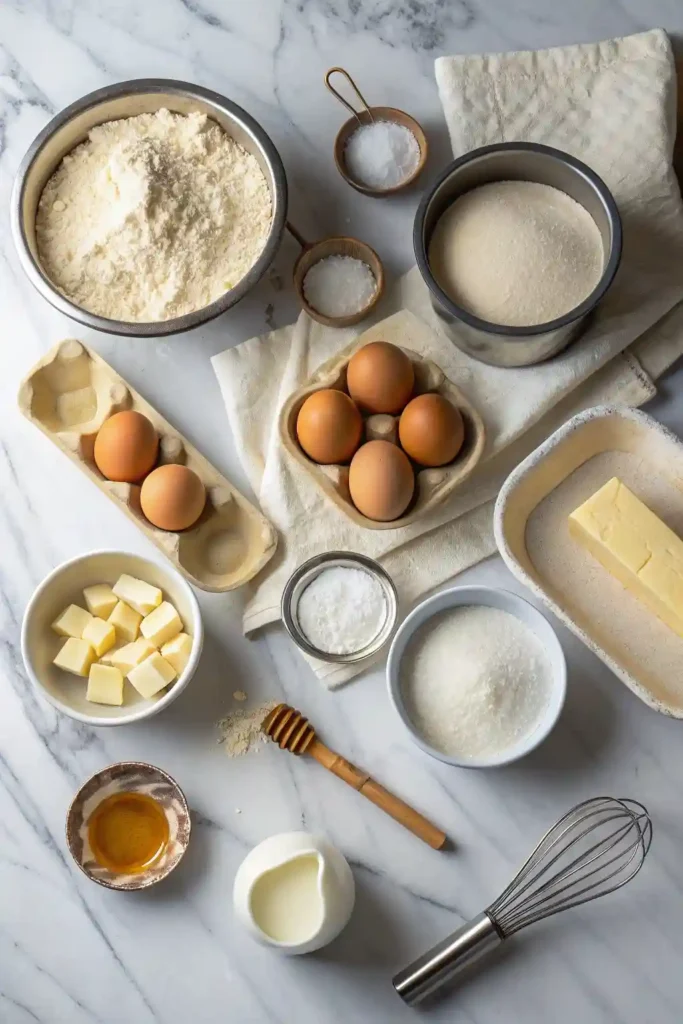
Ingredients For Baseball Cake
- Dry mix
- 2 ½ cups (300 g) all-purpose flour, sifted
- 2 ½ tsp baking powder
- ½ tsp fine salt
- Wet mix
- 1 cup (225 g) unsalted butter, room temperature
- 1 ¾ cups (350 g) sugar
- 4 large eggs, room temperature
- 1 Tbsp pure vanilla extract
- 1 cup (240 ml) whole milk, room temperature
- Frosting & décor
- 3 cups white buttercream icing (crumb coat + finish)
- ½ cup extra buttercream tinted red for piping seams (use gel food colour)
- 4 Tbsp seedless strawberry jam (filling, optional)
- Pan prep & extras
- Non-stick spray or softened butter for greasing pans
- Two 8-inch round parchment circles
- Cake board for assembling
Shortcut: Swap the scratch batter for one 15-oz boxed cake mix and prepare as directed, adding an extra tablespoon of milk for a bakery-soft crumb.
Step-by-Step Instructions
- Prep & preheat
- Heat oven to 350 °F / 175 °C. Grease two 8-inch round pans, line with parchment, and dust with flour.
- Make the batter
- Whisk flour, baking powder, and salt in a bowl.
- In a stand mixer, cream butter and sugar until pale. Beat in the eggs one at a time, then the vanilla.
- On low speed, add dry mix in three additions, alternating with milk. Stop as soon as the batter looks smooth.
- Bake
- Divide batter evenly between pans, smooth tops, tap once to settle, and bake 25-30 minutes.
- Cool 10 minutes, then gently turn each cake from pan onto a rack. Cool completely.
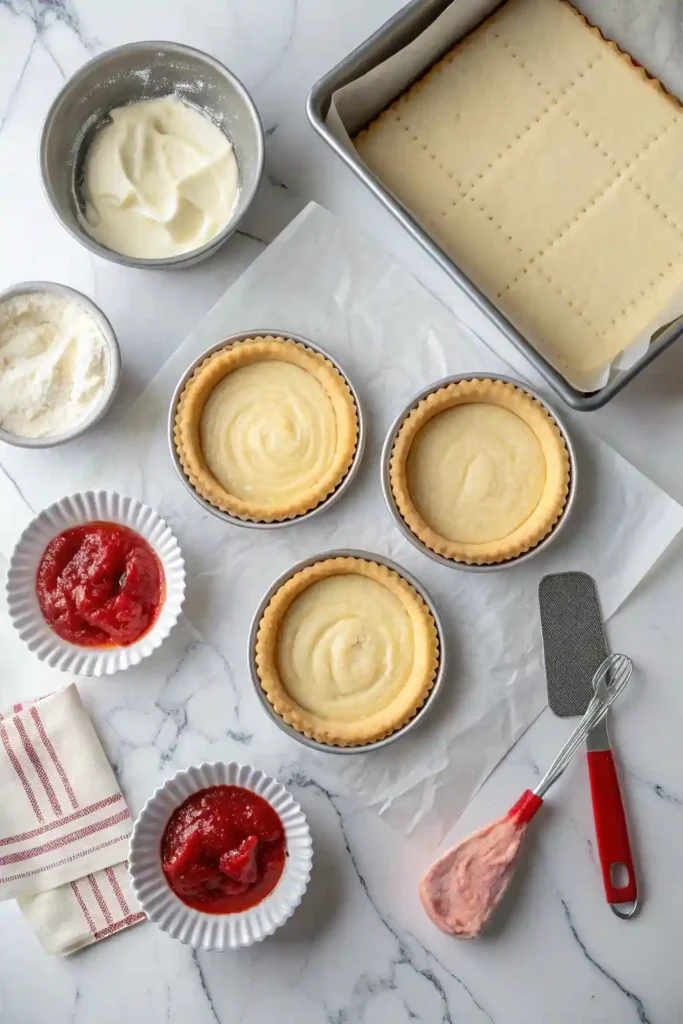
- Level & fill
- Trim any domes for flat layers. Swipe a spoonful of frosting on the cake board, add the first layer, and spread jam or a thin layer of frosting. Top with the second layer, inverted for a perfectly flat surface. Chill 15 minutes.
- Crumb-coat & chill
- Cover the entire cake in a whisper-thin coat of white icing to lock in crumbs. Refrigerate 10 minutes.
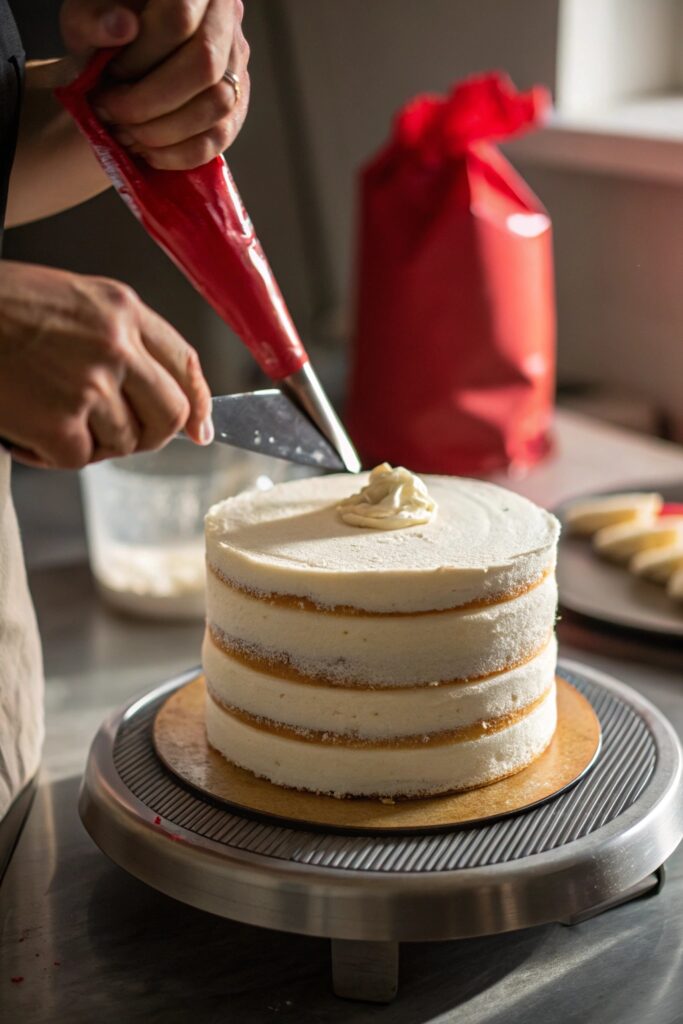
- Final frost
- Apply the remaining white buttercream, smoothing with an offset spatula until the dome looks perfectly round—like a baseball. Chill another 10 minutes to set.
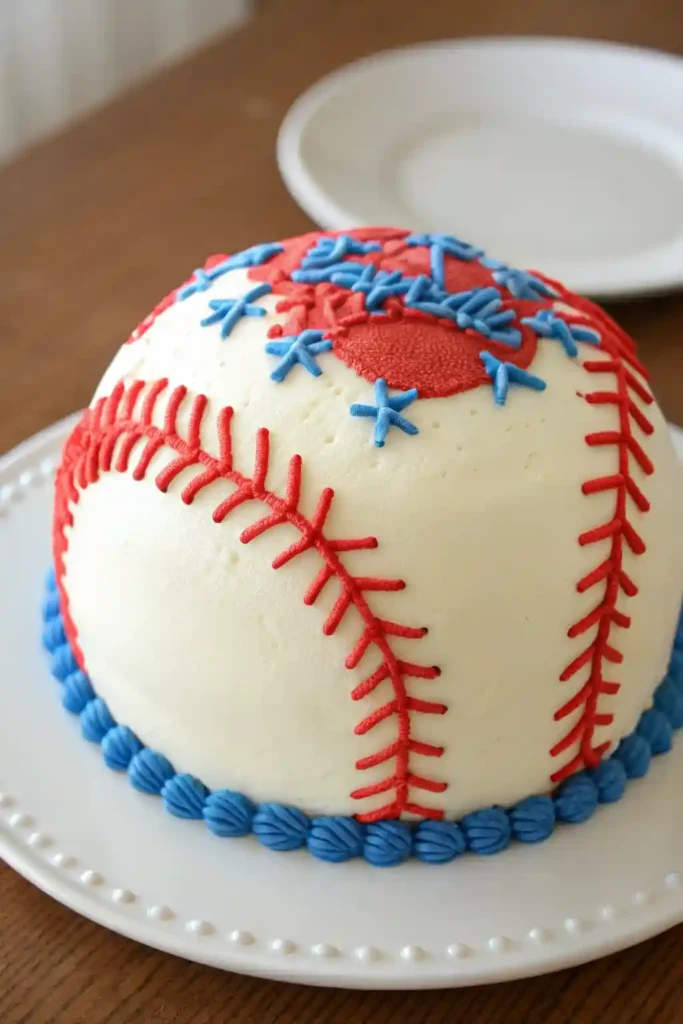
- Pipe the seams
- Fit a piping bag with a small round tip. Pipe two mirrored curved lines across the top, then add short diagonal stitches along each curve to recreate authentic red seams on the ball.
- Finish & serve
- Rest the cake at cool room temp for 20 minutes so the frosting softens slightly. Cut clean wedges with a hot knife, wiping between cuts. Enjoy, and store leftovers covered in the fridge for up to 3 days.
How Do I Bake, Cool, and Stack the Cake so It Looks Like the Real Thing?
Preheat the oven, grease each pan, and pour your silky mixture straight down the centre so it spreads evenly. Once the cake baked for about 28 minutes, tap the tins; a clean toothpick means it’s game-ready. Let the rounds rest for ten minutes, then gently release the cake from pan onto a rack to cool completely—rushing this step invites cracks later.
Level any domes with a serrated knife so every round lines up cleanly. Stack the tiers, adding a thin filling of strawberry jam between them for surprise colour. Chill the stack for 15 minutes to set the crumbs before the next play.
Once chilled, trim the edges until the profile reads as a perfect ball. A steady hand here means less work when you frost later. Resist the urge to stack before the crumb is fully set; a warm sponge trapped under frosting will steam, generating pockets that translate into uneven sides. A twenty-minute chill in the freezer balances internal moisture without forming ice crystals.
How to Frost and Decorate the Cake with Red Stitches for a Realistic Look?
Start with a crumb-coat: frost the entire surface in thin white icing, lock stray crumbs in place, then refrigerate for ten minutes. Follow with a generous final coat, smoothing from top to bottom until the profile is pristine. Set the treat on a greaseproof cake board before the detailing begins.
Tint a half-cup of frosting red and spoon it into your prepared bag. Pipe two mirror-image curves on the top, then add short diagonal stitches along each line, recreating the classic seams from the diamond. If your hand shakes, practice on parchment first; the beauty of frosting is that you can scrape and redo without damage.
If you want more drama, a thin chocolate drip around the edge frames the round shape without hiding the stitches and adds depth of flavor. Finish with a metallic sprinkle for easy but striking decoration.
For teams whose branding skews toward navy or forest green, tinting a secondary border in team hues personalizes the design without overshadowing the iconic red stitches. Gel colors offer maximum vibrancy with minimal liquid, preserving the consistency of your final coat.
Creative Cake Ideas to Customize Your Game-Day Dessert
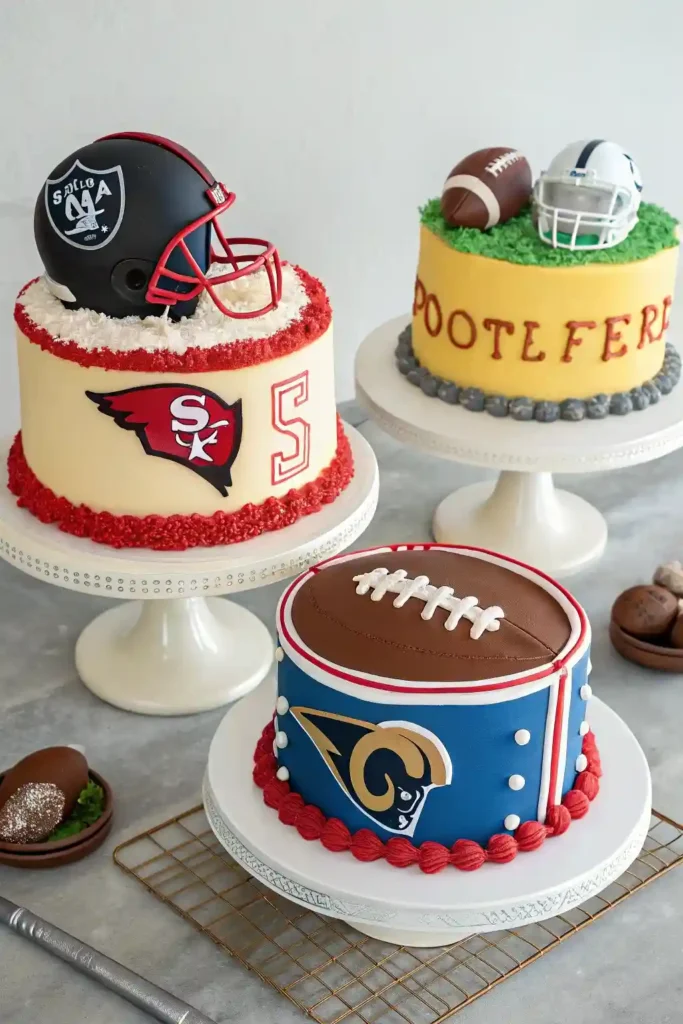
Need an idea to wow the crowd? Swap standard sponge for moist red velvet, or marble flavor ribbons of vanilla and chocolate throughout every tier for an eye-catching cut-away moment. You can even stencil jersey numbers in edible glitter around the sides so each guest feels part of the lineup.
For a surprise centre, hollow a small cavity and add sprinkles that tumble out when the first piece is served—the confection equivalent of fireworks after the ninth inning. A firm ganache dam around the opening keeps the sweets contained until the big reveal, delighting guests with an avalanche of colour.
Hosting a full game-day bash? Arrange mini cupcakes around the main attraction to look like field positions, or top each with a miniature fondant ball. The table instantly feels like a stadium concession stand—minus the long lines.
If you anticipate dietary requests, bake a petite gluten-free round and place it on a miniature tiered stand above the main dessert. With matching stitch motif, it keeps celiac guests included in the fun while maintaining clear separation for safety.
Serving Tips, Storage Advice, and Troubleshooting for Your Baseball Party Showpiece
Transport the dessert on a chilled board to keep the frost firm. If you must travel a distance, secure the box with non-skid shelf liner beneath the cake and place an ice pack beside—not under—the board. Once at the venue, cut thin wedges with a hot knife so the seams stay intact.
Leftovers hold well at room temperature for four hours; after that, refrigerate the dome in an airtight container. A night in the fridge actually intensifies the vanilla flavor and sets the internal structure, so you can serve picture-perfect pieces during next-day replays.
If the icing ever looks dull, mist lightly with water and buff gently. Cracked top after cooling? Cover with extra stitches—nobody will notice. And remember: baking is a craft, not a race. With patience and practice, every home baker can turn out a stadium-worthy masterpiece to decorate the dessert table.
Baseball Cake
Ingredients
Dry mix
- 2 ½ cups 300 g all-purpose flour, sifted
- 2 ½ tsp baking powder
- ½ tsp fine salt
Wet mix
- 1 cup 225 g unsalted butter, room temperature
- 1 ¾ cups 350 g sugar
- 4 large eggs room temperature
- 1 Tbsp pure vanilla extract
- 1 cup 240 ml whole milk, room temperature
Frosting & décor
- 3 cups white buttercream icing crumb coat + finish
- ½ cup extra buttercream tinted red for piping seams use gel food colour
- 4 Tbsp seedless strawberry jam filling, optional
Pan prep & extras
- Non-stick spray or softened butter for greasing pans
- Two 8-inch round parchment circles
- Cake board for assembling
Instructions
Prep & preheat
- Heat oven to 350 °F / 175 °C. Grease two 8-inch round pans, line with parchment, and dust with flour.
Make the batter
- Whisk flour, baking powder, and salt in a bowl.
- In a stand mixer, cream butter and sugar until pale. Beat in the eggs one at a time, then the vanilla.
- On low speed, add dry mix in three additions, alternating with milk. Stop as soon as the batter looks smooth.
Bake
- Divide batter evenly between pans, smooth tops, tap once to settle, and bake 25-30 minutes.
- Cool 10 minutes, then gently turn each cake from pan onto a rack. Cool completely.
Level & fill
- Trim any domes for flat layers. Swipe a spoonful of frosting on the cake board, add the first layer, and spread jam or a thin layer of frosting. Top with the second layer, inverted for a perfectly flat surface. Chill 15 minutes.
Crumb-coat & chill
- Cover the entire cake in a whisper-thin coat of white icing to lock in crumbs. Refrigerate 10 minutes.
Final frost
- Apply the remaining white buttercream, smoothing with an offset spatula until the dome looks perfectly round—like a baseball. Chill another 10 minutes to set.
Pipe the seams
- Fit a piping bag with a small round tip. Pipe two mirrored curved lines across the top, then add short diagonal stitches along each curve to recreate authentic red seams on the ball.
Finish & serve
- Rest the cake at cool room temp for 20 minutes so the frosting softens slightly. Cut clean wedges with a hot knife, wiping between cuts. Enjoy, and store leftovers covered in the fridge for up to 3 days.
Notes
| Calories | Fat | Saturated Fat | Carbs | Sugar | Protein | Fiber | Sodium |
|---|---|---|---|---|---|---|---|
| 715 kcal | 41 g | 26 g | 80 g | 64 g | 5 g | 1 g | 180 mg |
or a fun twist, consider a cupcake version of the baseball cake that allows guests to enjoy individual servings.
Your baseball cake can serve as an excellent centerpiece for parties, creating excitement and anticipation among guests.
Don’t hesitate to personalize your baseball cake with team colors and logos to make it even more special!Make sure to showcase your baseball cake on social media for others to admire your baking skills.
A baseball cake can also be a fun activity for family members, allowing everyone to pitch in and help decorate.Whether it’s for a birthday or a game day celebration, a baseball cake is sure to be a hit!
Frequently Asked Questions (FAQs)
1. Can I bake the baseball cake layers in advance?
Absolutely. Once the layers have cooled completely, wrap each one tightly in plastic wrap and refrigerate for up to 3 days—or freeze for up to 1 month. Thaw overnight in the fridge, then bring to room temperature before frosting so the buttercream spreads smoothly.
2. My red frosting always looks dull—how can I get vibrant “stitch” color?
Use a no-taste red gel food coloring and let the tinted buttercream rest 30 minutes; the color deepens as it sits. If you’re still short of the shade you want, add a tiny drop of orange gel to boost brightness without turning the frosting bitter.
3. How do I stop crumbs from ruining the white buttercream finish?
Chill the stacked layers for 15 minutes, then apply a super-thin crumb coat of frosting. Refrigerate again until firm (about 10 minutes) before adding the final buttercream layer. This two-step process seals stray crumbs so your outer coat stays perfectly clean.
4. Can I convert this recipe to a gluten-free version?
Yes. Substitute a 1-to-1 gluten-free all-purpose flour blend for the standard flour and add ½ teaspoon of xanthan gum if the blend doesn’t already include it. Bake an extra 2-3 minutes and test doneness with a toothpick—gluten-free batters sometimes need a touch longer to set.
5. What’s the best way to slice and serve the cake so the red seams stay intact?
Score the frosting first with a warm, dry knife along the seam lines, then cut wedges from the center outward. Wipe the blade after each slice to keep the white icing pristine and the red stitches sharply defined.