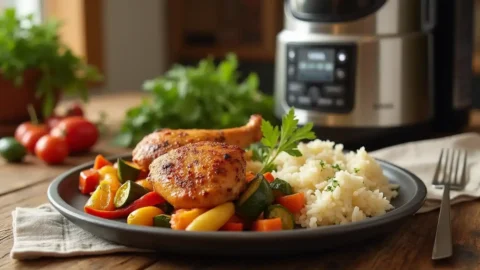
Have you ever wished for a single appliance that could handle everything from pressure cooking to air frying, all while saving you precious time in the kitchen? The Ninja Foodi does just that, transforming everyday meals into something truly extraordinary. Whether you’re craving crispy textures or tender, juicy flavors, this versatile gadget has you covered. In today’s recipe, we’ll dive into a dish that not only showcases the Ninja Foodi’s magic but also brings ease and joy to your cooking routine. Let’s turn a busy weeknight into an opportunity for effortless, delicious creativity!
________________________
_________________________
Key Benefits of Using the Ninja Foodi
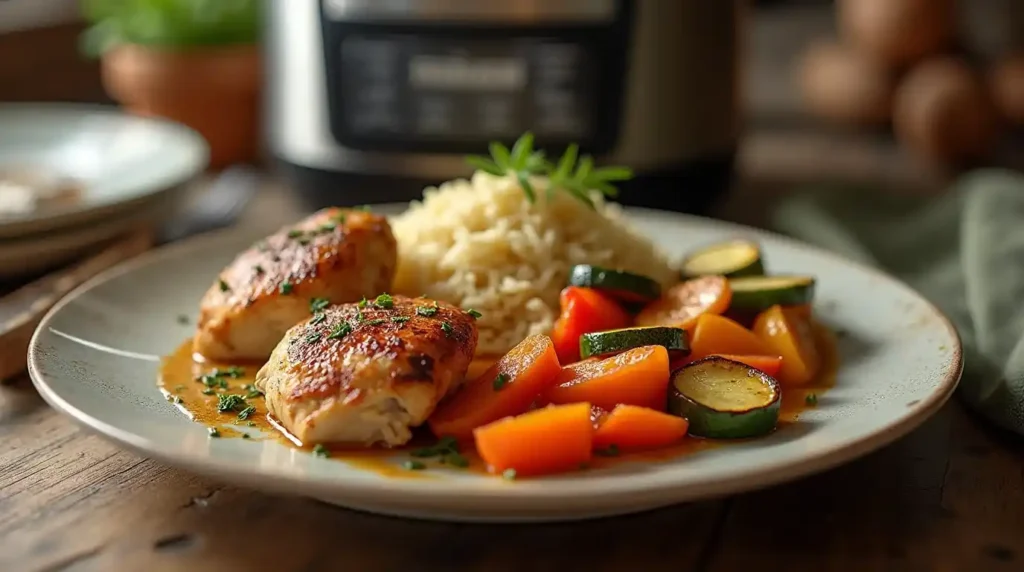
Cooking with the Ninja Foodi isn’t just about preparing meals—it’s about transforming the way you approach your kitchen routine. This versatile appliance brings an array of benefits that will make you wonder how you ever managed without it. Let’s explore why the Ninja Foodi is a game-changer for home cooks:
- Save Time Without Sacrificing Flavor
The Ninja Foodi’s combination of pressure cooking and air frying means you can cut traditional cooking times in half. Perfect for busy weeknights or when you’re in a pinch but still want a home-cooked meal. - Enjoy Healthier Meals with Less Oil
Love crispy, golden textures? The air fry function uses little to no oil, allowing you to enjoy guilt-free indulgence in your favorite dishes—think crispy chicken wings or perfectly roasted veggies. - One Appliance, Endless Possibilities
From steaming and sautéing to slow cooking and broiling, the Ninja Foodi covers it all. It’s like having multiple kitchen gadgets in one, saving both counter space and hassle. - Perfect Textures Every Time
Achieve tender meats and fluffy rice with the pressure cooker, then switch to air crisp for a crispy, caramelized finish. The results are restaurant-quality meals made right in your own kitchen. - Easy to Clean for Effortless Cooking
Hate cleanup? The non-stick, dishwasher-safe cooking pot and accessories make tidying up a breeze, giving you more time to relax and enjoy your meal.
Pro Tip:
If you’re new to the Ninja Foodi, start with simple recipes like soups or one-pot pastas. They’re practically foolproof and let you explore the appliance’s capabilities without feeling overwhelmed.
By incorporating these features into your routine, the Ninja Foodi not only simplifies your cooking process but also brings excitement and creativity back into your kitchen. It’s a true must-have for anyone who loves good food made effortlessly.
Ingredients
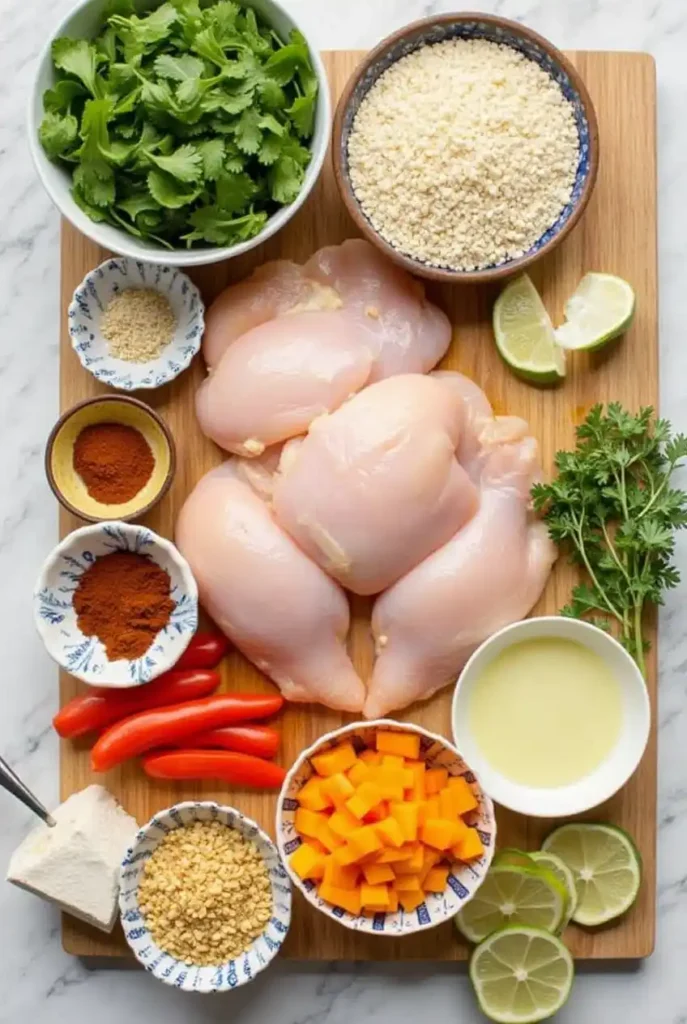
Before diving into the recipe, let’s talk about the heart of any great dish—the ingredients. Choosing the right components can make all the difference, and with the Ninja Foodi’s versatility, you’ll want to select items that truly shine. Here’s a breakdown to ensure you’re set up for success:
The Essentials
- Protein of Choice: Whether it’s juicy chicken thighs, tender beef, flaky fish, or plant-based options like tofu, the Ninja Foodi works its magic on all proteins. Choose fresh, high-quality cuts for the best results.
- Vegetables: Go seasonal! Carrots, bell peppers, zucchini, or even hearty greens like kale add a pop of flavor and nutrition. Chop them evenly for consistent cooking.
- Grains and Starches: Rice, quinoa, or even sweet potatoes cook beautifully in the Ninja Foodi. These are perfect for creating satisfying one-pot meals.
- Broths and Sauces: Use a flavorful broth—vegetable, chicken, or beef—to layer depth into your dish. Add sauces like soy sauce, tomato puree, or coconut milk for extra richness.
Seasonings and Aromatics
- Spices and Herbs: A blend of smoked paprika, garlic powder, dried thyme, and cumin can elevate simple recipes. Fresh herbs like parsley, cilantro, or basil make an excellent garnish.
- Aromatics: Don’t skimp on onions, garlic, or ginger. Sautéing them in the Ninja Foodi creates a flavor-packed base.
- Salt and Pepper: Simple but essential. Season your ingredients as you go to build balanced layers of flavor.
Optional Add-Ins
- Cheese: Sprinkle Parmesan or shredded cheddar for creamy, indulgent recipes.
- Nuts and Seeds: Toasted almonds, sesame seeds, or sunflower seeds can add texture and a nutty depth to your dishes.
- Dairy-Free or Gluten-Free Alternatives: Swap traditional items for almond milk, gluten-free pasta, or nutritional yeast for dietary preferences.
Pro Tip:
When prepping your ingredients, arrange them in small bowls or plates to keep your workspace tidy and organized. This “mise en place” approach not only saves time but also ensures you won’t miss a step.
By starting with fresh, quality ingredients and a few thoughtful additions, you’re setting yourself up for a flavorful, foolproof recipe that’s sure to impress. Remember, the beauty of the Ninja Foodi lies in its ability to adapt—so don’t hesitate to get creative with your choices!
Instructions
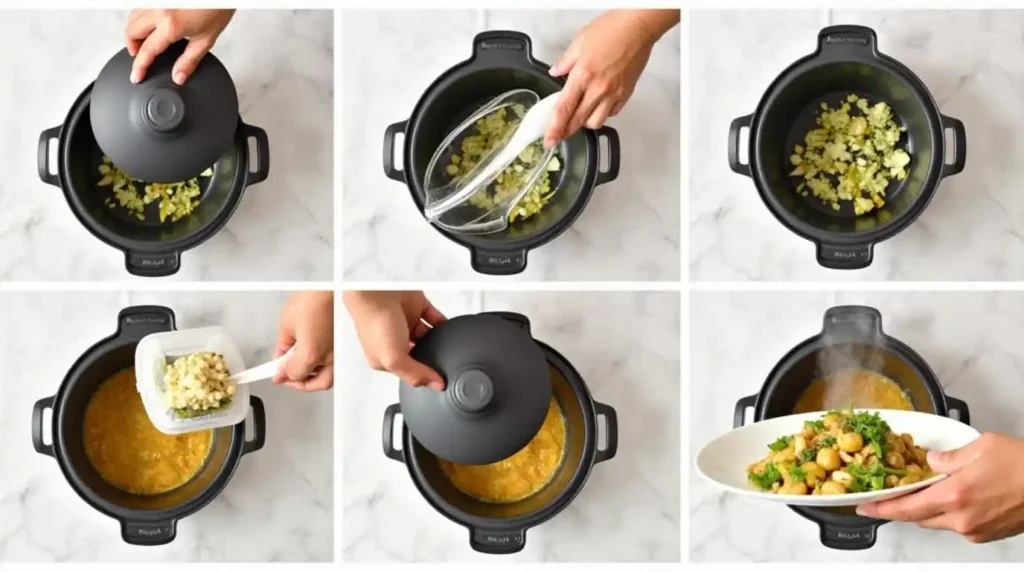
Cooking with the Ninja Foodi is a breeze once you know the steps. Follow this detailed guide to ensure your dish comes out perfectly every time. Whether you’re a beginner or a seasoned cook, this step-by-step breakdown will make the process easy and enjoyable.
1. Prep Your Ingredients
Start by gathering and preparing all your ingredients.
- Chop vegetables into uniform pieces to ensure even cooking.
- Pat your protein dry with a paper towel and season it generously on all sides.
- Measure out your grains, sauces, and seasonings to keep everything within reach.
Pro Tip:
Allow proteins like chicken or beef to sit at room temperature for 15–20 minutes before cooking. This helps them cook more evenly.
2. Preheat the Ninja Food
Select the appropriate cooking function to preheat the appliance.
- For pressure cooking: Add the required liquid (like broth or water) to the pot and set the pressure lid securely in place.
- For air frying: Use the crisping lid and set the desired temperature and time for preheating.
Pro Tip:
Preheating ensures the Ninja Foodi reaches the optimal temperature for crisping or cooking, which improves the texture and flavor of your dish.
3. Sauté Aromatics (If Applicable)
For recipes that call for onions, garlic, or other aromatics, use the “Sauté” function first.
- Add a tablespoon of oil to the pot and heat it for about 1–2 minutes.
- Sauté your aromatics until fragrant and translucent, usually 3–5 minutes.
- Deglaze the pot with a splash of broth or sauce to scrape up flavorful bits stuck to the bottom.
4. Layer Your Ingredient
For pressure cooking:
- Begin with liquids at the bottom to prevent burning.
- Layer proteins, grains, and vegetables strategically to ensure even cooking.
For air frying:
- Arrange ingredients in a single layer in the crisper basket for even airflow. Avoid overcrowding for the best results.
5. Cook Using the Correct Function
- Pressure Cooking: Lock the pressure lid, set the vent to “Sealing,” and select the pressure level (High or Low). Use the timer based on the recipe’s recommendation. Once done, allow for a natural or quick pressure release as specified.
- Air Frying: Adjust the temperature and time according to the recipe. Check halfway through and flip or shake ingredients for uniform crispiness.
Pro Tip:
Experiment with cooking modes! Combine pressure cooking for tender meats with air frying to add a crispy finish.
6. Check for Doneness
Always check your food before serving:
- Use a meat thermometer to ensure proteins are cooked to the safe internal temperature.
- Taste-test grains or vegetables to confirm they’re cooked to your liking.
7. Serve and Enjoy
Carefully remove the lid (release steam away from you), plate your meal, and garnish with fresh herbs, grated cheese, or a drizzle of sauce for added flair.
With these clear instructions and actionable tips, you’ll master the Ninja Foodi in no time. The step-by-step process ensures your dish is not only delicious but also stress-free to prepare. So, roll up your sleeves, press a few buttons, and let the Ninja Foodi do the rest!
Pro Tips and Variations
To make your Ninja Foodi recipes even more enjoyable, I’ve gathered some expert tips and creative variations to elevate your cooking experience. These insights will not only help you get the most out of your appliance but also inspire you to experiment and customize dishes to suit your taste.
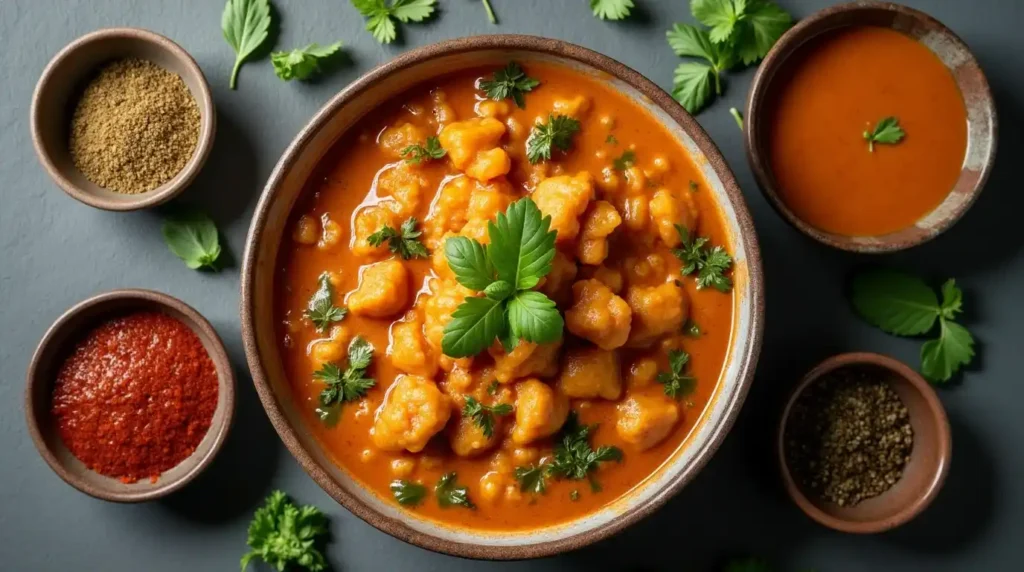
Pro Tips for Mastering the Ninja Foodi
- Use the Right Amount of Liquid
- When pressure cooking, always add at least one cup of liquid (broth, water, or sauce). This is essential for creating steam and building pressure.
- Avoid overfilling the pot, as it can affect the cooking process. Stick to the max-fill line for best results.
- Mind the Venting Process
- For a quick release, use a wooden spoon to carefully turn the vent away from you to avoid steam burns.
- For delicate dishes, allow a natural pressure release to prevent splattering or overcooking.
- Experiment with Cooking Modes
- Combine the “Pressure Cook” and “Air Crisp” functions for dishes like whole chicken or ribs. Start with pressure cooking for tenderness, then air fry to achieve a crispy, golden finish.
- Try the “Dehydrate” mode to make healthy snacks like fruit chips or veggie crisps.
- Layer Ingredients Strategically
- Place proteins at the bottom, closer to the liquid, for even cooking.
- Add delicate vegetables like spinach or zucchini toward the end to retain their texture and color.
- Preheat for Perfect Crisping
- Always preheat the air fryer mode for a few minutes before adding your ingredients. This ensures even cooking and a satisfyingly crispy texture.
Creative Variations to Try
- Protein Options
- Swap chicken for turkey, pork, or even tofu for a twist on your favorite recipes.
- For seafood lovers, the Ninja Foodi’s gentle cooking modes work wonders for salmon or shrimp.
- Global Flavors
- Add a Mediterranean flair with olive oil, lemon juice, and oregano.
- Create an Asian-inspired dish with soy sauce, ginger, garlic, and sesame oil.
- Bring Mexican zest with chili powder, lime, and fresh cilantro.
- Vegetarian and Vegan Ideas
- Use hearty plant-based proteins like chickpeas, lentils, or jackfruit.
- Experiment with dairy-free alternatives, such as coconut cream or cashew-based sauces, for rich, creamy dishes.
- One-Pot Wonders
- Create a comforting risotto by pressure cooking rice with broth and finishing with a sprinkle of Parmesan.
- Whip up a hearty chili with ground meat, beans, and bold spices—all in one pot!
Pro Tip: Make It Your Own
Don’t be afraid to customize! The Ninja Foodi’s versatility allows you to adapt recipes to your preferences. Add extra spices, substitute ingredients, or even experiment with leftovers to create something entirely new.
With these tips and variations, you’ll unlock the full potential of your Ninja Foodi. Whether you’re perfecting a classic recipe or trying something new, these insights will ensure every meal is a culinary success. Happy cooking!
Serving Suggestions
A beautifully cooked dish deserves to be served in a way that enhances both its flavor and presentation. After all, we eat with our eyes first! Here are some serving suggestions and tips to make your Ninja Foodi creations truly shine on the plate.

1. Plate Like a Pro
- Use Contrast: Pair colorful dishes with neutral plates to make the ingredients pop. For example, serve a vibrant stir-fry on a white plate or a hearty stew in a rustic bowl.
- Garnish Thoughtfully: A sprinkle of fresh herbs, grated cheese, or a drizzle of olive oil can elevate the look and taste of your dish. Think parsley for freshness, or sesame seeds for a nutty crunch.
- Add Height: Stack or layer ingredients for a more dynamic presentation. For instance, place your protein atop a bed of rice or vegetables to create a restaurant-style aesthetic.
2. Pairings That Complement
- Side Dishes:
- Serve your main dish with a simple salad for freshness. Try mixed greens with a light vinaigrette for balance.
- Pair hearty meals with crusty bread or fluffy dinner rolls to soak up the sauces.
- Beverages:
- For rich and creamy dishes, pair with a crisp white wine or sparkling water with a slice of lemon.
- Spicy meals go well with a cold lager or a sweet iced tea to cool the palate.
3. Setting the Scene
- Casual Meals: Keep it simple yet inviting by serving family-style. Place the Ninja Foodi pot or a large serving dish in the center of the table and let everyone dig in.
- Special Occasions: Use decorative platters and arrange portions individually for a more formal touch. Add cloth napkins and candles to set the mood.
4. Garnish and Texture Tips
- For extra texture, top dishes with crunchy elements like toasted nuts, crispy onions, or croutons.
- Enhance flavor with a final squeeze of citrus or a dash of freshly cracked pepper right before serving.
5. Make It Instagram-Worthy
If you love sharing your food creations online, here are a few tips:
- Use natural light when photographing your dish.
- Take shots from multiple angles to capture the texture and details.
- Sprinkle a pinch of garnish right before snapping the photo for that fresh, vibrant look.
Pro Tip: Create a Complete Experience
Think about the overall dining experience. Pair your dish with the right ambiance, whether it’s a cozy night with music or an outdoor feast with friends. Your presentation and setting can make the meal feel even more special.
With these serving suggestions, your Ninja Foodi recipes will not only taste amazing but look and feel like they belong in a top-tier dining experience. Enjoy the process of sharing your culinary creations with loved ones—it’s the perfect way to savor the fruits of your labor
Conclusion
Congratulations—you’ve just unlocked the secret to effortlessly creating mouthwatering dishes with the Ninja Foodi! Whether you’re a beginner or a seasoned cook, this versatile appliance is a true kitchen companion, making it easier than ever to prepare meals that are as delicious as they are satisfying.

By following this recipe and incorporating the tips shared throughout, you’ve not only made a fantastic dish but also gained confidence in experimenting with your Ninja Foodi. From tender pressure-cooked meats to perfectly crisped veggies, the possibilities are truly endless.
What’s Next
Now that you’ve mastered this recipe, don’t stop here!
- Explore More: Try adapting this dish by swapping ingredients or exploring other global flavors. A small change can turn this recipe into a brand-new favorite.
- Challenge Yourself: Experiment with new functions like broiling or dehydrating. The Ninja Foodi is built to inspire creativity, so don’t hesitate to push your culinary boundaries.
Stay Connected
Sharing is part of the joy of cooking! If you loved this recipe:
- Share it with your friends and family so they can experience the magic of the Ninja Foodi too.
- Leave a comment below with your thoughts, tips, or any fun variations you tried. I’d love to hear how you made this dish your own.
- Follow along for more recipes and tips to make every meal an adventure.
With the Ninja Foodi, cooking has never been more enjoyable, efficient, or rewarding. Each dish you create is a step toward making mealtime more special and stress-free. So, grab your Foodi, try something new, and keep exploring the endless possibilities. Here’s to many more flavorful adventures in the kitchen—happy cooking!
Craving a comforting and delicious meal? Don’t miss our Chicken with Buttered Noodles recipe a simple yet satisfying dish that’s perfect for any occasion!
FAQs
It’s natural to have a few questions when trying out a new recipe or appliance. To help you navigate your Ninja Foodi journey with confidence, here are answers to some of the most common questions readers ask.
1. Can I Use Frozen Ingredients in the Ninja Foodi?
Absolutely! One of the Ninja Foodi’s best features is its ability to cook frozen ingredients with ease.
For Proteins: Use the pressure-cooking function to thaw and cook frozen meats quickly. Just remember to add a few extra minutes to the cooking time.
For Vegetables: Frozen veggies work best in soups, stews, or when steamed. Avoid air-frying them directly as they may release too much moisture.
2. How Do I Clean the Ninja Foodi?
Cleaning the Ninja Foodi is simple and stress-free:
Removable Parts: The cooking pot, crisper basket, and accessories are non-stick and dishwasher-safe.
The Main Unit: Wipe the exterior with a damp cloth and avoid submerging it in water.
Deep Cleaning: For stubborn stains or odors, soak removable parts in warm, soapy water and scrub gently with a soft brush.
3. How Much Liquid Should I Add When Pressure Cooking?
A minimum of 1 cup of liquid is essential for building the necessary pressure. This can include:
Water
Broth
Sauces or other thin liquids
Avoid thick liquids like cream or purees when pressure cooking, as they can cause the pot to overheat.
4. Can I Double the Recipe?
Yes, you can double most recipes in the Ninja Foodi. Keep these tips in mind:
Ensure you don’t exceed the “Max Fill” line, especially for pressure-cooked dishes.
Cooking times usually remain the same, but it’s a good idea to check for doneness before serving.
5. What Are the Best Recipes to Start With?
For beginners, simple one-pot meals are a great way to get comfortable with the Ninja Foodi. Start with:
Soups and stews
Rice or quinoa dishes
Roast chicken with crispy skin
As you become more confident, try combining functions like pressure cooking and air frying for advanced dishes.
6. How Do I Avoid Overcooking or Undercooking?
Overcooking: Follow recommended cooking times closely and use the quick-release method to stop the cooking process immediately.
Undercooking: If your dish isn’t done, you can always seal the lid and cook for a few more minutes using the appropriate function.
7. Can I Use the Ninja Foodi Without Pressure Cooking?
Definitely! The Ninja Foodi’s versatility means you can use its other functions—like air frying, sautéing, steaming, or slow cooking—independently.
____________________________________
Pro Tip:
Keep experimenting and don’t hesitate to refer to the Ninja Foodi user manual for specific settings. Every recipe is an opportunity to learn something new
____________________________________
By addressing these common questions, you’ll feel more confident and equipped to tackle any recipe with your Ninja Foodi. Remember, cooking is all about enjoying the process and embracing creativity. If you have additional questions, drop them in the comments—I’m here to help!
____________________________________
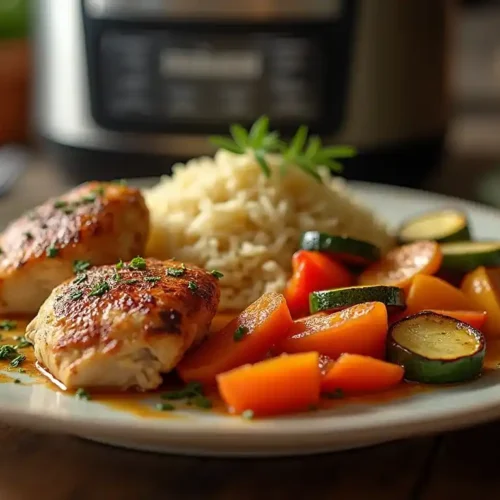
ninja foodi recipes
Ingredients
Protein of Choice:
- Whether it’s juicy chicken thighs tender beef, flaky fish, or plant-based options like tofu, the Ninja Foodi works its magic on all proteins. Choose fresh, high-quality cuts for the best results.
- Vegetables: Go seasonal! Carrots bell peppers, zucchini, or even hearty greens like kale add a pop of flavor and nutrition. Chop them evenly for consistent cooking.
Grains and Starches:
- Rice quinoa, or even sweet potatoes cook beautifully in the Ninja Foodi. These are perfect for creating satisfying one-pot meals.
Broths and Sauces:
- Use a flavorful broth—vegetable chicken, or beef—to layer depth into your dish. Add sauces like soy sauce, tomato puree, or coconut milk for extra richness.
Seasonings and Aromatics
Spices and Herbs:
- A blend of smoked paprika garlic powder, dried thyme, and cumin can elevate simple recipes. Fresh herbs like parsley, cilantro, or basil make an excellent garnish.
- Aromatics: Don’t skimp on onions garlic, or ginger. Sautéing them in the Ninja Foodi creates a flavor-packed base.
Salt and Pepper:
- Simple but essential. Season your ingredients as you go to build balanced layers of flavor.
Optional Add-Ins
- Cheese: Sprinkle Parmesan or shredded cheddar for creamy indulgent recipes.
Nuts and Seeds:
- Toasted almonds sesame seeds, or sunflower seeds can add texture and a nutty depth to your dishes.
- Dairy-Free or Gluten-Free Alternatives: Swap traditional items for almond milk gluten-free pasta, or nutritional yeast for dietary preferences.
Instructions
Prep Your Ingredients
- Start by gathering and preparing all your ingredients.
- Chop vegetables into uniform pieces to ensure even cooking.
- Pat your protein dry with a paper towel and season it generously on all sides.
- Measure out your grains, sauces, and seasonings to keep everything within reach.
Preheat the Ninja Foodi
- Select the appropriate cooking function to preheat the appliance.
- For pressure cooking: Add the required liquid (like broth or water) to the pot and set the pressure lid securely in place.
- For air frying: Use the crisping lid and set the desired temperature and time for preheating.
Sauté Aromatics (If Applicable)
- For recipes that call for onions, garlic, or other aromatics, use the “Sauté” function first.
- Add a tablespoon of oil to the pot and heat it for about 1–2 minutes.
- Sauté your aromatics until fragrant and translucent, usually 3–5 minutes.
- Deglaze the pot with a splash of broth or sauce to scrape up flavorful bits stuck to the bottom.
Layer Your Ingredients
- For pressure cooking:
- Begin with liquids at the bottom to prevent burning.
- Layer proteins, grains, and vegetables strategically to ensure even cooking.
For air frying:
- Arrange ingredients in a single layer in the crisper basket for even airflow. Avoid overcrowding for the best results.
Cook Using the Correct Function
- Pressure Cooking: Lock the pressure lid, set the vent to “Sealing,” and select the pressure level (High or Low). Use the timer based on the recipe’s recommendation. Once done, allow for a natural or quick pressure release as specified.
- Air Frying: Adjust the temperature and time according to the recipe. Check halfway through and flip or shake ingredients for uniform crispiness.
Check for Doneness
- Always check your food before serving:
- Use a meat thermometer to ensure proteins are cooked to the safe internal temperature.
- Taste-test grains or vegetables to confirm they’re cooked to your liking.
Serve and Enjoy
- Carefully remove the lid (release steam away from you), plate your meal, and garnish with fresh herbs, grated cheese, or a drizzle of sauce for added flair.
Notes
Nutrition Information (Per Serving)
- Calories: 400
- Fat: 15g
- Saturated Fat: 4g
- Protein: 35g
- Carbohydrates: 30g
- Dietary Fiber: 5g
- Sugars: 6g
- Cholesterol: 85mg
- Sodium: 600mg

