Craving a snack that’s both irresistibly crunchy and surprisingly simple to make? Look no further than homemade kettle chips! These golden, crispy delights are the perfect way to elevate your snacking game without any fuss. Made with just a handful of ingredients, they’re healthier, fresher, and more flavorful than store-bought versions. Plus, you can customize them with your favorite seasonings—think smoky paprika, zesty ranch, or even a hint of spice. Whether you’re hosting a gathering or enjoying a quiet night in, these chips are sure to impress. Ready to turn ordinary potatoes into something extraordinary? Let’s dive in!
Key Benefits of Kettle Chips

Why settle for store-bought kettle chips when you can make your own at home? Homemade kettle chips are not just a snack—they’re a game-changer! Here’s why you’ll love this recipe:
- Healthier Snacking: Skip the preservatives and artificial flavors! With just a few simple ingredients, you can create chips that are lower in calories and free from unnecessary additives.
- Customizable Flavors: From smoky barbecue to tangy salt and vinegar, the flavor possibilities are endless. You’re in control of what goes into your snack, making it perfect for any craving.
- Gluten-Free and Vegan-Friendly: Whether you’re catering to dietary restrictions or just exploring healthier options, these chips are naturally gluten-free and can easily be made vegan.
- Quick and Easy: No fancy equipment or hours in the kitchen needed. In just a few simple steps, you’ll have a batch of crispy, golden chips ready to enjoy.
- Perfect for Sharing (or Not!): These chips are a hit at parties, movie nights, or even as a lunchbox treat. But let’s be honest—they’re so good, you might want to keep them all to yourself!
With benefits like these, it’s no wonder homemade kettle chips are becoming a snack-time favorite. Ready to make your own? Let’s dive into the ingredients and get cooking!
Ingredients
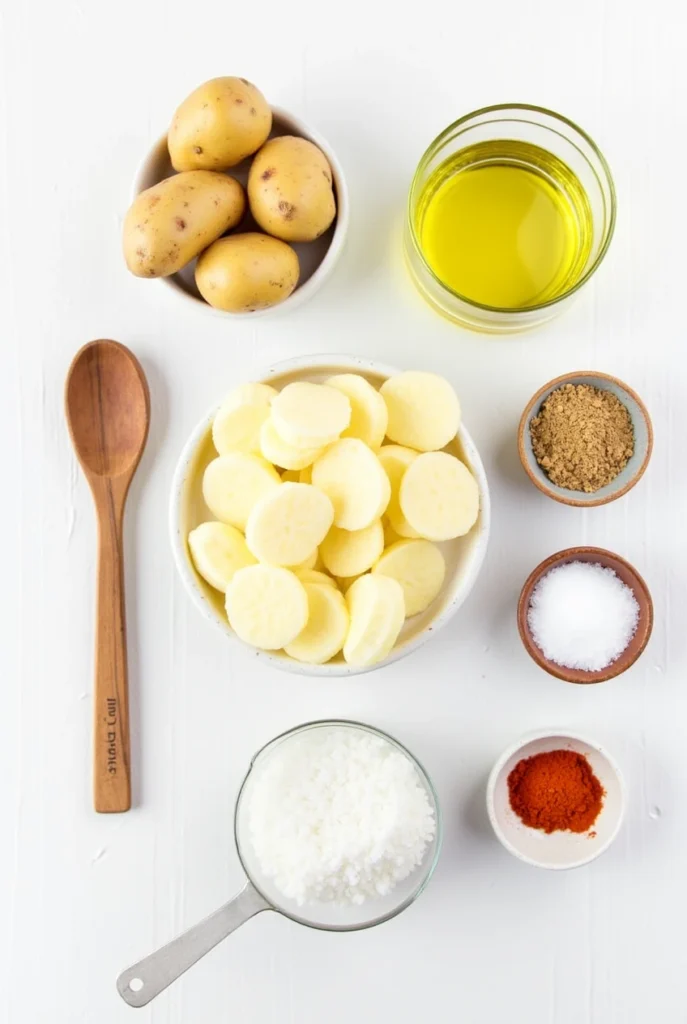
Let’s keep things simple! You only need a few pantry staples to make these irresistible homemade kettle chips. Here’s everything you’ll need to get started:
- 2 large russet potatoes (or Yukon Gold for a slightly sweeter flavor)
- 2 tablespoons olive oil (or avocado oil for a lighter option)
- 1 teaspoon salt (adjust to taste)
- 1 teaspoon smoked paprika (for a smoky kick)
- 1/2 teaspoon garlic powder (because everything’s better with garlic!)
- 1/2 teaspoon onion powder (for a hint of savory depth)
- Optional: A pinch of cayenne pepper for heat, or nutritional yeast for a cheesy twist
Pro Tips for Ingredient Prep:
- Choose the Right Potatoes: Russet potatoes are ideal for their starchy texture, which helps achieve that perfect crunch. Make sure they’re firm and free from sprouts or green spots.
- Slice Thin and Even: Use a mandoline slicer or a sharp knife to slice the potatoes into thin, even rounds. This ensures they cook uniformly and crisp up beautifully.
- Pat Dry: After slicing, pat the potato rounds dry with a clean kitchen towel or paper towels. Removing excess moisture is key to achieving that signature kettle chip crunch.
Gather your ingredients, and let’s move on to the fun part—turning these simple items into a snack you won’t be able to put down!
How to Make Kettle Chips
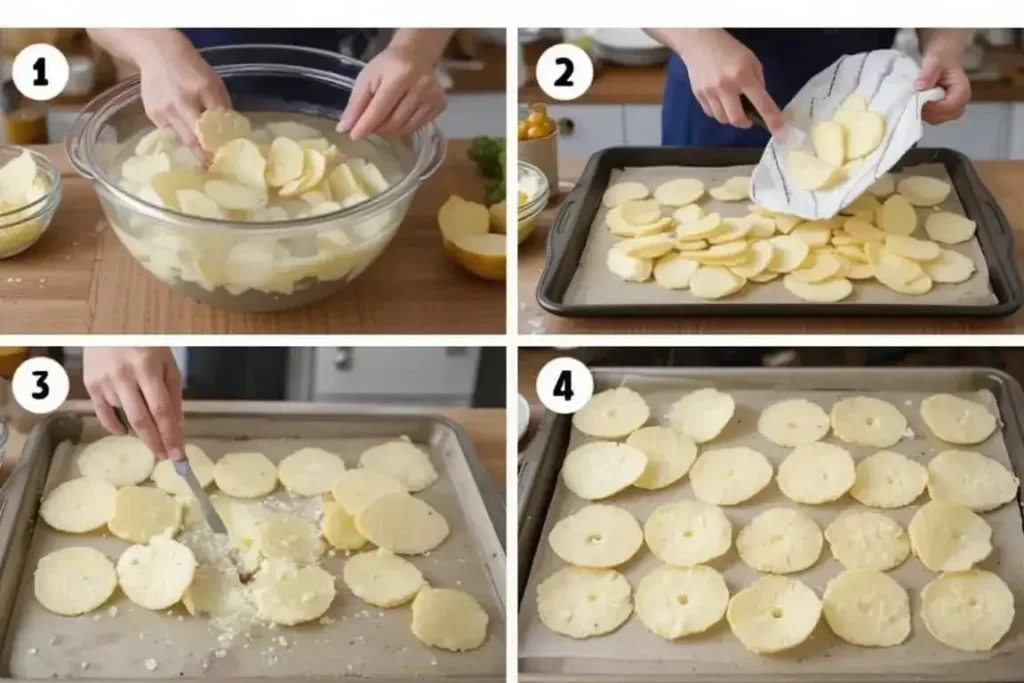
Ready to transform your potatoes into crispy, golden kettle chips? Follow these easy steps, and you’ll have a batch of homemade chips in no time!
Step 1: Preheat Your Oven
Start by preheating your oven to 400°F (200°C). This high temperature ensures your chips crisp up perfectly without becoming soggy.
Step 2: Slice the Potatoes
Using a mandoline slicer or a sharp knife, slice the potatoes into thin, even rounds (about 1/8-inch thick). Pro tip: If you’re using a knife, take your time to ensure uniformity—this helps them bake evenly.
Step 3: Dry the Slices
Pat the potato slices dry with a clean kitchen towel or paper towels. Removing excess moisture is crucial for achieving that signature crunch.
Step 4: Season the Chips
In a large mixing bowl, toss the potato slices with olive oil until evenly coated. Sprinkle the salt, smoked paprika, garlic powder, onion powder, and any optional seasonings (like cayenne or nutritional yeast) over the slices. Toss again to ensure every piece is well-seasoned.
Step 5: Arrange on Baking Sheets
Spread the seasoned potato slices in a single layer on parchment-lined baking sheets. Make sure they aren’t overlapping—this allows them to crisp up evenly.
Step 6: Bake to Perfection
Place the baking sheets in the preheated oven and bake for 15-20 minutes, flipping the slices halfway through. Keep an eye on them during the last few minutes to prevent over-browning.
Step 7: Cool and Crisp
Once baked, remove the chips from the oven and let them cool completely on the baking sheets. As they cool, they’ll become even crispier.
Step 8: Serve and Enjoy
Transfer your homemade kettle chips to a bowl and dig in! They’re perfect as-is or paired with your favorite dip.
Pro Tips for Success:
- Watch Closely: Ovens can vary, so keep an eye on your chips during the last few minutes of baking to avoid burning.
- Flip for Even Cooking: Flipping the chips halfway through ensures they crisp up evenly on both sides.
- Cool Completely: Patience is key! Letting the chips cool fully ensures they reach their maximum crispiness.
Now that you’ve mastered the basics, let’s explore some creative variations and pro tips to take your kettle chips to the next level!
Pro Tips and Variations for Perfect Kettle Chips

Now that you’ve nailed the basics, let’s take your homemade kettle chips to the next level! Here are some pro tips and creative variations to make this recipe your own:
Pro Tips for Perfect Kettle Chips:
- Slice Thin and Even: Use a mandoline slicer for consistently thin potato rounds. This ensures even cooking and maximum crispiness.
- Dry Thoroughly: Pat the potato slices dry before seasoning. Excess moisture can lead to soggy chips.
- Don’t Overcrowd the Pan: Spread the slices in a single layer on the baking sheet. Overlapping can cause uneven baking.
- Flip Halfway Through: Flipping the chips halfway through baking ensures they crisp up evenly on both sides.
- Cool Completely: Let the chips cool fully on the baking sheet. They’ll continue to crisp up as they cool.
Flavor Variations to Try:
- Salt and Vinegar: Toss the baked chips with a splash of malt vinegar and a sprinkle of sea salt for a tangy twist.
- Spicy Sriracha: Add 1-2 teaspoons of sriracha to the olive oil before coating the potatoes, then sprinkle with chili powder.
- Cheesy Herb: Skip the paprika and use 2 tablespoons of nutritional yeast, along with dried herbs like rosemary or thyme, for a cheesy, savory flavor.
- Barbecue Bliss: Mix 1 teaspoon of smoked paprika, 1/2 teaspoon of garlic powder, and a pinch of brown sugar for a smoky-sweet barbecue vibe.
- Sweet Cinnamon: Swap the savory spices for 1 teaspoon of cinnamon and 1 tablespoon of sugar (or a sugar substitute) for a sweet treat.
Storage Tips:
- Keep Them Crispy: Store your kettle chips in an airtight container at room temperature for up to 3 days. If they lose their crunch, pop them back in the oven at 300°F (150°C) for 5 minutes to revive them.
- Double the Batch: These chips are so addictive, you might want to make extra! Just be sure to bake them in separate batches to avoid overcrowding the pan.
With these tips and variations, you can customize your kettle chips to suit any craving or occasion. Ready to get creative? Let’s move on to serving suggestions!
Serving Suggestions for Your Kettle Chips
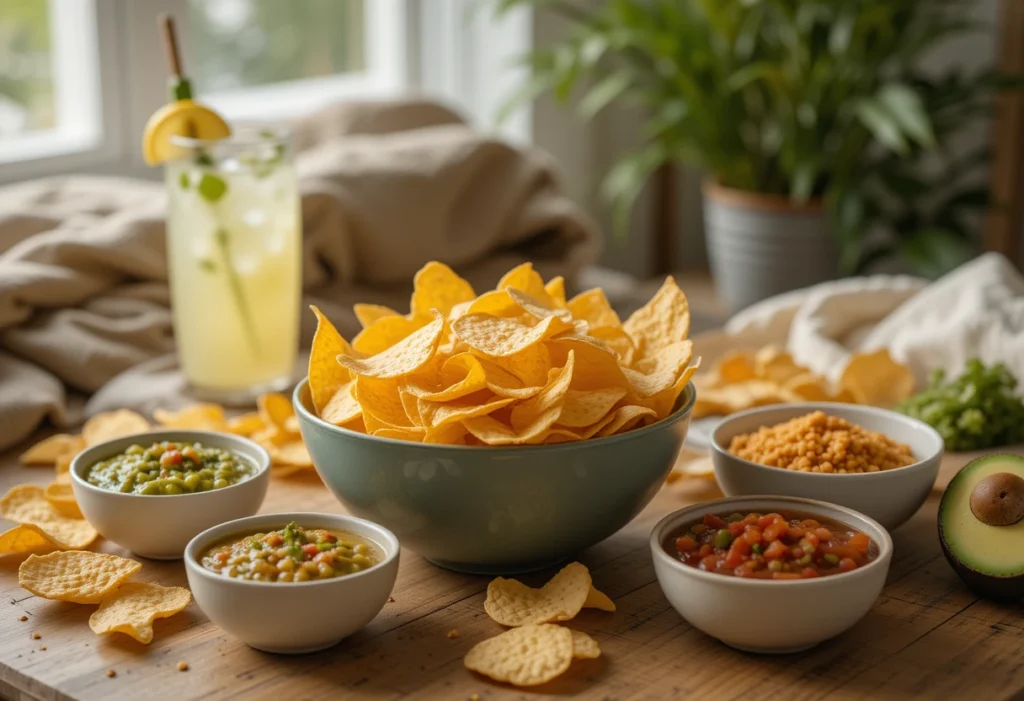
Your homemade kettle chips are ready to shine! Here are some fun and delicious ways to serve them, whether you’re hosting a party or enjoying a cozy night in:
Perfect Pairings:
- Dips Galore: Pair your kettle chips with your favorite dips for a crowd-pleasing snack. Try hummus, guacamole, spinach artichoke dip, or even a spicy salsa.
- Cheese and Charcuterie Boards: Add a bowl of kettle chips to your next cheese board for a crunchy, gluten-free alternative to crackers.
- Soup Topper: Crumble a handful of kettle chips over a bowl of soup or chili for an extra layer of texture and flavor.
Occasion Ideas:
- Movie Night Must-Have: Serve these chips alongside your favorite film for a healthier twist on classic movie snacks.
- Party Platter: Create a snack platter with kettle chips, nuts, dried fruit, and mini sandwiches for your next gathering.
- Lunchbox Surprise: Pack a small bag of kettle chips in your lunchbox for a satisfying midday treat.
Creative Combos:
- Sweet and Savory Mix: Combine your kettle chips with dark chocolate chunks, pretzels, and nuts for a trail mix-style snack.
- Salad Topper: Sprinkle a few crushed kettle chips over your salad for a crunchy, flavorful topping.
- Cocktail Companion: Serve your chips with a refreshing drink like iced tea, lemonade, or even a margarita for the ultimate snack-and-sip combo.
No matter how you serve them, these kettle chips are sure to be a hit. Now that you’ve got all the inspiration you need, let’s wrap things up with a quick conclusion!
Conclusion :
And there you have it homemade kettle chips that are irresistibly crunchy, endlessly customizable, and perfect for any occasion! Whether you’re looking for a healthier snack option, a fun kitchen project, or a crowd-pleasing treat, this recipe delivers on all fronts.

With just a few simple ingredients and easy steps, you can create a snack that’s as unique as you are. From smoky and spicy to sweet and savory, the flavor possibilities are endless. Plus, you’ll love knowing exactly what’s in your snack—no mystery ingredients here!
So, what are you waiting for? Grab your potatoes, fire up the oven, and get ready to fall in love with your new favorite snack. Don’t forget to share your creations with friends and family (if you can resist keeping them all to yourself).
Craving a tangy, crunchy snack? Try our irresistible Salt and Vinegar Chips recipe easy to make and impossible to resist! Visit the recipe now and satisfy those cravings
FAQs :
Got questions about making homemade kettle chips? Don’t worry—I’ve got you covered! Here are answers to some of the most common questions to help you nail this recipe every time:
1. Can I use sweet potatoes instead of russet potatoes?
Absolutely! Sweet potatoes work beautifully for this recipe. Just keep in mind that they may require a slightly longer baking time to crisp up.
2. How do I store kettle chips to keep them crispy?
Store them in an airtight container at room temperature for up to 3 days. If they lose their crunch, pop them back in the oven at 300°F (150°C) for 5 minutes to revive them.
3. Are kettle chips gluten-free?
Yes! Potatoes are naturally gluten-free, making this recipe a great option for anyone with gluten sensitivities. Just double-check that your seasonings are gluten-free if needed.
4. Can I make these chips oil-free?
Absolutely! For an oil-free version, use a light spritz of cooking spray or a small amount of aquafaba (the liquid from a can of chickpeas) to help the seasonings stick.
5. What’s the best way to add cheese flavor without dairy?
Nutritional yeast is your best friend! It adds a cheesy, nutty flavor without any dairy. Sprinkle 1-2 tablespoons over the potatoes before baking.
6. Can I make these chips in an air fryer?
Yes! Spread the seasoned potato slices in a single layer in your air fryer basket and cook at 375°F (190°C) for 10-12 minutes, shaking halfway through. Keep an eye on them to prevent burning.
7. Are kettle chips kid-friendly?
Definitely! Kids love the crunch and fun flavors. For picky eaters, stick to simple seasonings like a little salt or a sprinkle of cinnamon sugar.
8. Can I double the recipe?
Of course! Just bake the chips in batches to avoid overcrowding the baking sheet, which can lead to uneven cooking.
If you have more questions, feel free to drop them in the comments below. Happy snacking!
_________________________________
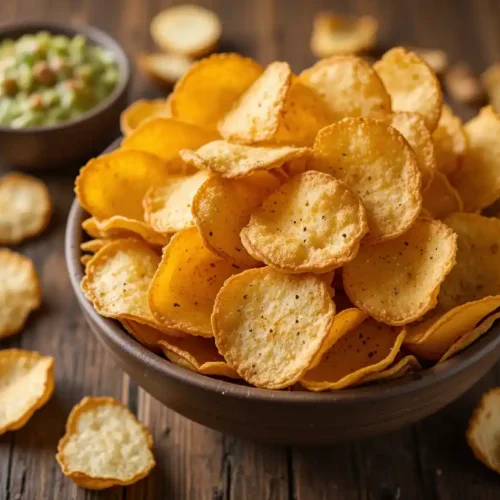
kettle chips
Ingredients
2 large russet potatoes
- or Yukon Gold for a slightly sweeter flavor
2 tablespoons olive oil
- or avocado oil for a lighter option
1 teaspoon salt
- adjust to taste
1 teaspoon smoked paprika
- for a smoky kick
1/2 teaspoon garlic powder
- because everything’s better with garlic!
1/2 teaspoon onion powder
- for a hint of savory depth
Optional: A pinch of cayenne pepper for heat, or nutritional yeast for a cheesy twist
Instructions
Step 1: Preheat Your Oven
- Start by preheating your oven to 400°F (200°C). This high temperature ensures your chips crisp up perfectly without becoming soggy.
Step 2: Slice the Potatoes
- Using a mandoline slicer or a sharp knife, slice the potatoes into thin, even rounds (about 1/8-inch thick). Pro tip: If you’re using a knife, take your time to ensure uniformity—this helps them bake evenly.
Step 3: Dry the Slices
- Pat the potato slices dry with a clean kitchen towel or paper towels. Removing excess moisture is crucial for achieving that signature crunch.
Step 4: Season the Chips
- In a large mixing bowl, toss the potato slices with olive oil until evenly coated. Sprinkle the salt, smoked paprika, garlic powder, onion powder, and any optional seasonings (like cayenne or nutritional yeast) over the slices. Toss again to ensure every piece is well-seasoned.
Step 5: Arrange on Baking Sheets
- Spread the seasoned potato slices in a single layer on parchment-lined baking sheets. Make sure they aren’t overlapping—this allows them to crisp up evenly.
Step 6: Bake to Perfection
- Place the baking sheets in the preheated oven and bake for 15-20 minutes, flipping the slices halfway through. Keep an eye on them during the last few minutes to prevent over-browning.
Step 7: Cool and Crisp
- Once baked, remove the chips from the oven and let them cool completely on the baking sheets. As they cool, they’ll become even crispier.
Step 8: Serve and Enjoy
- Transfer your homemade kettle chips to a bowl and dig in! They’re perfect as-is or paired with your favorite dip.
Notes
Nutrition Information (Per Serving)
- Calories: 120 kcal
- Fat: 7g
- Saturated Fat: 1g
- Protein: 2g
- Carbohydrates: 12g
- Fiber: 2g
- Sugar: 0g
- Sodium: 300mg

