

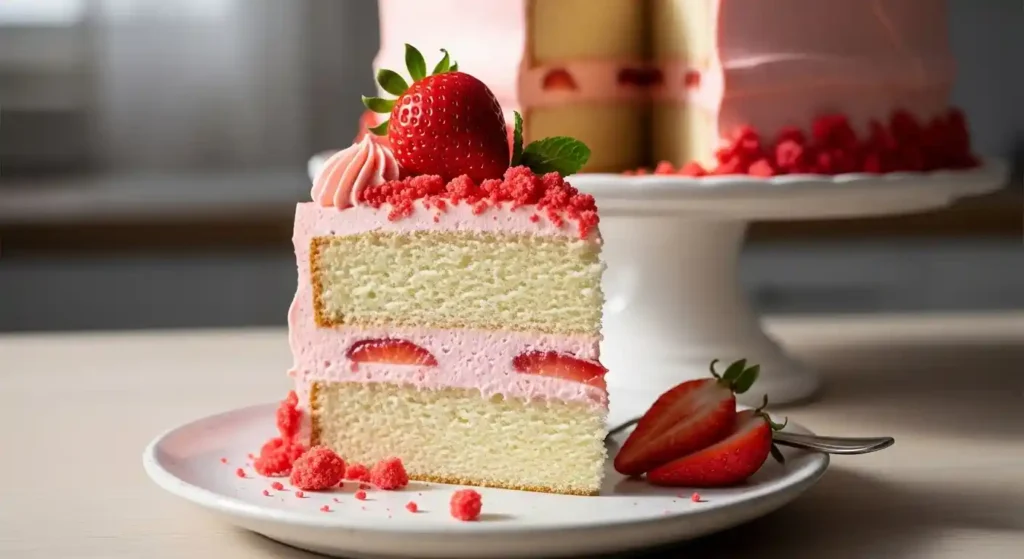
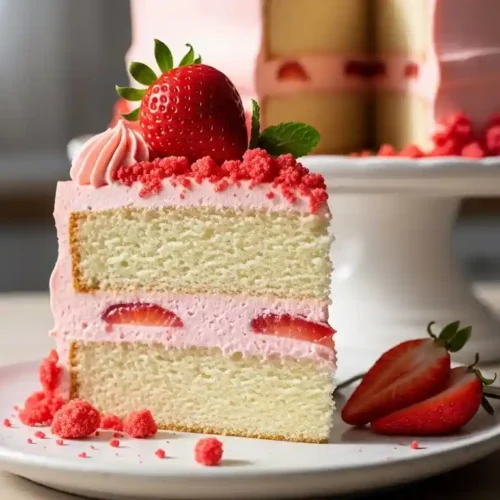
Get ready to create a truly unforgettable dessert: the Strawberry Crunch Cake. This beloved treat brings back delightful memories of classic ice cream bars, transformed into a stunning layer cake that’s surprisingly easy to make. Our recipe features a moist, tender strawberry cake base, a rich, fluffy buttercream, and that iconic, irresistible Golden Oreo strawberry crunch topping. It’s the perfect blend of creamy and crunchy textures in every single bite. For another indulgent strawberry dessert, try our Red Velvet Strawberry Cheesecake.
Table of Contents
Why You’ll Love Strawberry Crunch Cake

- Nostalgic Flavor: This cake perfectly captures the beloved taste of classic strawberry shortcake ice cream bars. It’s a delightful trip down memory lane with every bite.
- Easy & Impressive: Despite its stunning appearance, our recipe is designed to be straightforward for any home baker. You’ll create a showstopper effortlessly.
- Irresistible Textures: Enjoy the moist, tender cake base, the creamy, luscious buttercream, and the satisfying crunch of the Golden Oreo topping. Every layer offers a unique sensation.
- Crowd-Pleaser: This dessert is guaranteed to be a hit at any gathering, from family dinners to festive celebrations. Prepare for rave reviews and empty plates!
Ingredients
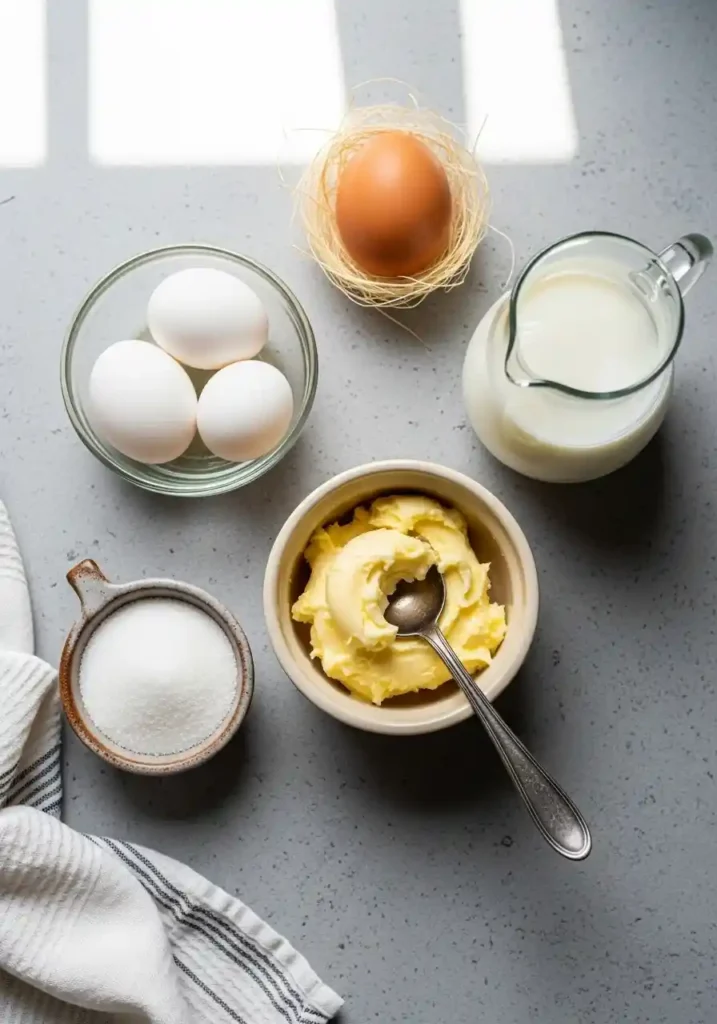
- 1/2 cup (113g) unsalted butter, softened to room temperature
- 1 1/4 cups (250g) granulated sugar
- 3 large egg whites, at room temperature (for a lighter texture)
- 1 large whole egg, at room temperature (for richness)
- 2/3 cup (160ml) whole milk, at room temperature
- 3-ounce package (85g) strawberry flavored gelatin powder (like Jell-O, just the powder for vibrant color and flavor)
- 2 teaspoons pure vanilla extract
- 2 1/4 cups (270g) all-purpose flour, sifted
- 1 teaspoon baking powder
- 1/2 teaspoon baking soda
- 1/2 teaspoon fine sea salt
- 1 cup (226g) unsalted butter, softened
- 1/4 cup (60ml) heavy cream (or whole milk)
- 2 teaspoons pure vanilla extract
- 1/8 teaspoon fine sea salt
- 4 cups (480g) confectioners’ sugar (powdered sugar), sifted
- 12 Golden sandwich cookies (like Golden Oreos), cream filling removed (or 1 ½ cups crushed shortbread cookies)
- 1 cup (about 25g) freeze-dried strawberries, lightly crushed
- 4 Tablespoons (56g) unsalted butter, melted and cooled (crucial for preventing sogginess)
Instructions

Step 1:
Preheat your oven to 350°F (175°C). Lightly grease and flour a 9×13 inch baking pan, or line it with parchment paper for effortless removal. This crucial step ensures your cake won’t stick and releases cleanly after baking.
Step 2:
In a large mixing bowl, beat the softened unsalted butter with an electric mixer until it’s light and creamy, about 1-2 minutes. Gradually add the granulated sugar and continue beating on medium-high speed until the mixture is visibly pale and fluffy, another 2-3 minutes. This aeration process creates a wonderfully tender cake crumb.
Step 3:
Add the three egg whites and one whole egg, one at a time, beating well after each addition until fully incorporated and the mixture appears light and airy. Next, mix in the room temperature whole milk, strawberry gelatin powder, and pure vanilla extract until just combined. Remember to scrape down the sides of the bowl to ensure everything is mixed evenly.
Step 4:
In a separate medium bowl, whisk together the sifted all-purpose flour, baking powder, baking soda, and fine sea salt. Sifting the flour is key; it prevents lumps and ensures an even distribution of the leavening agents for a uniform, perfect rise.
Step 5:
Gradually add the dry ingredient mixture to the wet mixture, beating on low speed until just combined. Be very careful not to overmix the batter; excessive mixing can overdevelop the gluten, resulting in a tough cake. Mix only until no streaks of flour remain.
Step 6:
Pour the prepared cake batter evenly into your greased and floured baking pan. Bake for 20-25 minutes, or until a wooden skewer or toothpick inserted into the center of the cake comes out completely clean. The cake’s top should be lightly golden and spring back when gently touched.
Step 7:
Allow the cake to cool in the pan on a wire rack for at least 15-20 minutes before carefully inverting it onto the rack to cool completely. A fully cooled cake is absolutely essential before applying frosting; otherwise, the buttercream will melt and slide off.
Step 8:
For the buttercream frosting, in a large mixing bowl, beat the softened unsalted butter on medium speed with an electric mixer until it’s wonderfully creamy and smooth. Pour in the heavy cream, pure vanilla extract, and a pinch of fine sea salt, beating until all ingredients are fully incorporated.
Step 9:
Gradually add the sifted confectioners’ sugar to the butter mixture, starting on low speed to prevent a ‘sugar cloud,’ then increasing to medium-high speed. Beat for 3-5 minutes until the frosting is visibly light, fluffy, and easily spreadable. The extended beating incorporates air, making it incredibly airy.
Step 10:
Prepare the irresistible crunch topping by placing the Golden sandwich cookies (without their cream filling) and lightly crushed freeze-dried strawberries into a food processor. Pulse until fine crumbs form. Alternatively, place them in a sturdy Ziploc bag and crush them thoroughly with a rolling pin. Transfer the crumbs to a bowl and pour in the melted and *cooled* unsalted butter. Toss gently until the crumbs are evenly coated. Ensuring the butter is cool is vital to prevent the crunch from becoming soggy later.
Step 11:
Once the cake is completely cool, spread an even, generous layer of the fluffy vanilla buttercream frosting over the top. Then, generously sprinkle the prepared strawberry crunch topping evenly over the frosting. For the best slicing and serving experience, chill the cake for at least 30 minutes to allow the frosting to set before cutting. Enjoy your amazing Strawberry Crunch Cake!
Serving and Storage Tips

Serve this delicious Strawberry Crunch Cake chilled or at cool room temperature for the best flavor and texture. It pairs wonderfully with a cup of coffee or a glass of cold milk. Garnish with fresh strawberries for an extra touch of elegance. Store any leftover cake in an airtight container in the refrigerator for up to 3-4 days. This helps maintain its freshness and prevents the crunch topping from becoming soft too quickly. There’s no need to reheat this cake; it’s best enjoyed cold or at room temperature. If desired, let it sit out for 15-20 minutes before serving to soften the buttercream slightly.
Helpful Notes
- Room Temperature Ingredients: Ensure all cold ingredients like butter, eggs, and milk are at room temperature. This helps them emulsify properly, creating a smoother batter and a more tender cake.
- Prevent Soggy Crunch: To keep your crunch topping perfectly crisp, ensure the melted butter is completely cooled before mixing it with the crushed cookies and freeze-dried strawberries. Store any extra crunch topping separately in an airtight container at room temperature.
- Chill for Clean Slices: For perfectly neat and clean slices, chill the frosted cake in the refrigerator for at least 30 minutes before cutting. Use a hot, dry knife for the best results.
Conclusion
Our Strawberry Crunch Cake truly delivers on its promise of nostalgic flavor and impressive presentation. With its tender strawberry cake, creamy buttercream, and iconic crunchy topping, it’s a dessert that excites the senses. For another delightful strawberry treat, discover our Cheesecake Deviled Strawberries. It’s surprisingly simple to master, making it perfect for both seasoned bakers and beginners. This recipe offers the best of both worlds: a quick box-mix option for convenience and a from-scratch version for a truly gourmet experience. We’ve poured our best tips into making sure your cake is a guaranteed showstopper. We hope you love this cake as much as we do! Please leave a comment below with your thoughts, rate the recipe with stars, and don’t forget to share your creations on social media using #StrawberryCrunchCake.
Strawberry Crunch Cake The Easiest Recipe Ever
Ingredients
- 1/2 cup 113g unsalted butter, softened to room temperature
- 1 1/4 cups 250g granulated sugar
- 3 large egg whites at room temperature (for a lighter texture)
- 1 large whole egg at room temperature (for richness)
- 2/3 cup 160ml whole milk, at room temperature
- 3- ounce package 85g strawberry flavored gelatin powder (like Jell-O, just the powder for vibrant color and flavor)
- 2 teaspoons pure vanilla extract
- 2 1/4 cups 270g all-purpose flour, sifted
- 1 teaspoon baking powder
- 1/2 teaspoon baking soda
- 1/2 teaspoon fine sea salt
- 1 cup 226g unsalted butter, softened
- 1/4 cup 60ml heavy cream (or whole milk)
- 2 teaspoons pure vanilla extract
- 1/8 teaspoon fine sea salt
- 4 cups 480g confectioners’ sugar (powdered sugar), sifted
- 12 Golden sandwich cookies like Golden Oreos, cream filling removed (or 1 ½ cups crushed shortbread cookies)
- 1 cup about 25g freeze-dried strawberries, lightly crushed
- 4 Tablespoons 56g unsalted butter, melted and cooled (crucial for preventing sogginess)
Instructions
Step 1:
- Preheat your oven to 350°F (175°C). Lightly grease and flour a 9×13 inch baking pan, or line it with parchment paper for effortless removal. This crucial step ensures your cake won’t stick and releases cleanly after baking.
Step 2:
- In a large mixing bowl, beat the softened unsalted butter with an electric mixer until it’s light and creamy, about 1-2 minutes. Gradually add the granulated sugar and continue beating on medium-high speed until the mixture is visibly pale and fluffy, another 2-3 minutes. This aeration process creates a wonderfully tender cake crumb.
Step 3:
- Add the three egg whites and one whole egg, one at a time, beating well after each addition until fully incorporated and the mixture appears light and airy. Next, mix in the room temperature whole milk, strawberry gelatin powder, and pure vanilla extract until just combined. Remember to scrape down the sides of the bowl to ensure everything is mixed evenly.
Step 4:
- In a separate medium bowl, whisk together the sifted all-purpose flour, baking powder, baking soda, and fine sea salt. Sifting the flour is key; it prevents lumps and ensures an even distribution of the leavening agents for a uniform, perfect rise.
Step 5:
- Gradually add the dry ingredient mixture to the wet mixture, beating on low speed until just combined. Be very careful not to overmix the batter; excessive mixing can overdevelop the gluten, resulting in a tough cake. Mix only until no streaks of flour remain.
Step 6:
- Pour the prepared cake batter evenly into your greased and floured baking pan. Bake for 20-25 minutes, or until a wooden skewer or toothpick inserted into the center of the cake comes out completely clean. The cake’s top should be lightly golden and spring back when gently touched.
Step 7:
- Allow the cake to cool in the pan on a wire rack for at least 15-20 minutes before carefully inverting it onto the rack to cool completely. A fully cooled cake is absolutely essential before applying frosting; otherwise, the buttercream will melt and slide off.
Step 8:
- For the buttercream frosting, in a large mixing bowl, beat the softened unsalted butter on medium speed with an electric mixer until it’s wonderfully creamy and smooth. Pour in the heavy cream, pure vanilla extract, and a pinch of fine sea salt, beating until all ingredients are fully incorporated.
Step 9:
- Gradually add the sifted confectioners’ sugar to the butter mixture, starting on low speed to prevent a ‘sugar cloud,’ then increasing to medium-high speed. Beat for 3-5 minutes until the frosting is visibly light, fluffy, and easily spreadable. The extended beating incorporates air, making it incredibly airy.
Step 10:
- Prepare the irresistible crunch topping by placing the Golden sandwich cookies (without their cream filling) and lightly crushed freeze-dried strawberries into a food processor. Pulse until fine crumbs form. Alternatively, place them in a sturdy Ziploc bag and crush them thoroughly with a rolling pin. Transfer the crumbs to a bowl and pour in the melted and *cooled* unsalted butter. Toss gently until the crumbs are evenly coated. Ensuring the butter is cool is vital to prevent the crunch from becoming soggy later.
Step 11:
- Once the cake is completely cool, spread an even, generous layer of the fluffy vanilla buttercream frosting over the top. Then, generously sprinkle the prepared strawberry crunch topping evenly over the frosting. For the best slicing and serving experience, chill the cake for at least 30 minutes to allow the frosting to set before cutting. Enjoy your amazing Strawberry Crunch Cake!
Notes
Nutritional Information (Estimated)
Note: These values are per serving and are approximate.| Nutrient | Amount |
|---|---|
| Calories | 680 kcal |
| Fat | 32g |
| Carbohydrates | 92g |
| Protein | 6g |
| Sugar | 65g |
| Fiber | 3g |
| Sodium | 276mg |
Frequently Asked Questions (FAQ)
What is strawberry crunch cake made of?
Strawberry crunch cake typically features a moist strawberry-flavored cake base. This is often made from scratch or by doctoring a box mix with strawberry gelatin. It’s layered with a rich, creamy frosting, commonly vanilla buttercream or cream cheese frosting. The signature element is the crunchy topping, usually made from crushed Golden Oreos, freeze-dried strawberries, and melted butter.
Does strawberry crunch cake need to be refrigerated?
Yes, due to the fresh ingredients and buttercream frosting, it’s best to refrigerate strawberry crunch cake. This helps maintain its freshness, structure, and prevents spoilage. Keep it covered tightly in an airtight container or wrapped in plastic wrap. This also helps to prevent the crunch topping from getting too soft too quickly.
How long can strawberry crunch cake last?
When stored properly in the refrigerator, strawberry crunch cake will typically last for 3 to 4 days. For optimal freshness and crunch, it’s often best enjoyed within the first 2 days. You can also freeze individual slices for longer storage. Wrap them tightly in plastic wrap and then foil, and they will keep for up to 2-3 months.
Can I make strawberry crunch cake ahead of time?
Absolutely! You can bake the cake layers a day or two in advance and store them wrapped at room temperature. The crunch topping can also be made ahead and stored separately in an airtight container. Assemble and frost the cake the day before serving for best results. This allows the flavors to meld beautifully and simplifies your preparation on the day of your event.