


Tired of shelling out $5 for a cup of cold brew that’s sometimes bitter, sometimes weak? Imagine waking up every morning to a pitcher of perfectly smooth, deeply rich, and consistently delicious coffee concentrate waiting for you in the fridge. It’s not a dream—it’s the magic of homemade cold brew.
Learning how to make cold brew coffee is a true game-changer. It elevates your daily coffee ritual, is kinder to your stomach, and saves you a surprising amount of money. This foolproof guide will walk you through every step of our simple, no-machine method, helping you master the art of the perfect brew from your very first batch.
Table of Contents
What is Cold Brew? (And How is it Different from Iced Coffee?)
Let’s clear this up first, because it’s the key to understanding the superior flavor. While both are served cold, they are worlds apart in their creation.
- Iced Coffee: This is simply regular coffee brewed with hot water, then cooled and poured over ice. The heat extracts acids and oils that can become bitter as the coffee cools and gets diluted.
- Cold Brew: This is a gentle, slow infusion. Coarse coffee grounds are steeped in cold water for 12-18 hours. This time-over-heat process extracts deep, smooth flavor compounds without the harsh acids, resulting in a naturally sweeter, mellower, and less acidic coffee.
Why This Cold Brew Recipe is a Game-Changer
- Incredibly Smooth Flavor: The slow steeping process creates a coffee concentrate that is rich and chocolatey without a hint of bitterness.
- Gentle on Your Stomach: This method is famously low in acid. Many people who struggle with hot coffee find they can enjoy The potentially lower acidity profile of cold brew coffee without discomfort.
- Make-Ahead Convenience: A single batch provides delicious coffee for your entire week, making your mornings effortless.
- It’s Incredibly Frugal: Let’s do the math. A 12 oz bag of quality coffee beans ($15) makes about 128 oz of concentrate. Diluted 1:1, that’s 256 oz of coffee, or over thirty 8 oz servings. Your cost per cup is around 50 cents. Compare that to a $5+ café cold brew, and you’re saving hundreds of dollars a year.
Choosing Your Roast: The Secret to Custom Flavor
The beauty of homemade cold brew is that you control the flavor profile. The beans you choose make all the difference.
- Light Roast: Want to taste the bean’s origin? A light roast will yield a brighter, more vibrant brew with delicate floral or citrus notes that are often lost in hot brewing methods.
- Medium Roast: This is the perfect all-rounder. It delivers that classic, balanced cold brew flavor with smooth chocolate and nutty notes. When in doubt, start here.
- Dark Roast: For those who love a bold, rich, and intense cup. Dark roasts produce a deep, syrupy concentrate with notes of dark chocolate and caramel.
The most critical factor, regardless of roast, is the grind. You must use a coarse grind—think the texture of coarse sea salt. A fine grind will over-extract, creating a bitter, muddy mess that’s impossible to filter cleanly. This is the single most important rule for how to make cold brew with ground coffee.
The Golden Ratio for a Perfect Concentrate
The secret to a versatile concentrate that you can customize perfectly is the ratio:
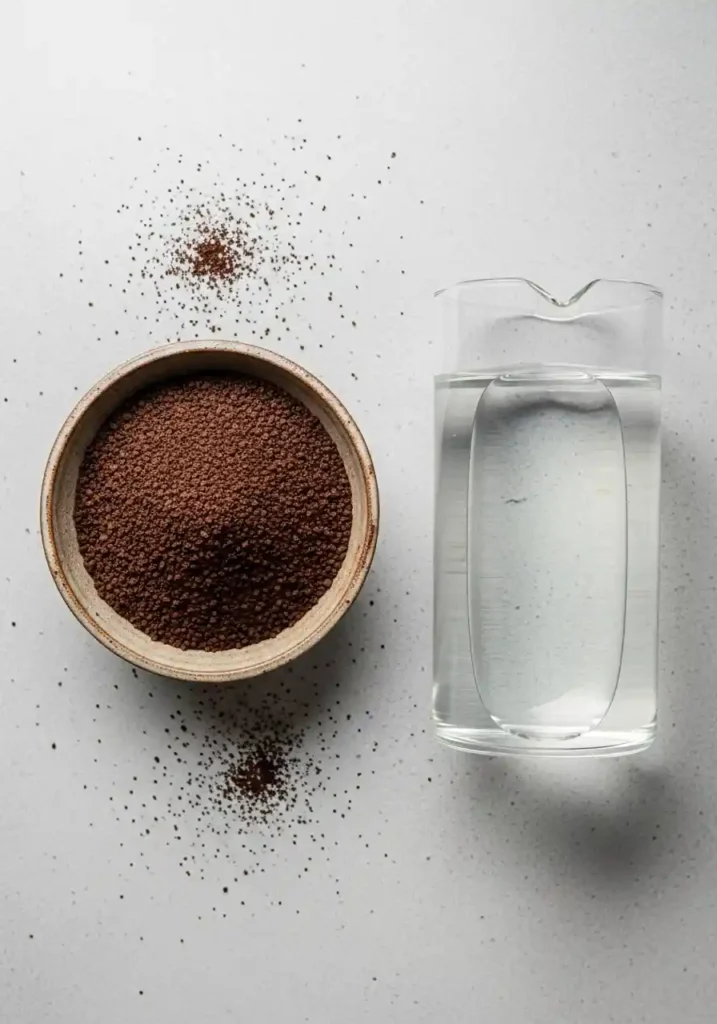
1 part coarsely ground coffee to 4 parts water (by volume).
For this recipe, we use 1 cup of coffee grounds and 4 cups of water. This creates a potent base that you can dilute with water, milk, or your favorite creamer to achieve your ideal strength.
Easy Homemade Cold Brew Coffee
This simple recipe delivers a consistently smooth and flavorful coffee concentrate every time. Follow these steps for a perfect batch.
Ingredients
- 1 cup coarsely ground coffee beans (medium to dark roast recommended)
- 4 cups filtered water
- Optional: Additional filtered water, milk (dairy or non-dairy), or creamer for dilution
- Ice for serving
Equipment
- A large pitcher or 2-quart mason jar
- A fine-mesh sieve
- Paper coffee filters or cheesecloth
Instructions
- Combine & Saturate: In your large pitcher or jar, combine the 1 cup of coarse coffee grounds and 4 cups of filtered water. Stir gently to ensure all the grounds are thoroughly wet.
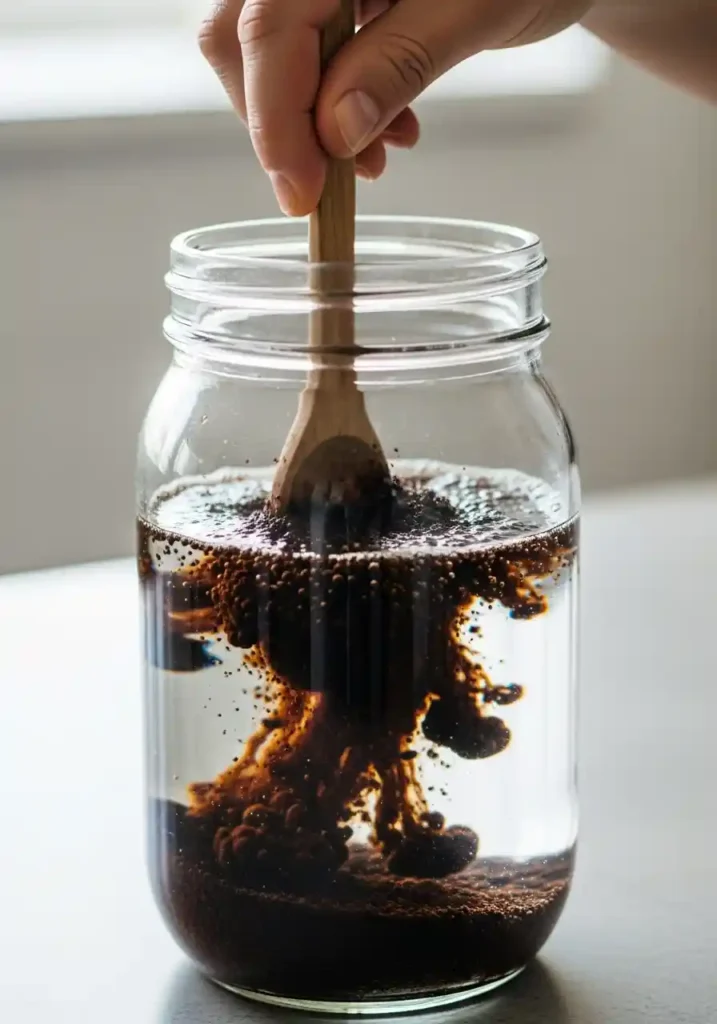
- Steep Patiently: Cover the container and let it steep for 12 to 18 hours. You can leave it on the counter at a cool room temperature or place it in the refrigerator.
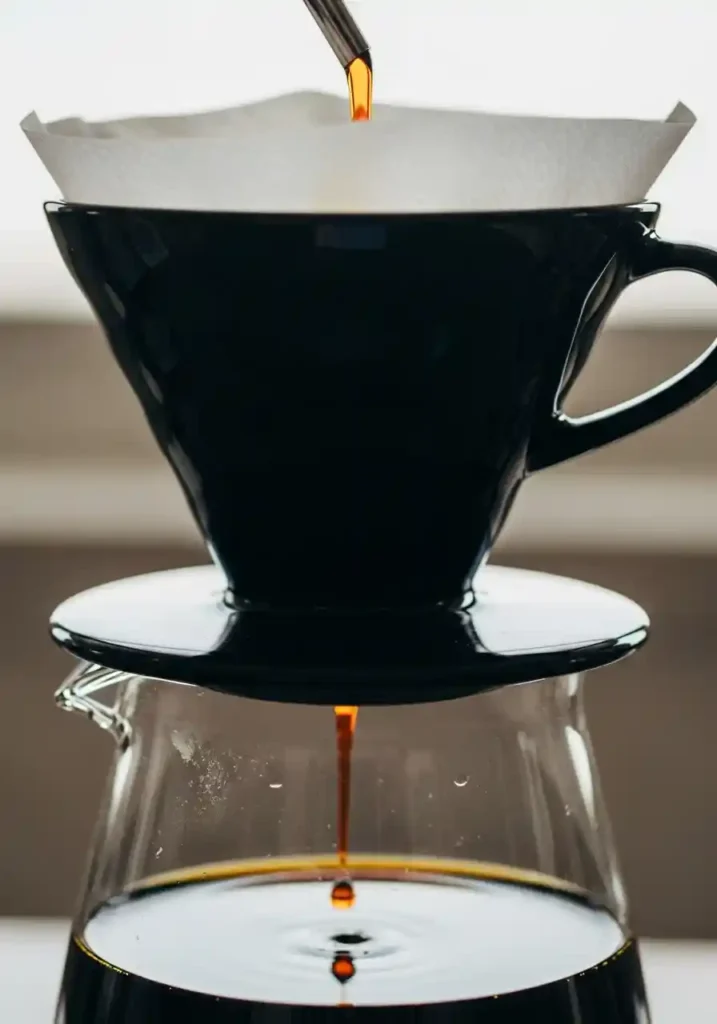
- First Strain (The Big Stuff): Slowly pour the steeped mixture through a fine-mesh sieve into a large bowl or another pitcher. This will remove the bulk of the coffee grounds.
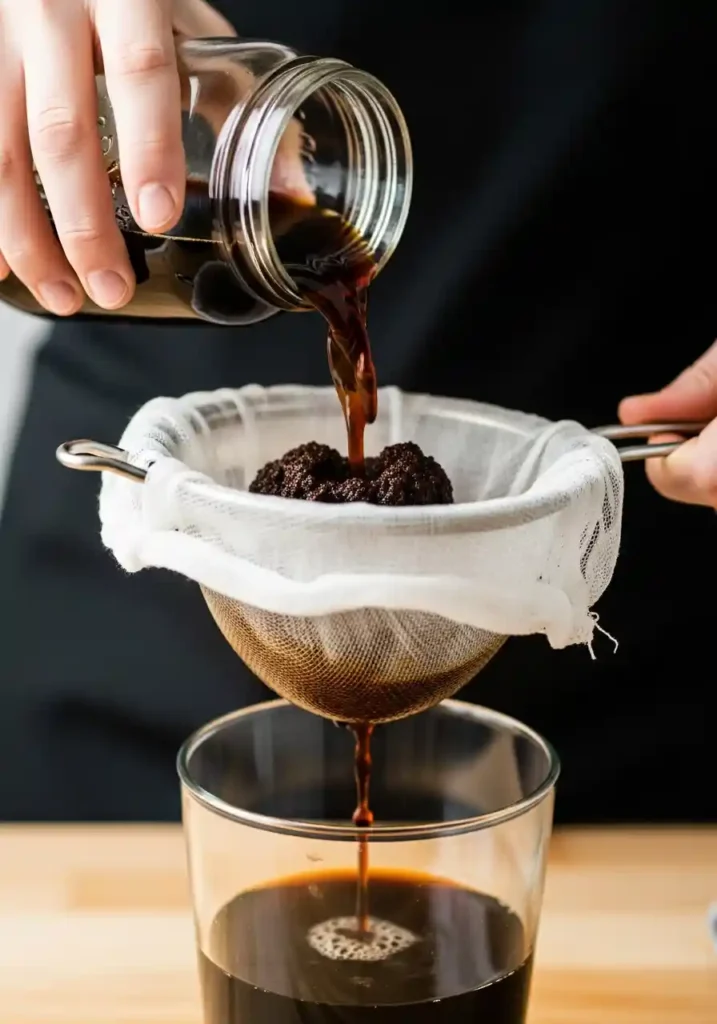
- Second Strain (The Secret to Clarity): Line the sieve with a paper coffee filter and place it over your final storage container. Slowly pour the coffee through this second filter. This crucial step removes the fine sediment (silt) and guarantees a crystal-clear, grit-free concentrate.
- Store: You now have a beautiful cold brew concentrate! Store it in a sealed, airtight container in the refrigerator. For the best flavor, enjoy it within one week, but it will last for up to two weeks.
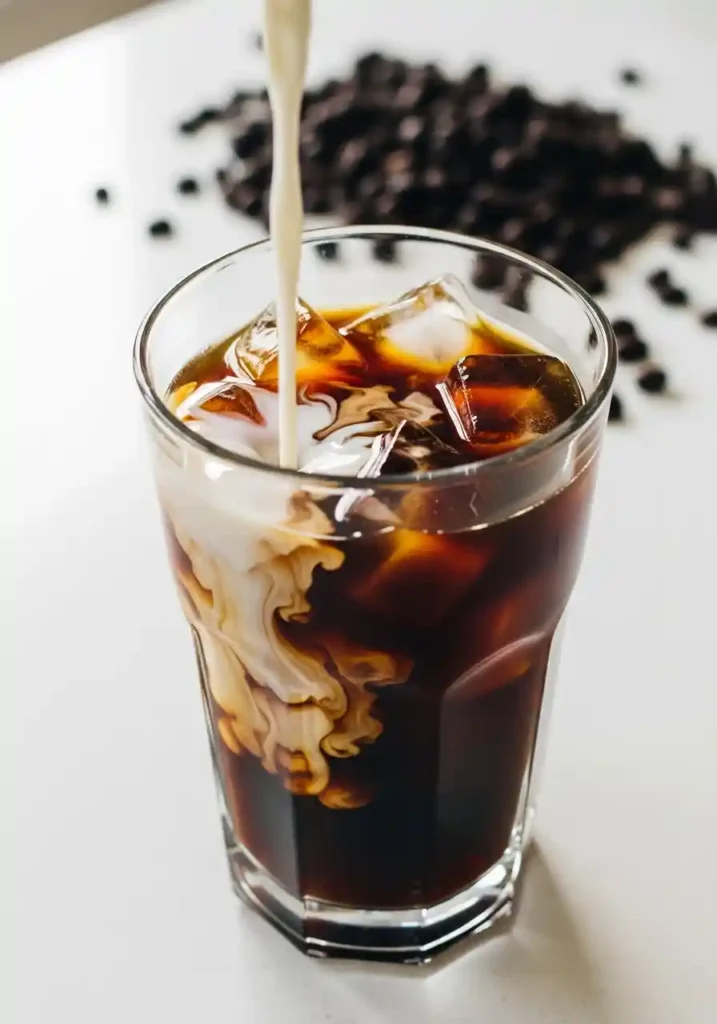
- Serve: To serve, fill a glass with ice. Pour in the concentrate and dilute it with a 1:1 ratio of water, milk, or creamer. Taste and adjust the ratio until you find your perfect strength.
Cold Brew Troubleshooting: Fixing Common Issues
Ran into a problem? Don’t worry, every issue has a simple fix. I’ve been there, and these solutions work.
- Why is my cold brew bitter?
This is almost always due to over-extraction. The culprit is either a grind that was too fine (creating too much surface area) or steeping it for too long (over 24 hours). The Fix: Ensure you’re using a very coarse grind and stick to the 12-18 hour steeping window.
- Why is my concentrate cloudy or sludgy?
This means fine coffee sediment made it into your final product. The Fix: Do not skip the second straining step! Filtering the coffee through a paper filter or a few layers of cheesecloth after the initial sieve is the non-negotiable secret to a clean, clear brew.
- My cold brew tastes weak and watery!
This is a sign of under-extraction. It likely wasn’t steeped long enough, or you over-diluted it when serving. The Fix: Try steeping for the full 18 hours, especially if you’re using a lighter roast. When serving, start with less water or milk—you can always add more.
How to Serve and Store Your Cold Brew
Your delicious concentrate is ready! Here are a few ideas for amazing cold brew coffee drinks:
- Classic Iced Cold Brew: Mix equal parts concentrate and cold, filtered water over ice.
- Creamy Cold Brew Latte: Use your favorite milk (oat, almond, and dairy are all fantastic) instead of water for a rich, creamy treat.
- Sweetened Delight: Stir in a splash of simple syrup, vanilla, or caramel before adding your liquid of choice.
A perfect cup of cold brew is an amazing start to any morning, especially alongside a savory dish like our Tater Tot Breakfast Casserole.
For storage, keep your concentrate in a sealed jar in the refrigerator. To ensure quality, it’s wise to follow the best practices for safely storing homemade concentrates and beverages.
A Note on Caffeine: This is a concentrate and can be quite potent! As you enjoy your creation, be mindful of the recommended safe limits for daily caffeine intake.

How to Make Cold Brew Coffee
Ingredients
- 1 cup coarsely ground coffee beans medium to dark roast recommended
- 4 cups filtered water
- Optional: Additional filtered water milk (dairy or non-dairy), or creamer for dilution
- Ice for serving
Instructions
- Combine & Saturate: In your large pitcher or jar, combine the 1 cup of coarse coffee grounds and 4 cups of filtered water. Stir gently to ensure all the grounds are thoroughly wet.
- Steep Patiently: Cover the container and let it steep for 12 to 18 hours. You can leave it on the counter at a cool room temperature or place it in the refrigerator.
- First Strain (The Big Stuff): Slowly pour the steeped mixture through a fine-mesh sieve into a large bowl or another pitcher. This will remove the bulk of the coffee grounds.
- Second Strain (The Secret to Clarity): Line the sieve with a paper coffee filter and place it over your final storage container. Slowly pour the coffee through this second filter. This crucial step removes the fine sediment (silt) and guarantees a crystal-clear, grit-free concentrate.
- Store: You now have a beautiful cold brew concentrate! Store it in a sealed, airtight container in the refrigerator. For the best flavor, enjoy it within one week, but it will last for up to two weeks.
- Serve: To serve, fill a glass with ice. Pour in the concentrate and dilute it with a 1:1 ratio of water, milk, or creamer. Taste and adjust the ratio until you find your perfect strength.
Notes
Nutrition information
- Calories: 5kcal
- Protein: 0g
- Fat: 0g
- Carbohydrates: 1g
- Sodium: 0mg