Finding a dessert that is universally loved, easy to serve, and visually stunning can be a challenge. Enter the ultimate party treat: Frozen Cheesecake Pops. Whether you are hosting a summer barbecue, planning a baby shower, or just looking for a clever way to use up leftover dessert, these bite-sized delights are guaranteed to be the star of the show.
Table of Contents
What makes this concept so brilliant is its sheer convenience. You get all the rich, tangy indulgence of a traditional slice without the need for plates or forks. Plus, creating these treats at home allows for endless creativity, giving you the power to customize everything from the chocolate shell to the festive sprinkles on top.
If you want a modern twist on a classic favorite that looks like it came from a gourmet bakery, you are in the right place. Let’s dive into everything you need to know to master this sensational dessert.
Why You’ll Love This Recipe
There is a reason this fun treat has taken the culinary world by storm. Here is why this recipe will quickly become your go-to:
Ultimate Convenience: This is the ultimate no bake cheesecake pops* hack. You can use a pre-made base to save hours of kitchen time.
- Portion Control Built-In: Bite-sized treats make it incredibly easy to manage indulgence. For more insights on this, exploring Strategies for Portion Control can help you enjoy sweets mindfully.
Highly Customizable: From a vibrant strawberry cheesecake popsicle recipe* variation to a dark chocolate sea salt finish, the flavor combinations are endless.
Perfectly Make-Ahead: These cheesecake popsicles actually require* being made in advance, making your day-of party prep completely stress-free.
Ingredients You Will Need
Creating the perfect pop requires just a few simple ingredients. The beauty of this frozen cheesecake recipe lies in its simplicity and flexibility.
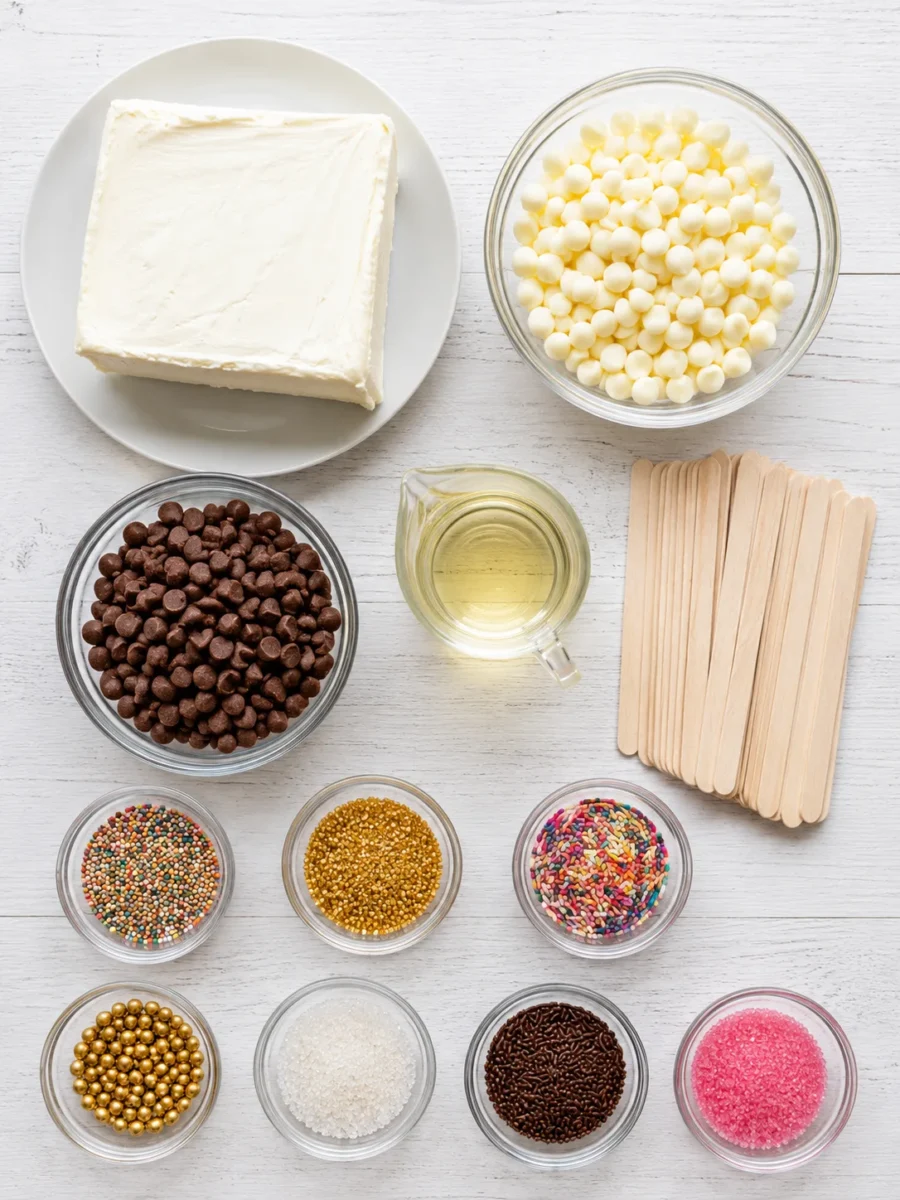
- Frozen cheesecake (pre-made or homemade): You can use a classic baked or no-bake base. For deep nutritional context on your primary ingredient, you can review the Standard Nutritional Data for Cream Cheese or explore a deeper Nutritional Profile of Cream Cheese.
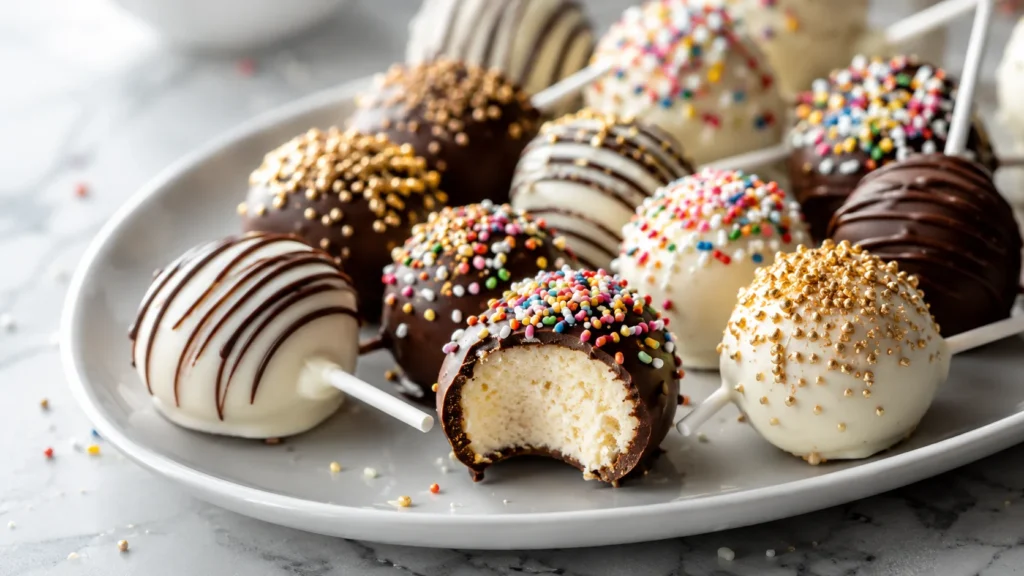
- White chocolate morsels: Ideal for creating a sweet, snowy coating that takes food coloring and sprinkles beautifully.
- Semi-sweet chocolate: A great contrast to the sweet cream cheese filling. Darker chocolate also brings added benefits; read up on the Health Benefits of Dark Chocolate and the Antioxidant Properties of Cocoa Flavanols.
- Vegetable oil or shortening: This is the secret ingredient for thinning the chocolate to the perfect dipping consistency. If you’re curious about how different fats perform, reviewing Understanding Saturated Fats is highly informative.
- Colored sugars: For a textured, sparkling finish.
- Sprinkles: Essential for matching your dessert to your party’s theme!
Step-by-Step Instructions: Making Frozen Cheesecake Pops
Follow these simple steps to achieve professional-looking results every time.
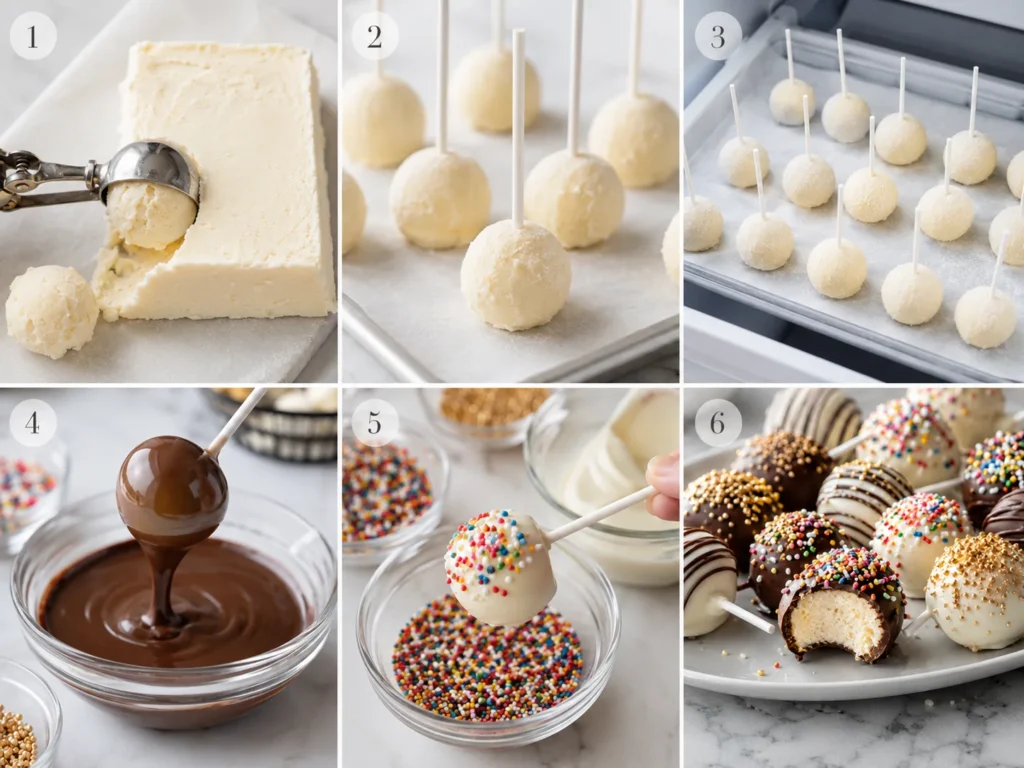
1. Using a 1 to 1.5-inch ice cream scoop, form the cheesecake into compact balls, pressing firmly to ensure they hold their shape.
2. Insert a lollipop stick or wooden craft stick into the center of each cheesecake ball.
3. Place the pops on a baking sheet lined with wax paper and flash-freeze until they are very firm.
4. In a microwave-safe bowl, melt the white or semi-sweet chocolate combined with a small amount of vegetable oil or shortening to create a smooth dipping consistency.
5. Dip each frozen cheesecake pop into the melted chocolate, rotating to coat fully, and gently shake off the excess.
6. While the chocolate is still wet, decorate with colored sugars or sprinkles for visual appeal.
7. Return the finished pops to the freezer and chill until the chocolate shell has completely snapped and set.
Dietary Variations and Swaps
One of the greatest strengths of any cheesecake pops recipe is how easily it can be adapted to fit different dietary requirements without sacrificing flavor or texture.
Gluten-Free Needs: If you are making your base from scratch, simply swap the traditional graham crackers for a certified gluten-free alternative. For those new to this lifestyle, Navigating a Gluten-Free Diet offers excellent foundational advice.
Low-Sugar & Keto Options: You can dramatically reduce the glycemic load by utilizing sugar-free chocolate chips and a keto-friendly cheesecake base. Understanding The Impact of Added Sugar on Health is a great motivator for experimenting with natural sweeteners like monk fruit or stevia.
Dairy-Free & Vegan: Yes, you can make plant-based pops! Use a vegan cream cheese alternative. Many excellent dairy-free bases are crafted from nuts; checking out the Health Benefits of Cashews for Dairy Substitutes and resources on Managing Lactose Intolerance can guide you in choosing the right ingredients.
Expert Tips for Flawless Results
Creating treats that look like they belong in a high-end bakery—often popularized as the kitchen frozen cheesecake pops style—requires a few insider techniques:
The Stick Trick: To ensure your stick never falls out, dip the tip of the lollipop stick into the melted chocolate before* inserting it into the cheesecake ball. As the chocolate freezes inside the ball, it acts like edible glue.
- Temperature is Everything: Your cheesecake balls must be rock-hard before dipping. If they are even slightly soft, they will fall off the stick into your chocolate bowl.
- Expand Your Cheesecake Repertoire: Once you master this method, you can use almost any dense dessert as a base. For instance, if you love creative twists, you might enjoy trying a sopapilla cheesecake recipe, crafting elegant cheesecake deviled strawberries, or serving a stunning red velvet strawberry cheesecake at your next gathering.
Storage and Make-Ahead Instructions
Proper storage is crucial for maintaining the crisp chocolate shell and the creamy interior.
Once the chocolate has completely set, transfer the pops into an airtight container. To prevent them from sticking together, separate layers with sheets of parchment or wax paper. They will keep perfectly in the freezer for up to one month. When you are ready to serve them, simply pull them out of the freezer and let them sit at room temperature for about 5 minutes so the interior softens slightly while the shell retains its signature snap.
Frequently Asked Questions
How do I prevent the cheesecake balls from falling off the stick during the dipping process?
The key to flawless frozen cheesecake pops is temperature control and the “glue” method. First, ensure the formed balls are completely frozen solid. Second, dip the end of your lollipop stick into the melted chocolate before inserting it into the cheesecake ball. When you flash-freeze them again, the chocolate acts as an anchor, securing the heavy ball to the stick.
Can I use a store-bought frozen cheesecake for this recipe, or should I bake one from scratch?
You can absolutely use either! A store-bought frozen cheesecake is an incredible time-saving shortcut that yields fantastic results. Simply let it thaw slightly so you can scoop it, form your balls, and re-freeze. Baking from scratch allows for more custom flavor profiles, but store-bought is perfect for quick, effortless entertaining.
What is the best way to store cheesecake pops, and how long will they stay fresh in the freezer?
Store your finished treats in a rigid, airtight container to protect them from freezer burn and physical damage. Place a piece of wax or parchment paper between any layers. When stored properly, they will stay fresh and delicious in the freezer for up to one month.
How do I get a perfectly smooth chocolate coating that has a “snap” texture when frozen?
Achieving that satisfying “snap” comes down to thinning your chocolate correctly. By adding a small amount of vegetable oil or shortening (about 1 teaspoon per cup of chocolate) during the melting process, you thin out the viscosity of the chocolate. This allows the excess to drip off smoothly, leaving a thin, elegant shell that snaps perfectly when bitten into, rather than a thick, clunky layer of chocolate.
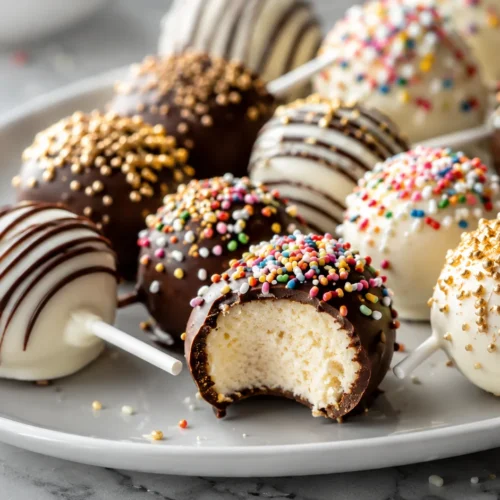
The Best Easy Frozen Cheesecake Pops

Equipment
- Baking Sheet
- Wax paper
- Ice cream scoop (1 to 1.5-inch)
- Lollipop sticks or wooden craft sticks
- Microwave-safe bowl
Ingredients
Cheesecake Base
- 1 whole Frozen cheesecake (pre-made or homemade) thawed just enough to scoop
Coating & Decor
- 1 cup White chocolate morsels
- 1 cup Semi-sweet chocolate
- 2 teaspoons Vegetable oil or shortening divided for thinning the chocolate
- 2 tablespoons Colored sugars for decoration
- 2 tablespoons Sprinkles for decoration
Instructions
- Using a 1 to 1.5-inch ice cream scoop, form the cheesecake into compact balls, pressing firmly to ensure they hold their shape.
- Insert a lollipop stick or wooden craft stick into the center of each cheesecake ball.
- Place the pops on a baking sheet lined with wax paper and flash-freeze until they are very firm.
- In a microwave-safe bowl, melt the white or semi-sweet chocolate combined with a small amount of vegetable oil or shortening to create a smooth dipping consistency.
- Dip each frozen cheesecake pop into the melted chocolate, rotating to coat fully, and gently shake off the excess.
- While the chocolate is still wet, decorate with colored sugars or sprinkles for visual appeal.
- Return the finished pops to the freezer and chill until the chocolate shell has completely snapped and set.