

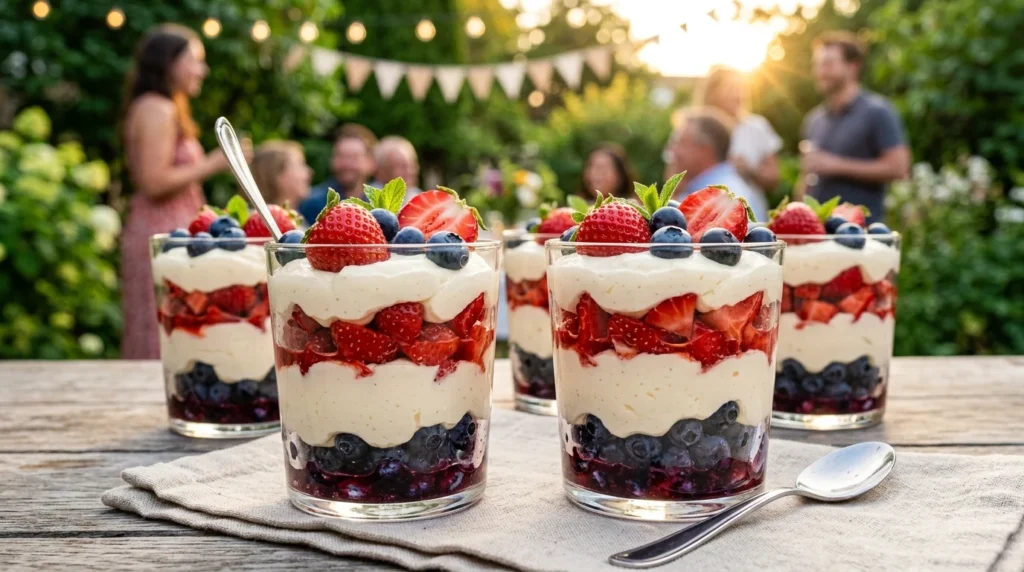
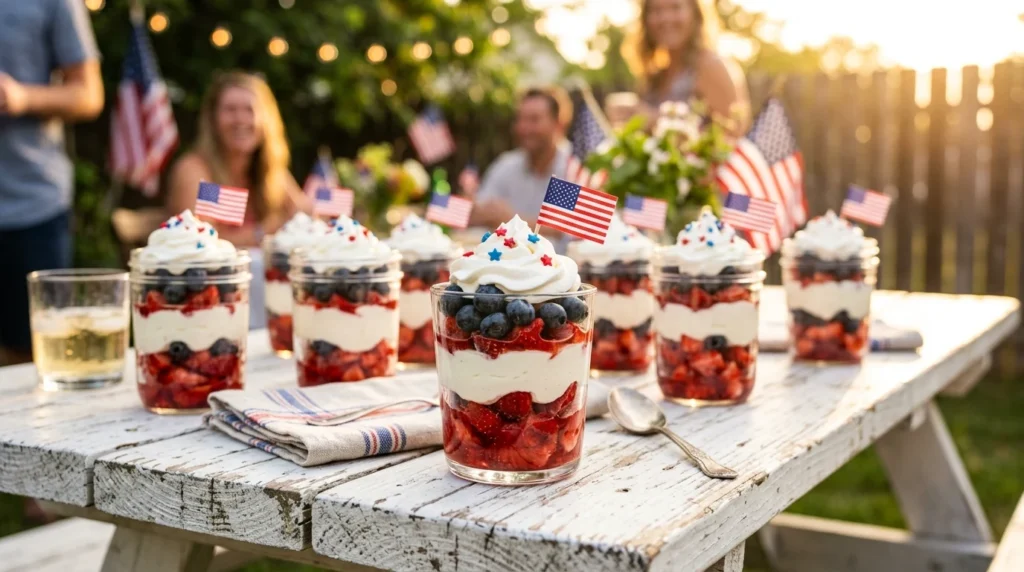
Beat the summer heat with these adorable, individually portioned desserts! If you are looking for the ultimate make-ahead treat for holiday BBQs and warm-weather gatherings, these No Bake Patriotic Cheesecake Cups are exactly what you need. Combining crushed graham crackers, a rich and creamy vanilla cheesecake filling, and fresh summer berries, they deliver maximum flavor with zero oven time.
Table of Contents
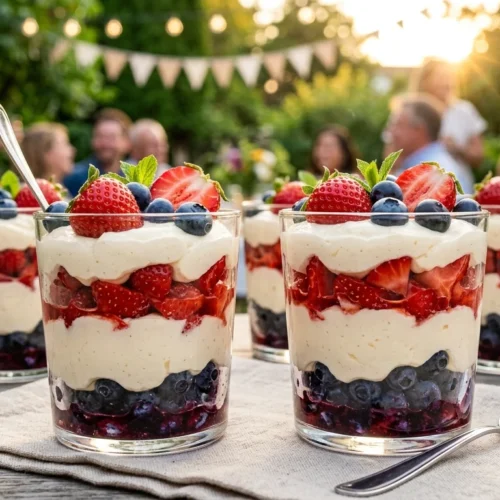
When the temperature rises, the last thing you want to do is turn on your oven. That’s why these easy summer berry cheesecake cups are a lifesaver. Featuring vibrant red, white, and blue layers, they are not only incredibly delicious but also visually stunning—making them the absolute perfect addition to your holiday dessert table.
Why You Will Love This Recipe
As a chef, I am always looking for ways to maximize flavor while minimizing stress in the kitchen, especially when hosting. Here is why you will fall in love with these quick patriotic treats:
- No Oven Required: Keep your kitchen cool! This red white and blue dessert no bake recipe is completely heat-free.
- Individually Portioned: Serving is a breeze. Everyone gets their own perfectly portioned cup, which means no messy slicing or serving spatulas required.
- Make-Ahead Friendly: You can assemble these 4th of july dessert cups a day in advance, giving you more time to spend with your guests.
- Fresh and Light: The combination of an airy filling and fresh fruit creates a dessert that isn’t overly heavy.
The Essential Ingredients
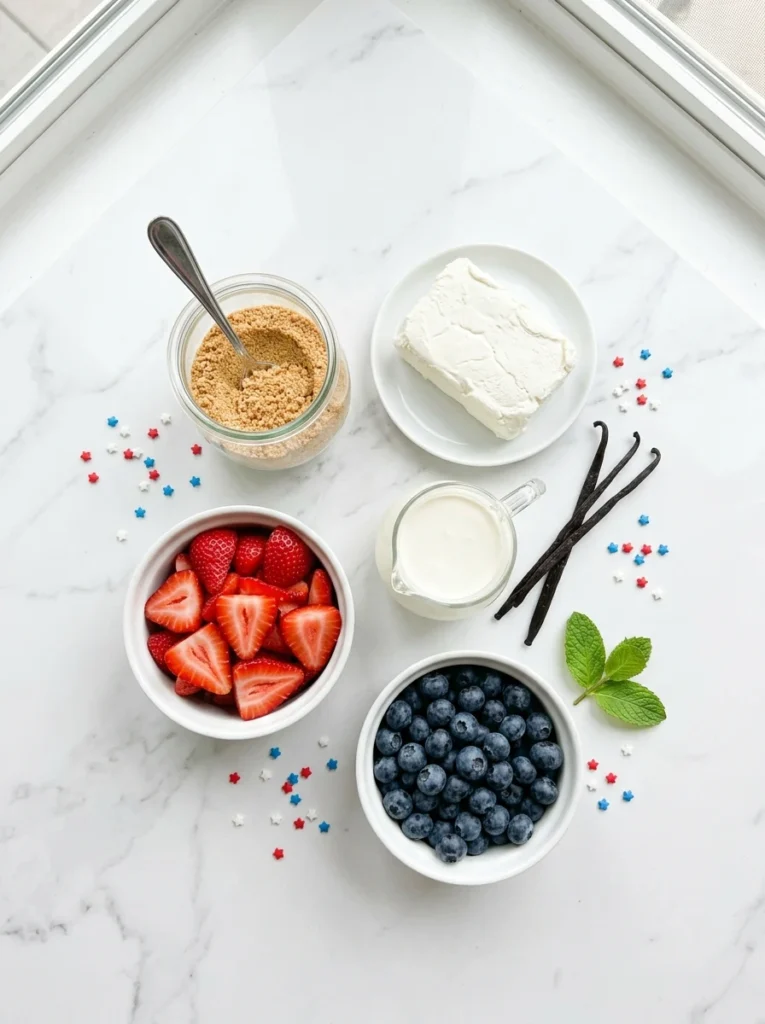
To create these beautiful dessert cups, you only need a handful of simple, high-quality ingredients.
For the Crust
- Graham Crackers: Finely crushed. The sweet, slightly honeyed flavor is the traditional base for any great cheesecake.
- Unsalted Butter: Melted, to bind the cracker crumbs together and add a rich, buttery flavor.
For the Cheesecake Filling
- Cream Cheese: Full-fat cream cheese works best for that classic, rich texture. Make sure it is softened to room temperature for a lump-free filling.
- Powdered Sugar: Sweetens the mixture while keeping it perfectly smooth.
- Vanilla Extract: A splash of pure vanilla elevates the flavor profile.
- Heavy Whipping Cream: Whipped to stiff peaks and folded in. This is the secret to a luscious, airy, and creamy cheesecake filling that melts in your mouth.
For the Berry Topping
- Fresh Blueberries: Plump and sweet, providing the beautiful blue layer.
- Fresh Strawberries: Hulled and chopped. They add the vibrant red layer and a slight tartness to balance the sweet filling.
Step-by-Step Instructions
Ready to assemble these quick patriotic treats? Follow these simple steps for flawless execution every time.
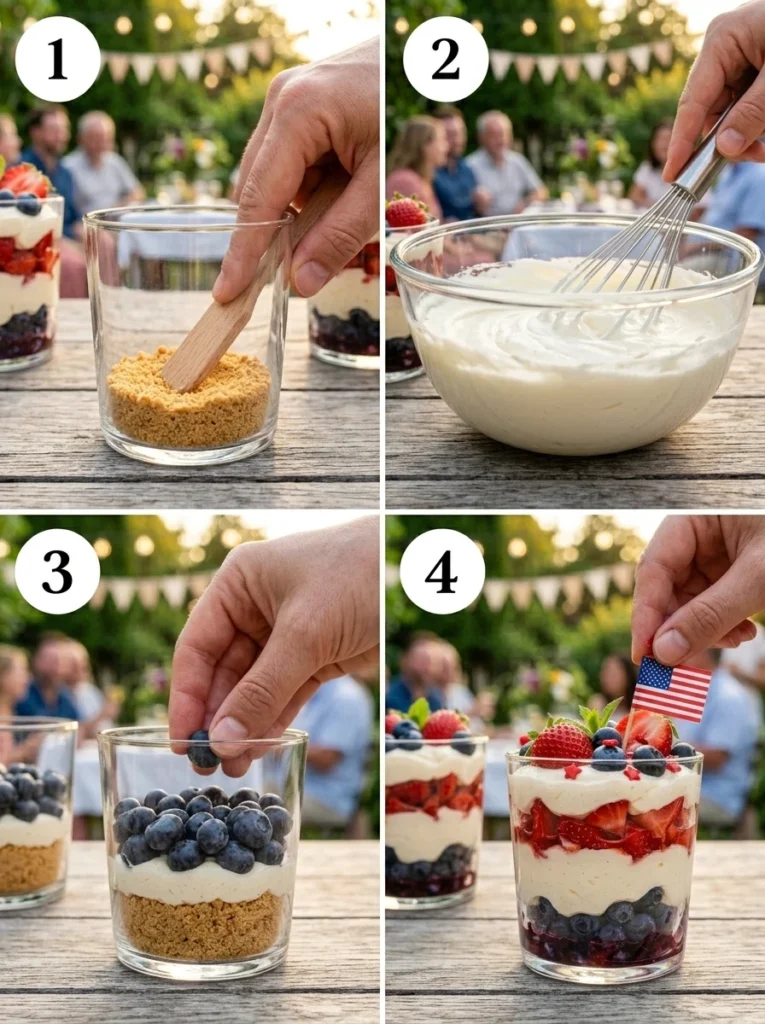
Step 1: Prepare the Graham Cracker Crust
Crush your graham crackers into fine crumbs using a food processor or by placing them in a zip-top bag and rolling over them with a rolling pin. In a medium bowl, mix the crumbs with melted butter until the mixture resembles wet sand. Press the mixture evenly into the bottom of your serving cups (clear plastic or glass cups work beautifully to show off the layers).
Step 2: Whip the Cream Cheese Base
In a large mixing bowl, beat the softened cream cheese, powdered sugar, and a splash of vanilla extract using a hand mixer. Whip the mixture until it is perfectly smooth, fluffy, and free of any lumps.
Step 3: Fold in the Whipped Cream
In a separate bowl, whip the heavy cream until stiff peaks form. Gently fold the whipped cream into the cream cheese mixture using a rubber spatula. Take your time with this step to keep the filling airy and light. Once combined, pipe or spoon the mixture directly over the graham cracker crust in each cup.
Step 4: Add the Fresh Berries and Chill
Top your cheesecake filling generously with fresh blueberries and chopped strawberries. The contrast of the berries against the white filling creates that iconic look, making these the ultimate 4th of July desserts. Cover the cups loosely with plastic wrap and chill in the refrigerator for at least 2 hours before serving to allow the filling to set.
Chef’s Tips for the Best Dessert Cups
- Room Temperature Cream Cheese: I cannot stress this enough! If your cream cheese is cold, your filling will be lumpy. Leave it on the counter for about an hour before you begin.
- Piping Bag for Clean Layers: If you want picture-perfect layers, transfer your cheesecake filling into a piping bag (or a large zip-top bag with the corner snipped off) to pipe it over the crust. This prevents the filling from smearing on the sides of the cups.
- Dry Your Berries: After washing your strawberries and blueberries, dry them thoroughly with paper towels. Excess water can bleed into the white cheesecake layer and make it soggy.
Variations and Dietary Swaps
This easy summer berry cheesecake recipe is wonderfully versatile. Here are a few ways you can customize it:
- Gluten-Free: Simply swap the traditional graham crackers for your favorite gluten-free graham crackers or cookies.
- Lighter Version: If you are looking for Tips for enjoying treats in moderation, you can substitute the full-fat cream cheese with Neufchâtel (low-fat cream cheese) and use a light whipped topping instead of heavy whipping cream.
- Extra Flavor: Add a teaspoon of fresh lemon zest to the cheesecake filling. The citrus notes pair beautifully with the berries and brighten up the entire dessert.
- Different Fruits: While red and blue berries are perfect for patriotic holidays, you can swap them out for raspberries, blackberries, or even diced peaches depending on what is in season. Not only do berries taste great, but you also get the added Health benefits of fresh berries!
Frequently Asked Questions (FAQs)
Can I make these cheesecake cups ahead of time?
Absolutely! In fact, they taste better when made ahead. You can prepare and assemble the crust and cheesecake filling up to 2 days in advance. Keep them tightly covered in the refrigerator. I recommend adding the fresh chopped berries just a few hours before serving so they look their best and don’t bleed into the filling.
Can I use frozen berries instead of fresh?
For the topping, fresh berries are highly recommended. Frozen berries tend to release a lot of liquid as they thaw, which will make your cheesecake cups watery and cause the red and blue colors to bleed into the white layer.
What size cups should I use for this recipe?
Small, clear cups ranging from 5 to 8 ounces are ideal. Clear plastic punch cups, small mason jars, or stemless wine glasses work beautifully because they allow your guests to see the distinct red, white, and blue layers.
How long do these dessert cups last in the fridge?
Leftovers can be stored in the refrigerator for up to 3 days. Ensure they are covered with plastic wrap to prevent the cheesecake from absorbing any fridge odors and to keep the berries fresh.
No Bake Patriotic Cheesecake Cups
Equipment
- Hand mixer
- Clear serving cups
- Piping bag
Ingredients
Crust
- 1 cup Graham cracker crumbs
- 3 tbsp Unsalted butter melted
Cheesecake Filling
- 8 oz Cream cheese softened
- 0.5 cup Powdered sugar
- 1 tsp Vanilla extract
- 1 cup Heavy whipping cream cold
Berry Topping
- 1 cup Fresh blueberries
- 1 cup Fresh strawberries chopped
Instructions
- Crush graham crackers into fine crumbs and mix with melted butter. Press the mixture evenly into the bottom of your serving cups.
- In a large bowl, whip cream cheese, powdered sugar, and a splash of vanilla extract until perfectly smooth and fluffy.
- Gently fold in heavy whipped cream to make the filling airy, then pipe or spoon the mixture over the crust.
- Top generously with fresh blueberries and chopped strawberries. Chill for 2 hours before serving!